
Key Considerations
- cURL helps you transfer data between any two URLs.
- It works the same on Windows, macOS, and Linux.
- You can use cURL to test APIs, automate form submissions, download files, and fix connection issues.
cURL, short for Client URL, is one of those tools that doesn’t get nearly as much attention as it deserves. Maybe that’s because it’s a shy tool. It stays in the background, quietly doing the work. But as you already know, cURL is one of the simplest yet most powerful ways to transfer data between URLs.
It doesn’t matter what protocol you’re using, the platform you’re on, or what you’re trying to do. If the data’s online, one way or another, cURL just works. This article will show you how.
What is cURL?
cURL is a command-line tool that was built to solve a problem. In 1996, Daniel Stenberg, a Swedish developer, was working on an Internet Relay Chat (IRC) bot. He needed a way to pull real-time currency exchange rates from the web and feed them into chat conversations.
He found a starting point: httpget, a command-line tool originally written by Rafael Sagula in Brazil. Daniel extended it, rewrote it, and kept pushing updates. Over the next few years, he became the project's core maintainer and built in support for more protocols, better transfer handling, and cross-platform stability.
The tool went through a few names, but eventually, it became cURL, short for “Client URL.” That name stuck because it fit. Since then, cURL has quietly become part of the internet’s backbone. If you’ve ever wondered what is cURL and why developers rely on it, the answer lies in its simplicity and flexibility.
But you’re not here for a history lesson (If you're interested in cURL's history, read this). You want to know how to use it and how it can work for your setup. First things first: let’s find it and get it running on your machine.
How to install cURL
If you’re on a modern system, cURL is likely pre-installed. Always verify availability with the curl --version command before attempting a manual install.
Installing cURL on Windows
Let’s first check if it's already there:
Step 1: Open CMD
Press 'Windows + R,' then type 'cmd' to open your command prompt.
Step 2: Check if cURL is installed
Paste the following cURL command:
curl --version
Hit 'Enter.' If you see version info like this,
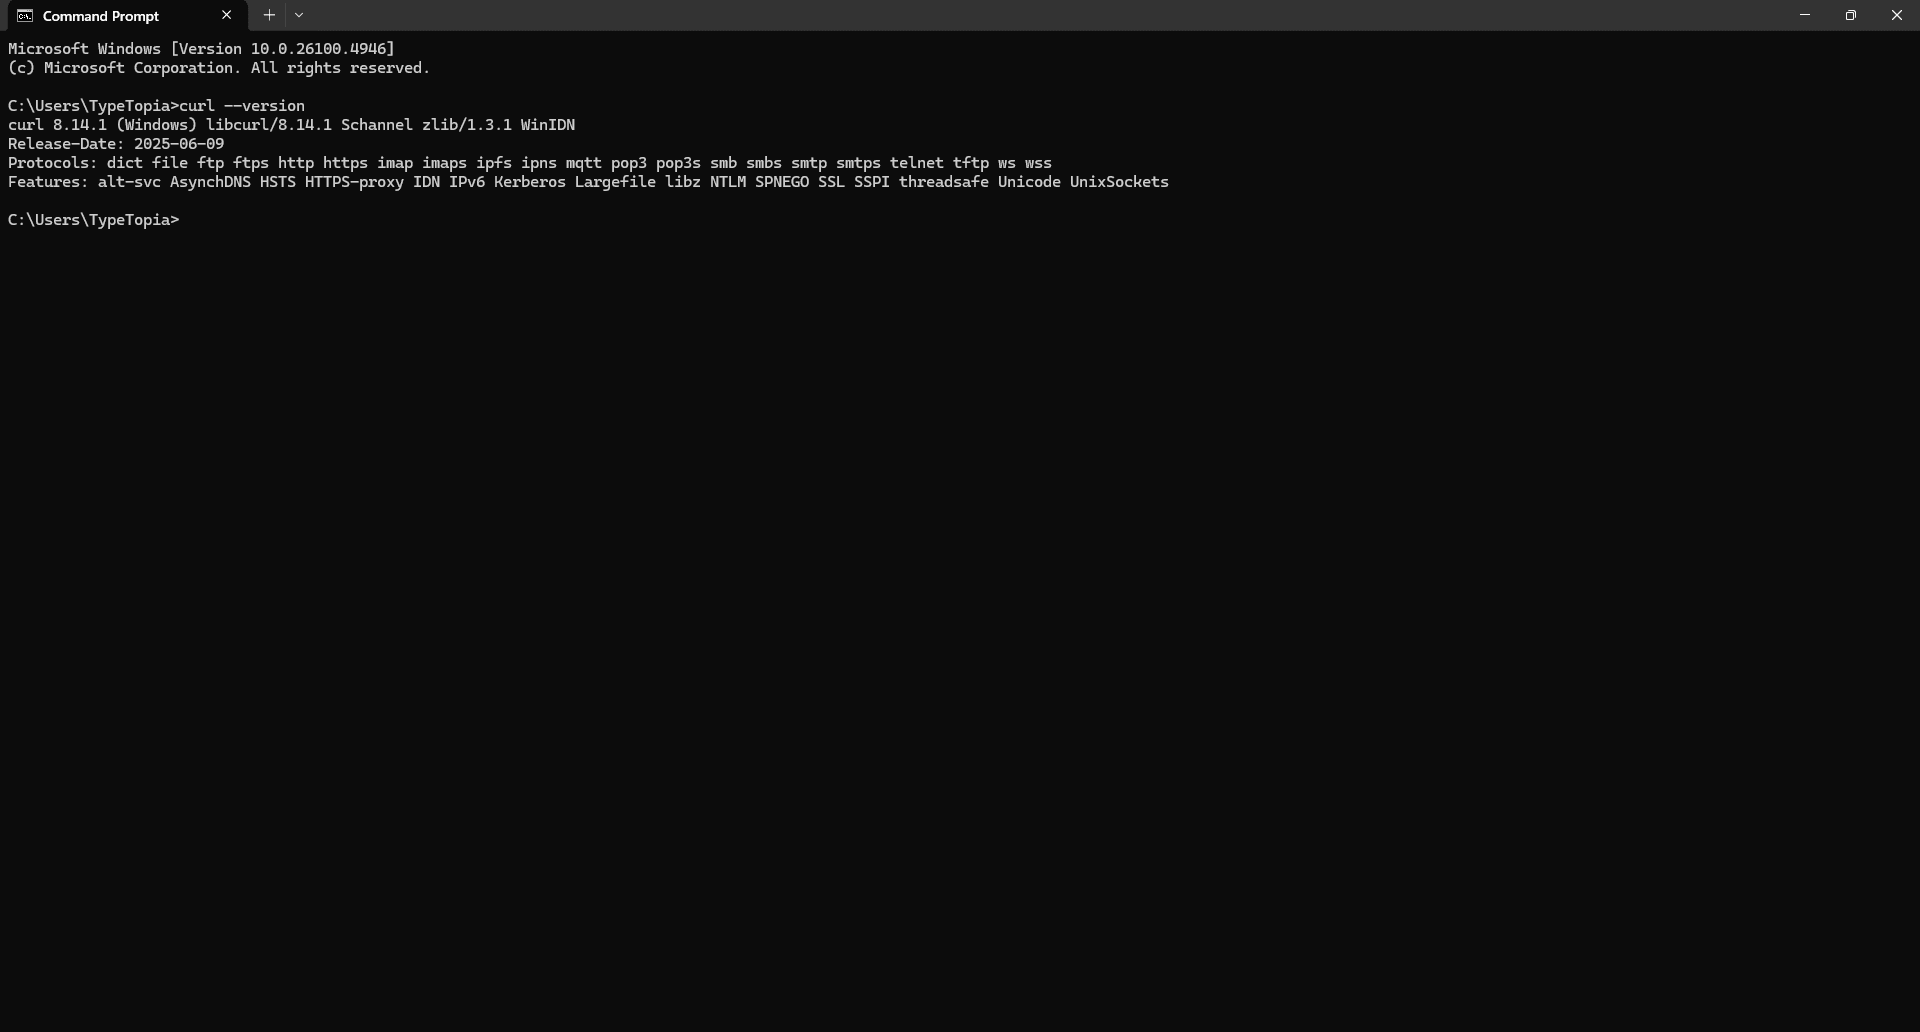
you're all set. cURL is already installed on your machine. Go ahead and jump to the section titled "Understanding the cURL syntax" for the next steps.
Step 3: Download cURL manually (if needed)
If it is not installed or you want a newer version, go to the cURL for Windows download page.
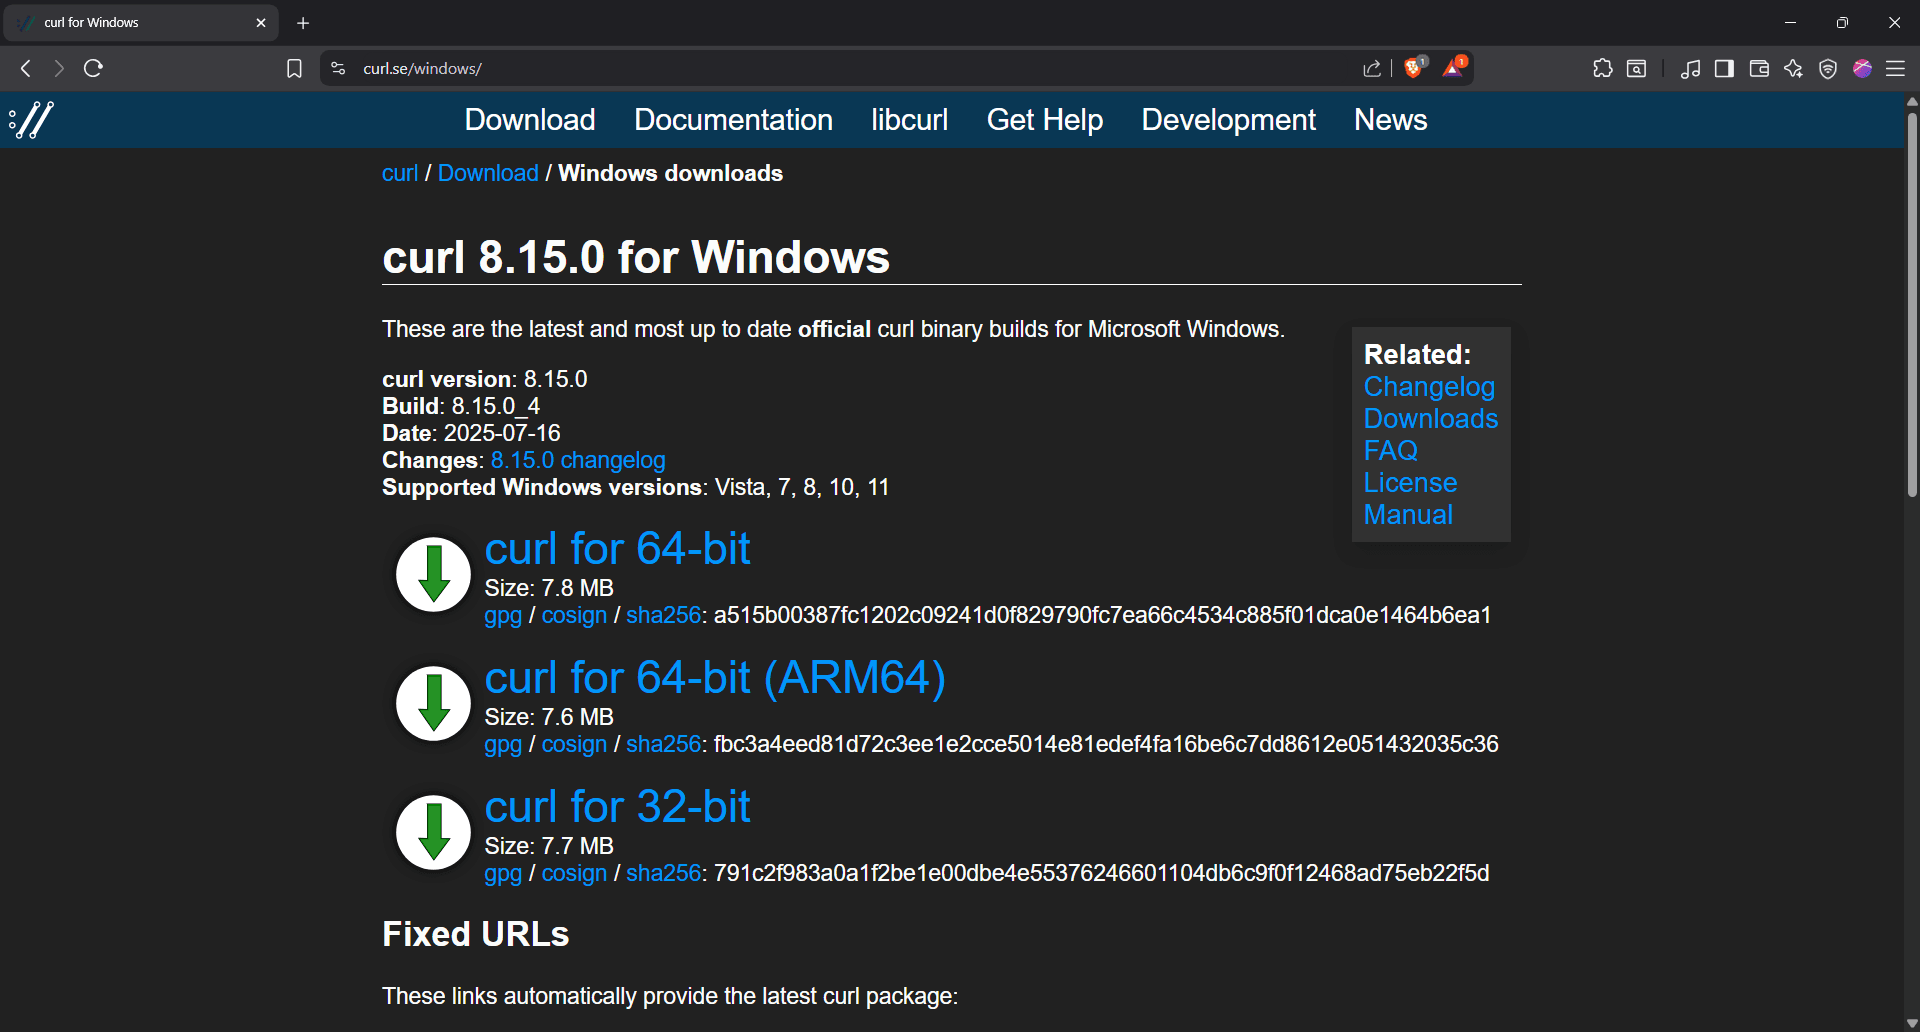
Step 4: Choose the right download
Select the appropriate build. You'll be prompted to download and save the zip file.
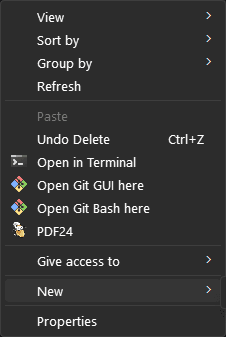
Step 5: Create a folder for cURL
It's best to create a new folder somewhere that feels safe, like Local Disk C. Just right-click anywhere in the list of folder options and hover over 'New.'
Step 6: Prepare the new folder
On the right, a 'Folder' option will appear, select it. Click on the 'New folder,' and you'll be prompted to name it. We'll call it 'cURL.'
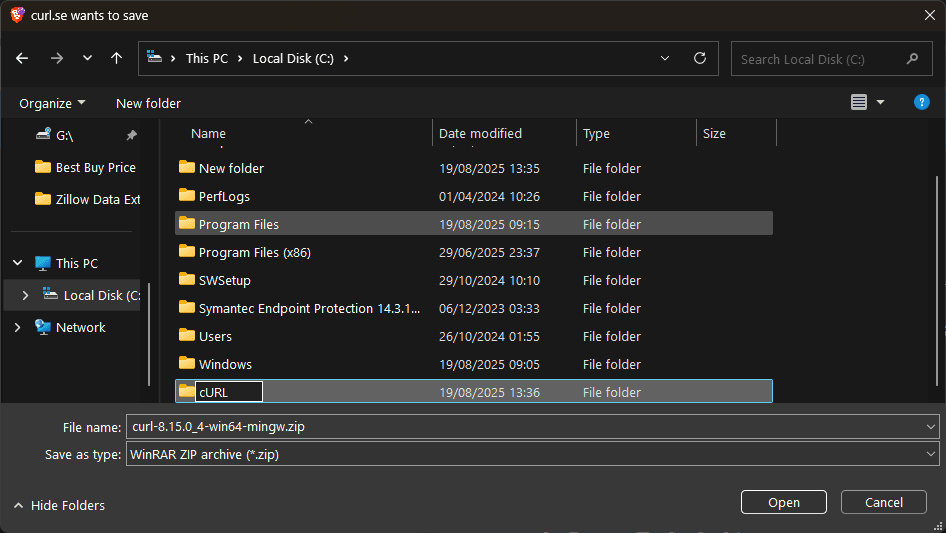
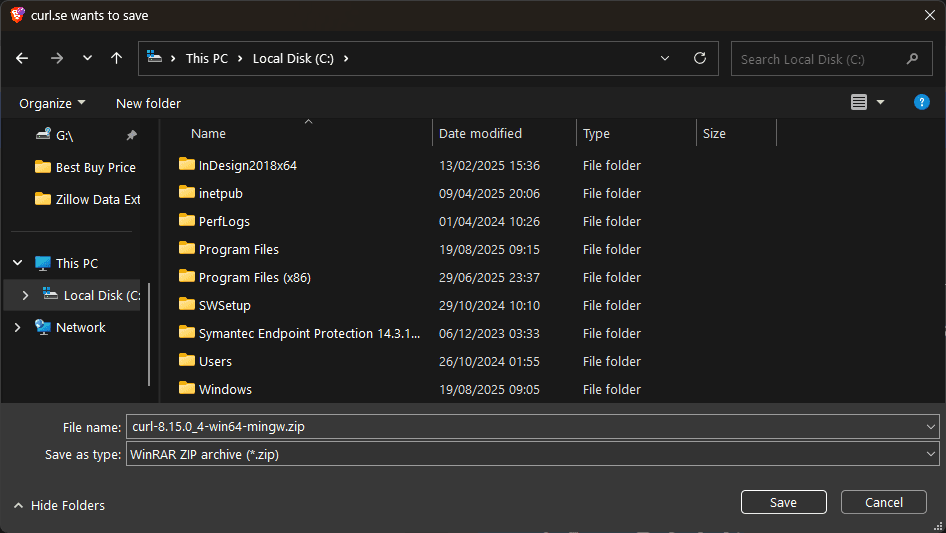
Step 7: Save the zip file in your new folder
Hit 'Save' and wait for the zip file to download.
Step 8: Find the cURL zip file
Navigate to the downloaded file, and select it.
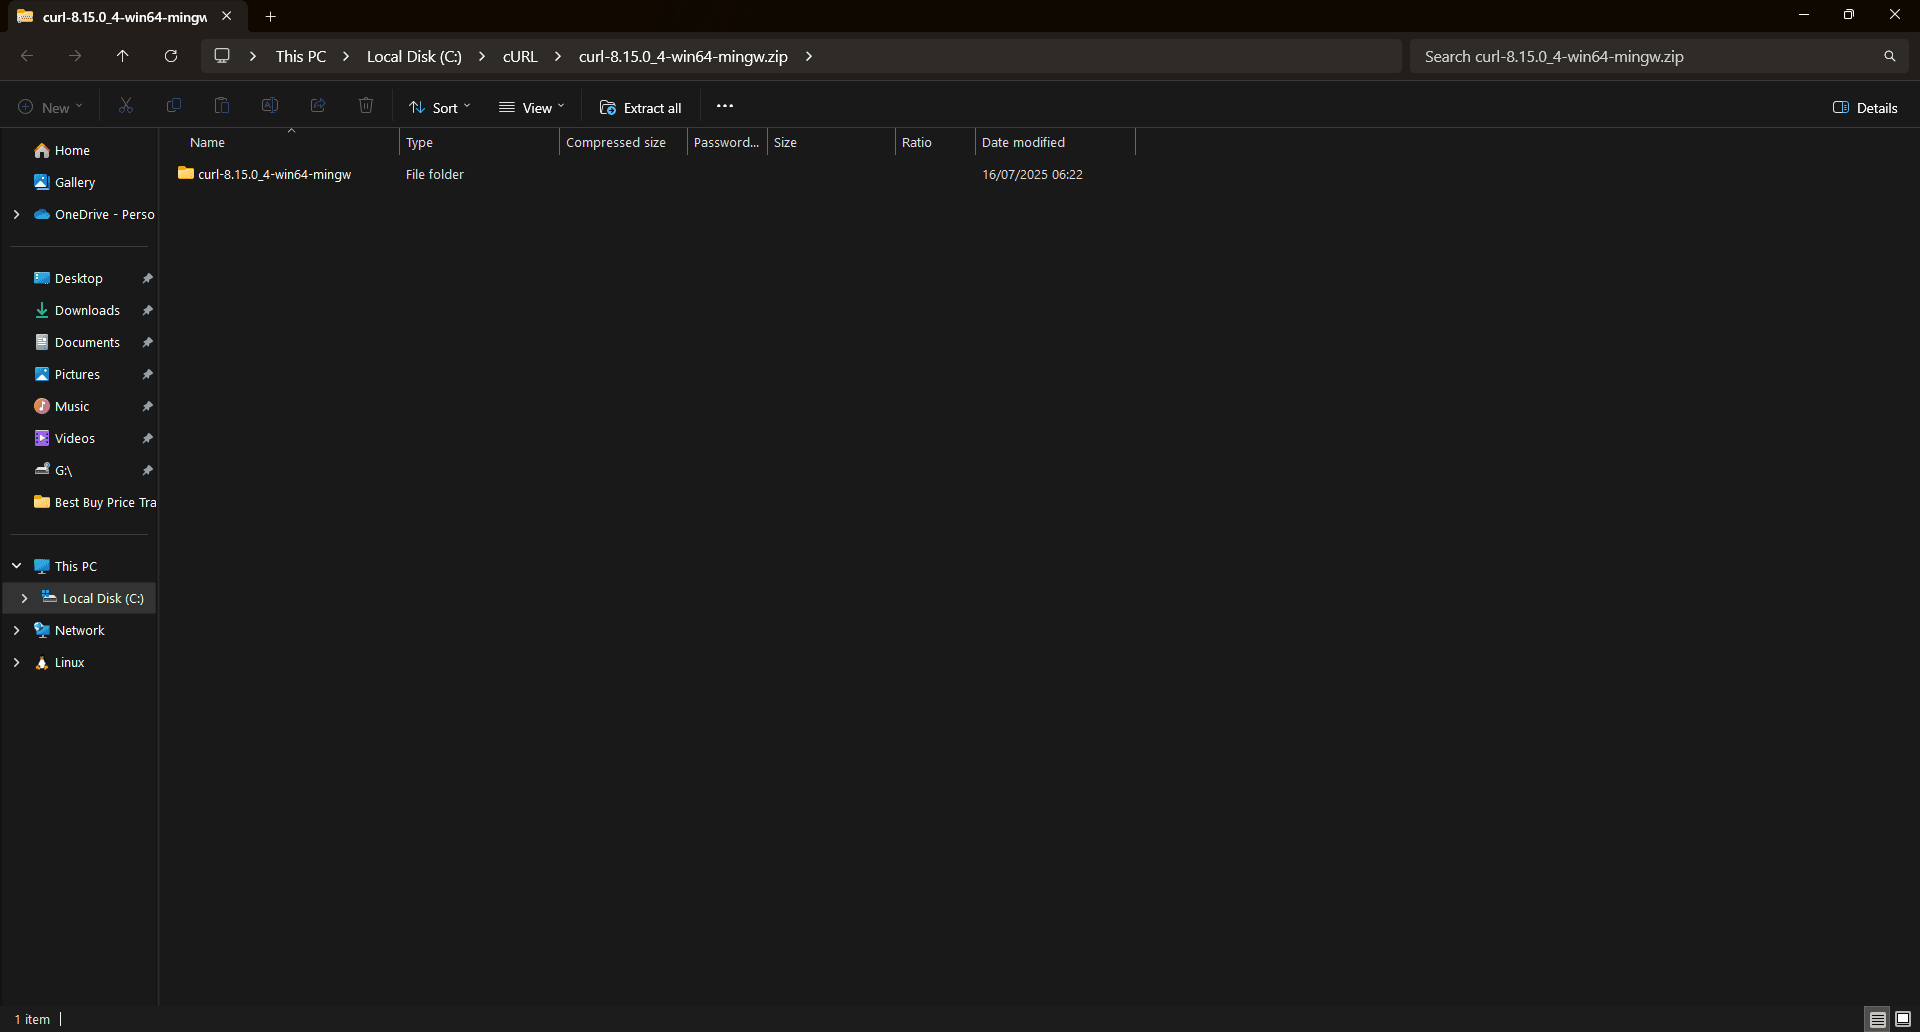
Step 9: Find the option to extract your cURL files
Right-click the downloaded cURL archive. A new drop-down list will appear.

Step 10: Extract the zip file
Select 'Extract All' and choose a location to extract the file.

Step 11: Open the extracted file
Hit 'Extract' and wait for the files to be extracted. Once done, right click on the new file.
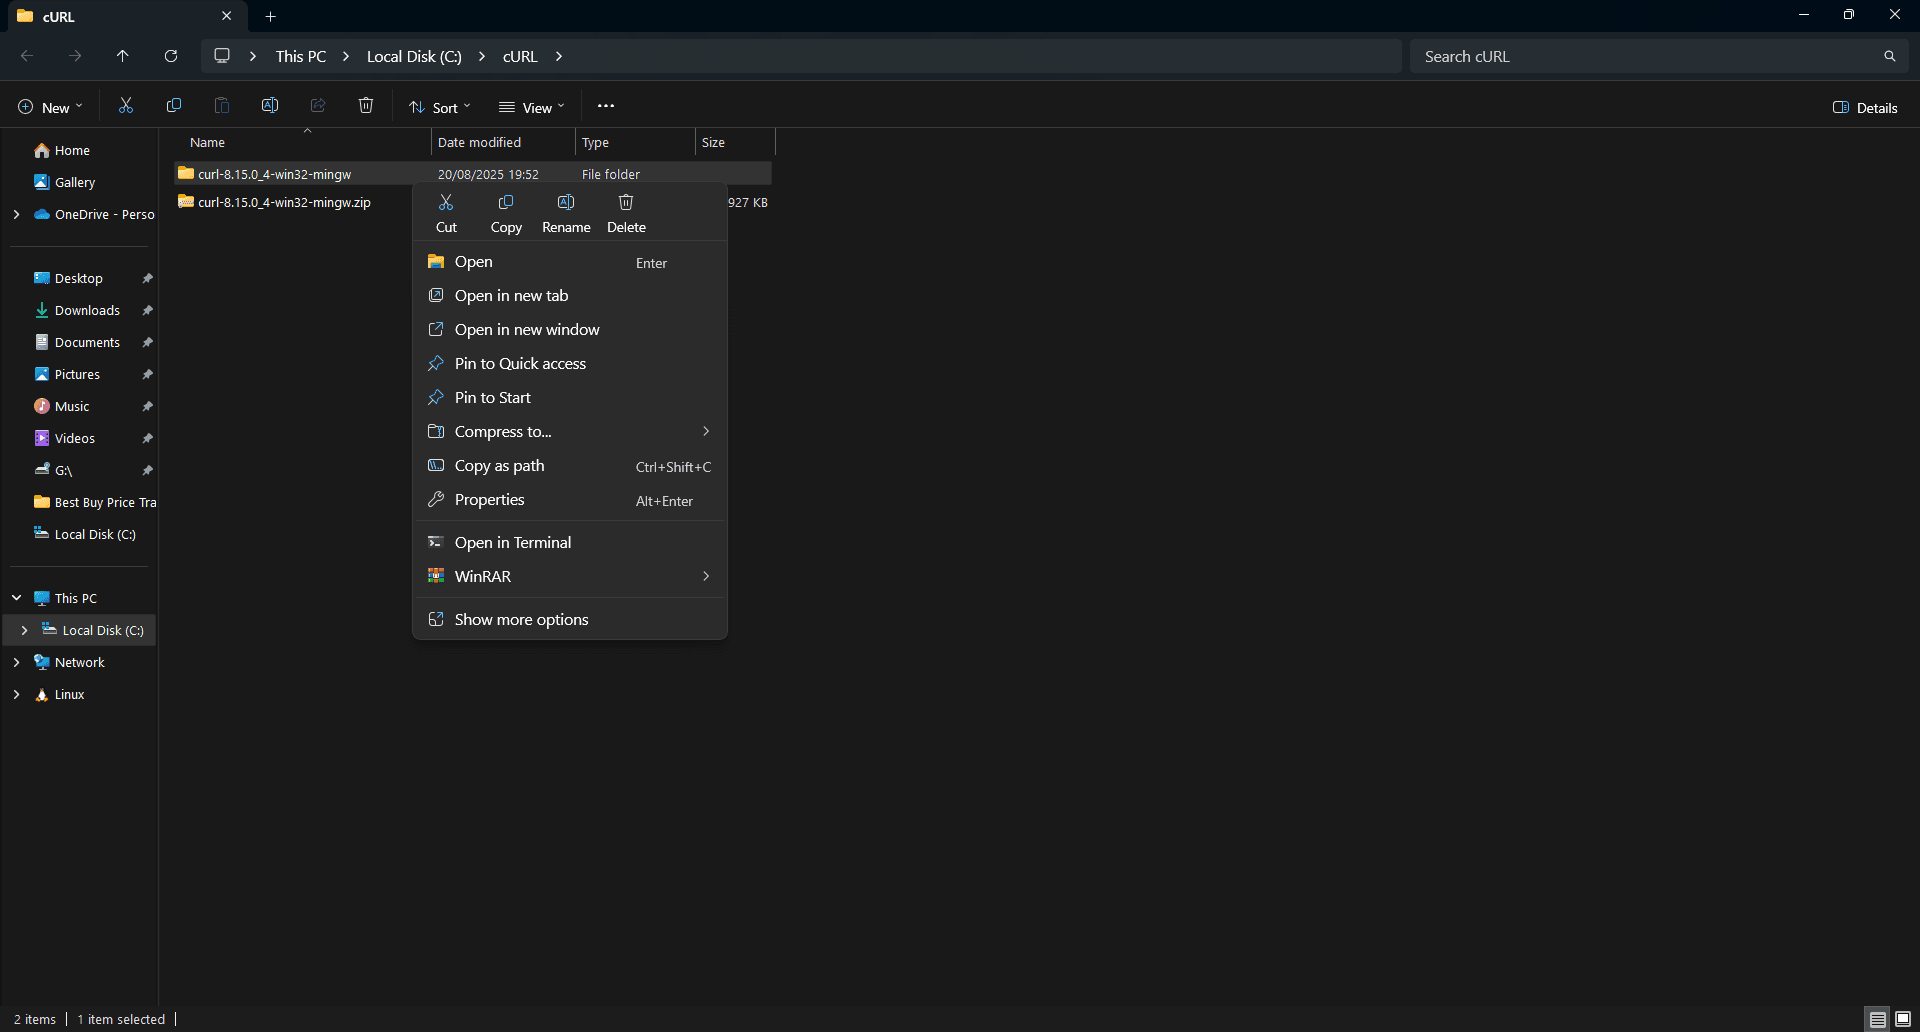
Step 12: Copy the path to the extracted file
From the drop-down list that appears, click 'Copy as path' and paste the file path somewhere safe. It should look like this:
c:\cURL\curl-8.15.0_4-win32-mingw
Step 13: Open your start menu
Press your Windows button or click the Windows icon at the bottom left section of your screen. Then, in the menu that appears, type 'Environment variables' and open it.
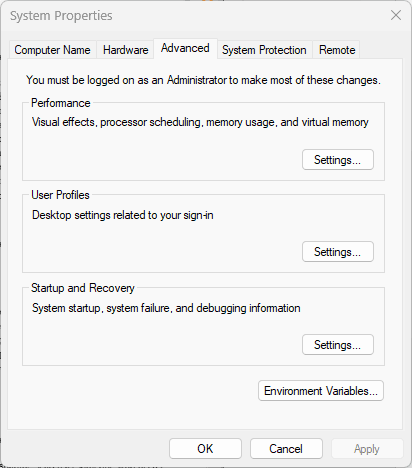
Step 14: Open environment variables
Click on 'Environment variables' at the bottom of the system properties menu.
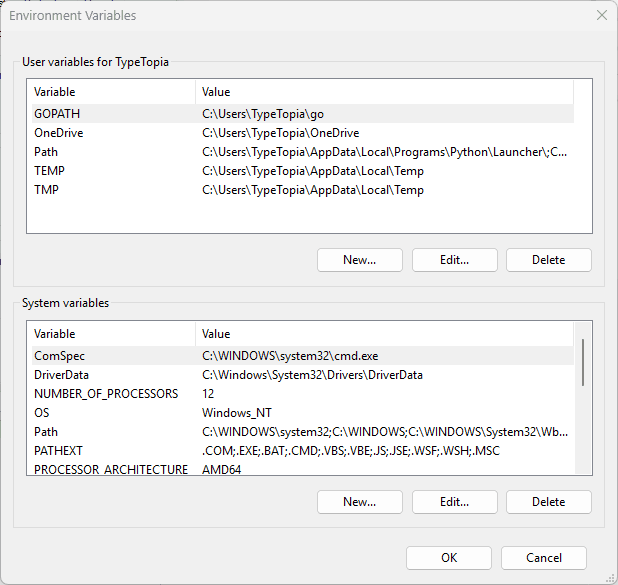
Step 15: Edit system path
Under 'system variables,' find 'Path,' select it, and hit 'Edit'.
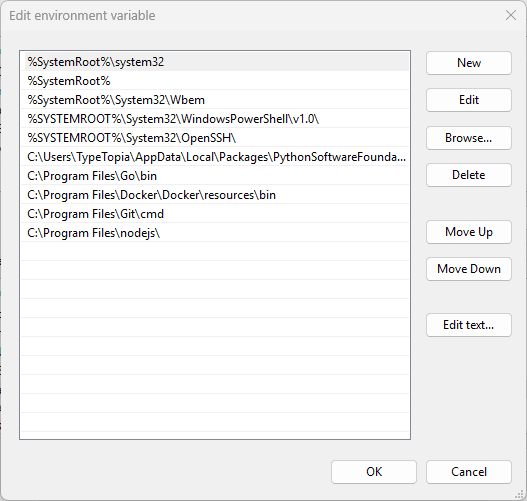
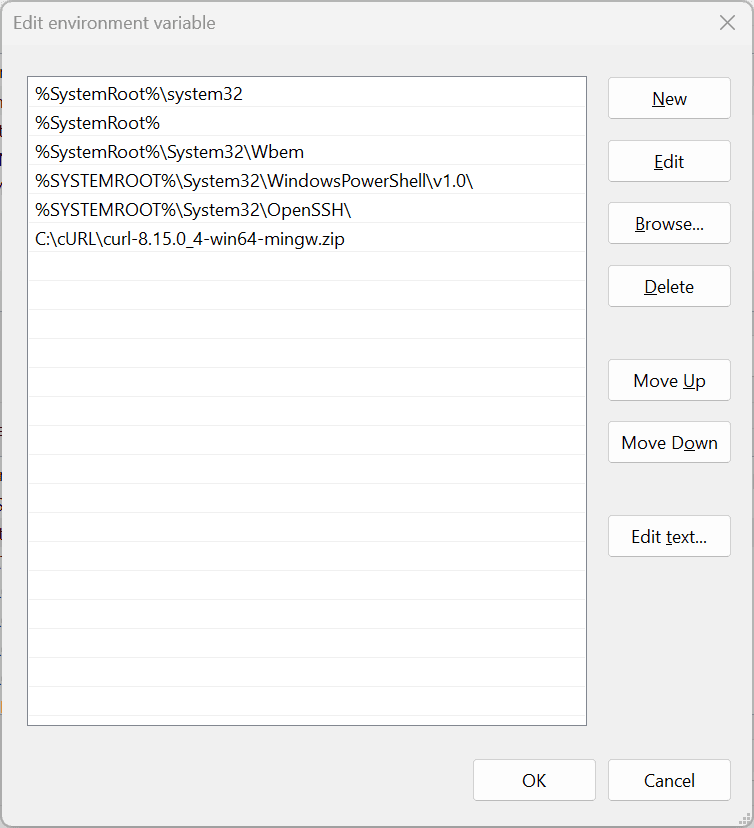
Step 16: Add the cURL folder to your system path
Click 'New' and paste the extracted file location path you copied earlier.
Step 17: Save your changes
Press 'OK'.
Step 18: Verify the installation
Go back to your command line tool and paste the following cURL command:
curl --version
If all went well, you should now see the current cURL version you installed as the new version.
Installing cURL on macOS
Most macOS versions ship with cURL by default. So let's start by checking whether the command line tool is installed:
Step 1: Open your terminal
Hit 'Cmd + Space' and type 'Terminal' to open your command-line interface.
Step 2: Check if cURL is already installed
Run the following cURL command:
curl --version
If you get information about your current cURL version, you're good to go. If you get an error, then you need to manually install cURL.
Step 3: Install Homebrew (if needed)
The first thing you need to do is check for Homebrew:
brew --version
If you get an error, run the following command:
/bin/bash -c "$(curl -fsSL
https://raw.githubusercontent.com/Homebrew/install/HEAD/install.sh)"
Let the installer run and then follow the prompts to set up Homebrew and update your shell.
Step 4: Restart the terminal
Once installed, close and reopen your terminal.
Step 5: Install cURL via Homebrew
Run the following command to install cURL via Homebrew:
brew install cURL
Step 6: Verify the installation
Confirm successful installation with:
/opt/homebrew/bin/curl --version
You should see details about your cURL version.
Installing cURL on Linux
Most Linux distributions come with cURL pre-installed, but let’s verify just to be sure.
Step 1: Open your terminal
Press 'Ctrl + Alt + T' to open your terminal.
Step 2: Check if cURL is installed
Run this cURL command:
curl --version
If you see version info, you’re all set. If not, cURL isn’t installed.
Step 3: Install cURL (if not installed)
Update your package list:
sudo apt update
Then install cURL:
sudo apt install curl -y
By now, you probably have the answer to the basic question: “What is cURL, and do I already have it on my system?” It's time to see how it works.
Understanding the cURL syntax
The easiest way to grasp cURL syntax is to use it. We’ll practice with MockAPI, a free tool that lets you quickly spin up a test API for sending requests.
Creating a MockAPI account for practice
Follow these steps to set up your free MockAPI account:
Step 1: Sign up for MockAPI
Just go to the site, create a free account, and follow the prompts to set it up.
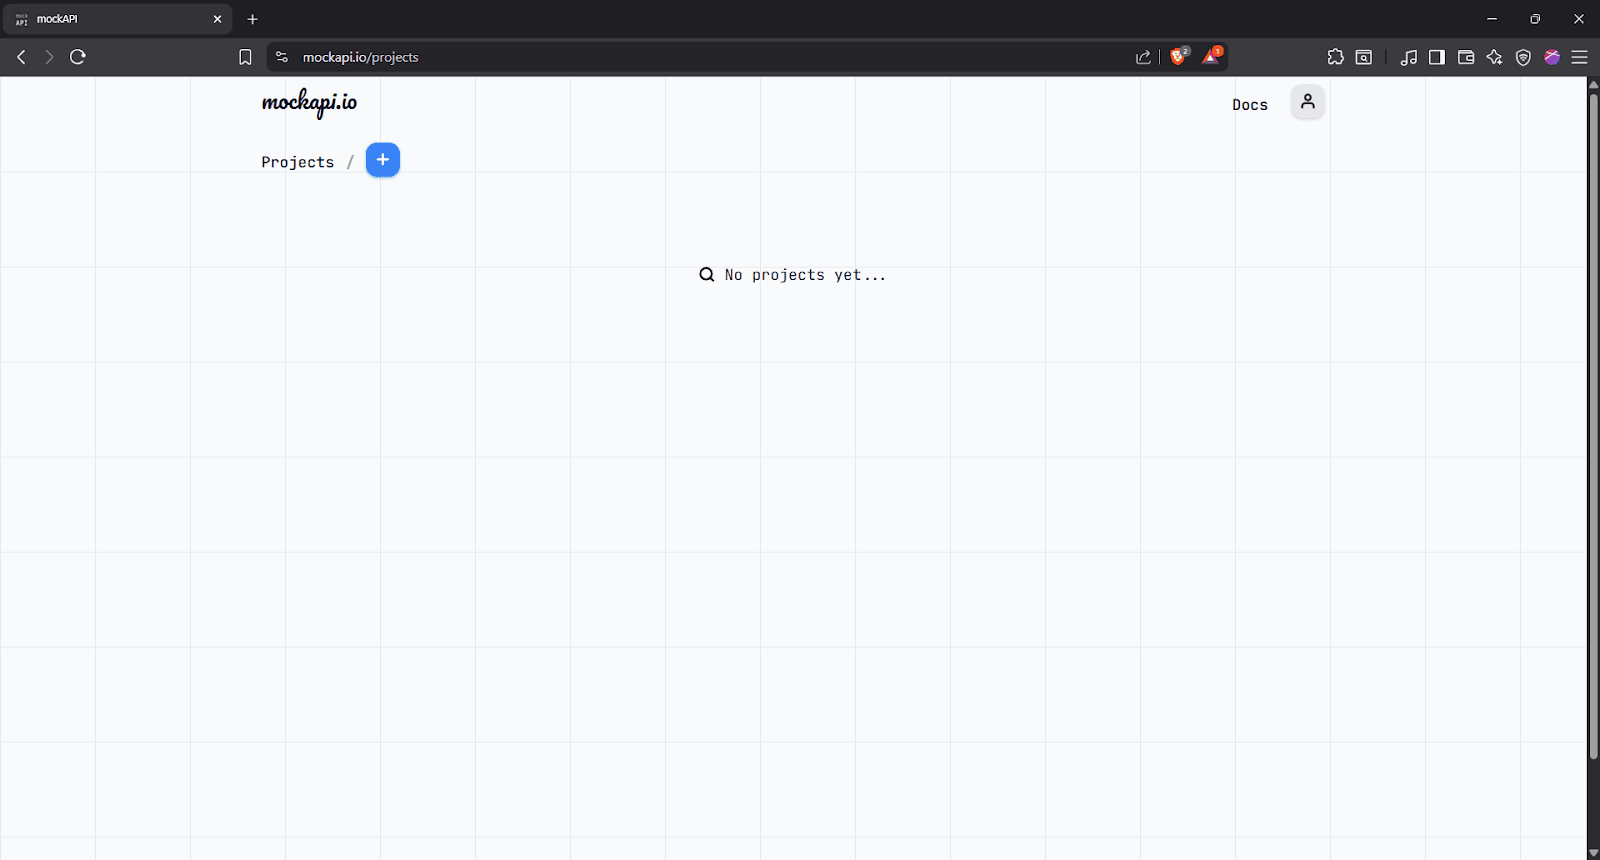
Step 2: Create a new project
On the MockAPI dashboard, click the blue '+' icon to create a new project.
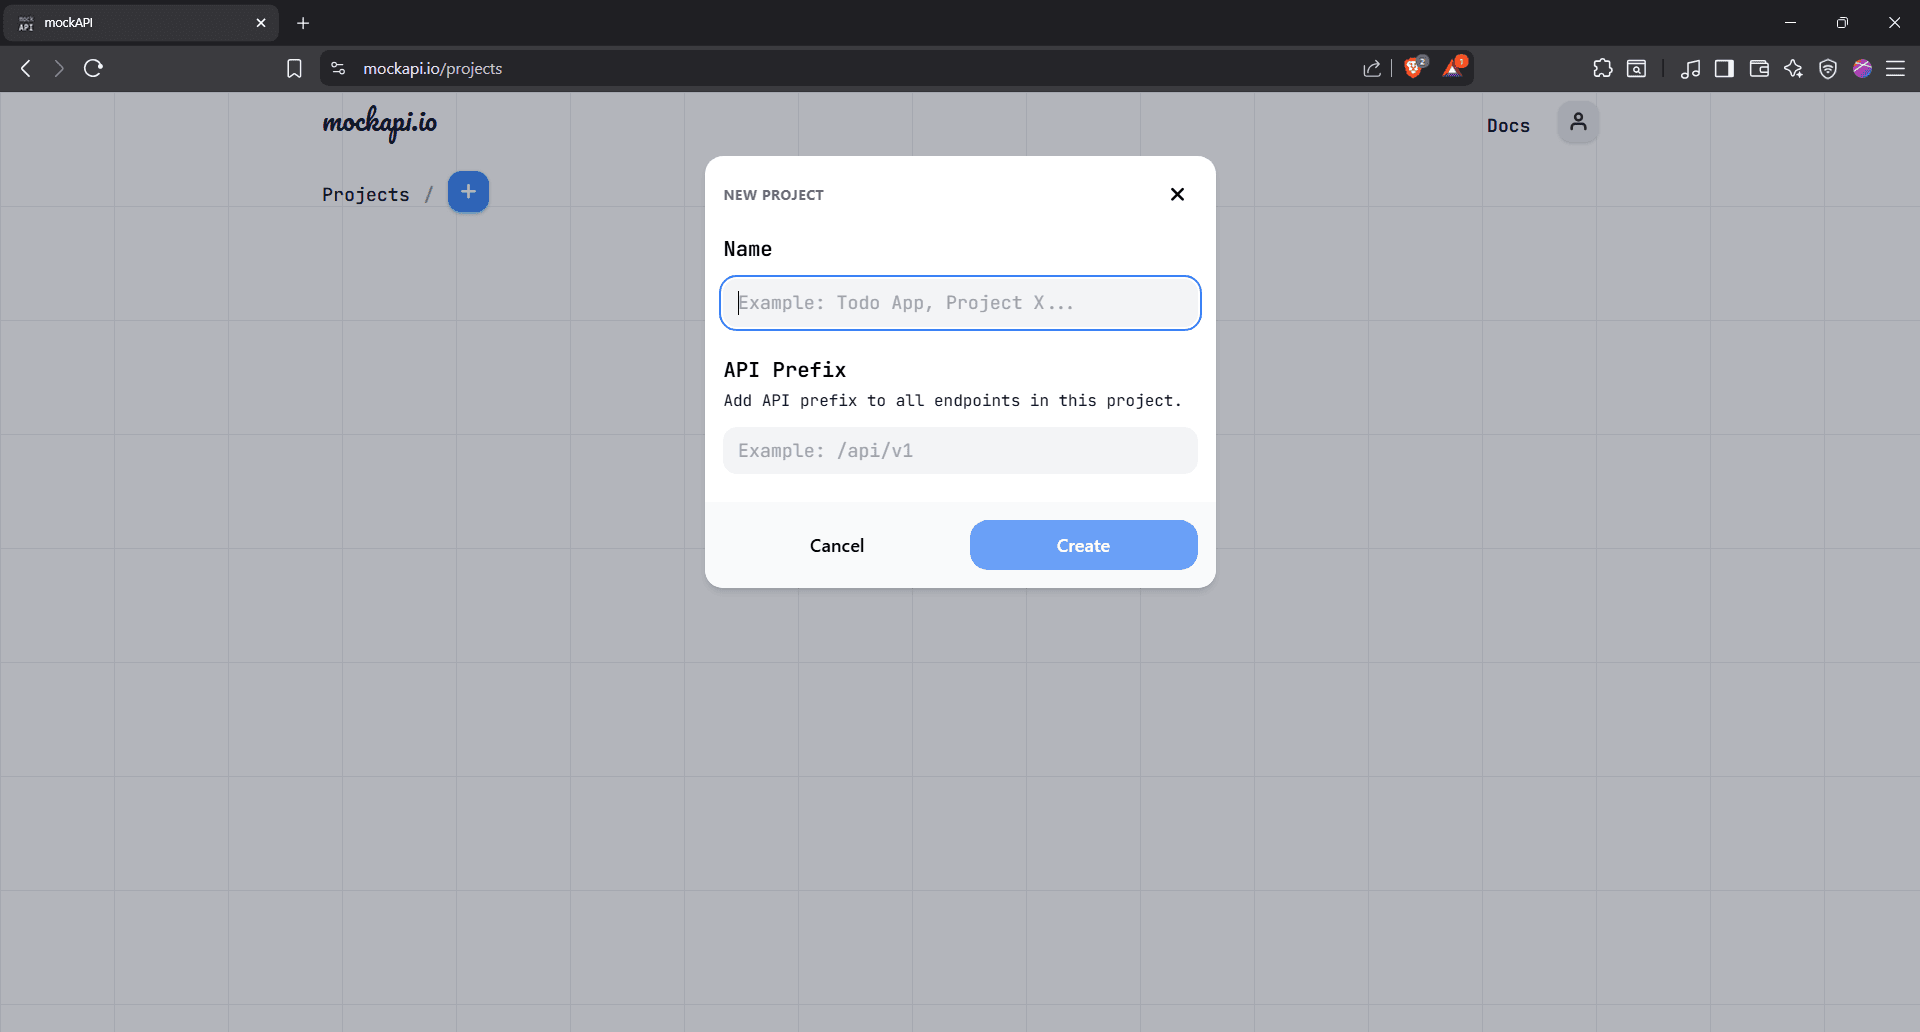
Name it “cURL Test” (or any name you prefer). You can leave the API prefix blank.

Click 'Create,' and your project will appear on the next screen.
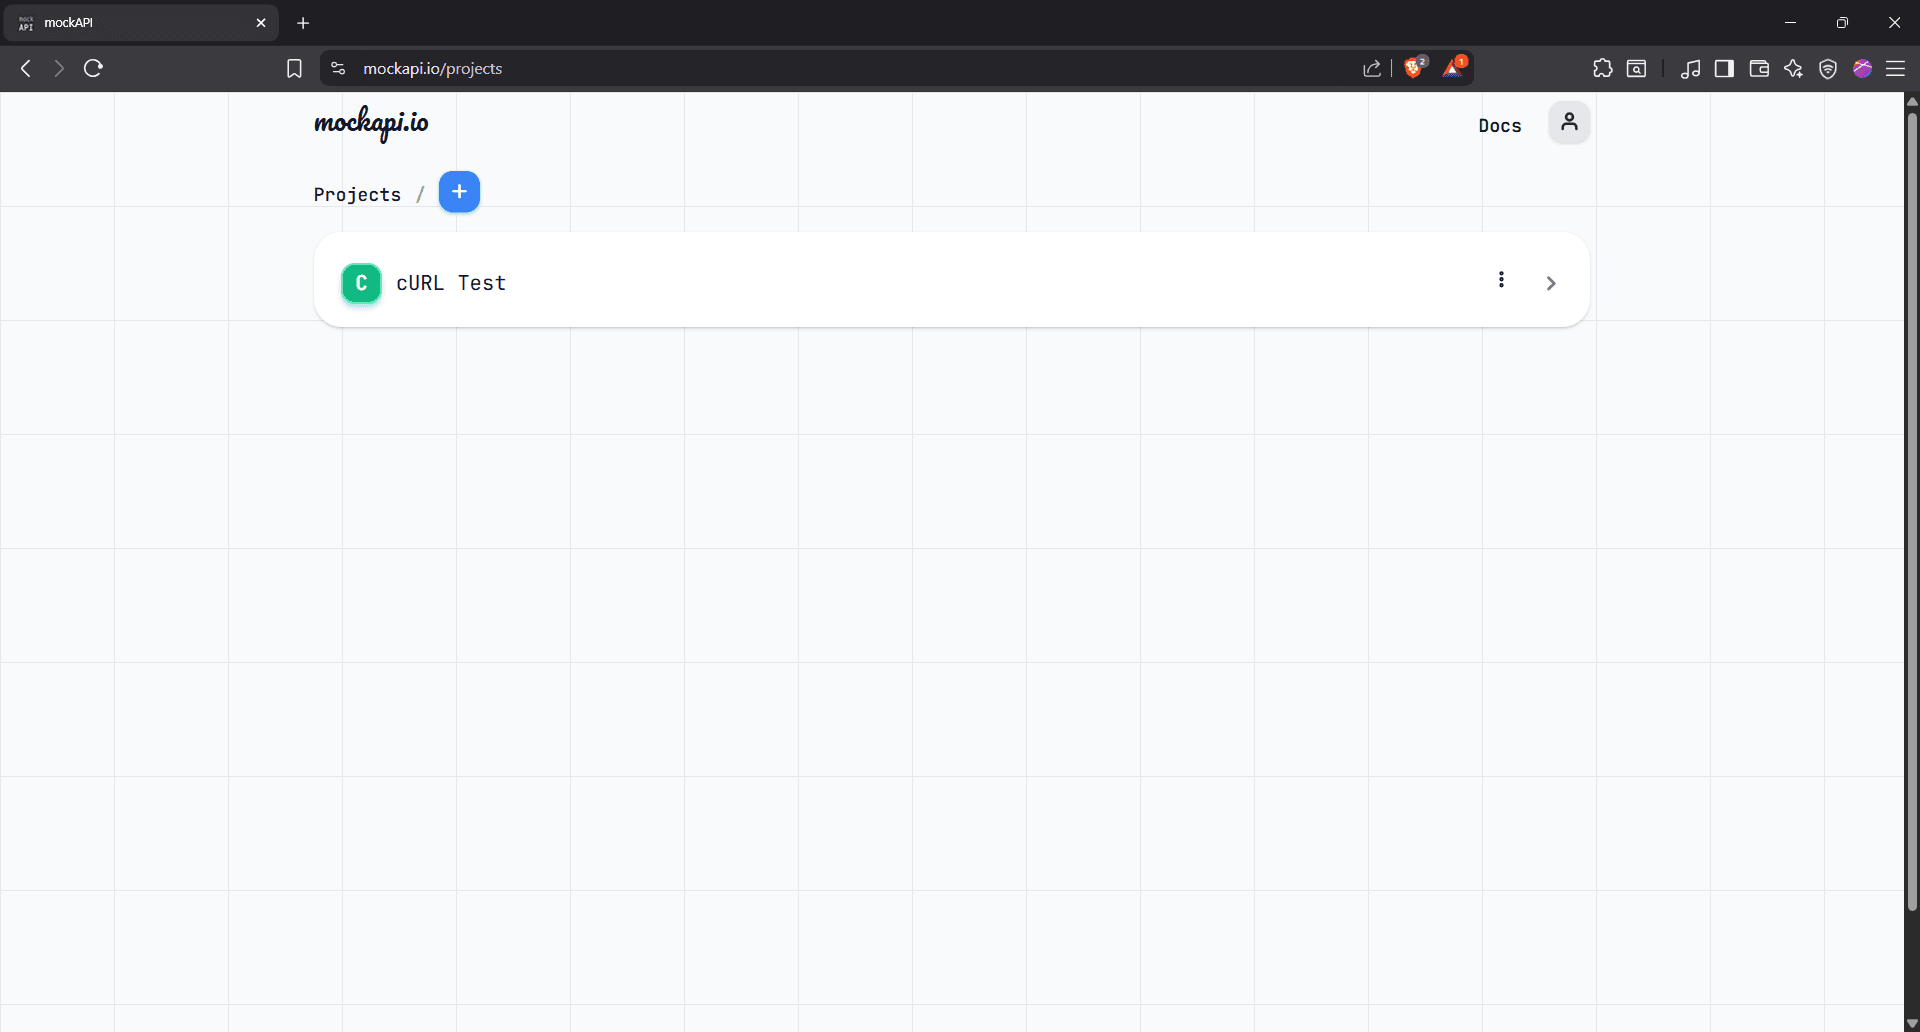
Step 3: Open the project
Select the project to open it.
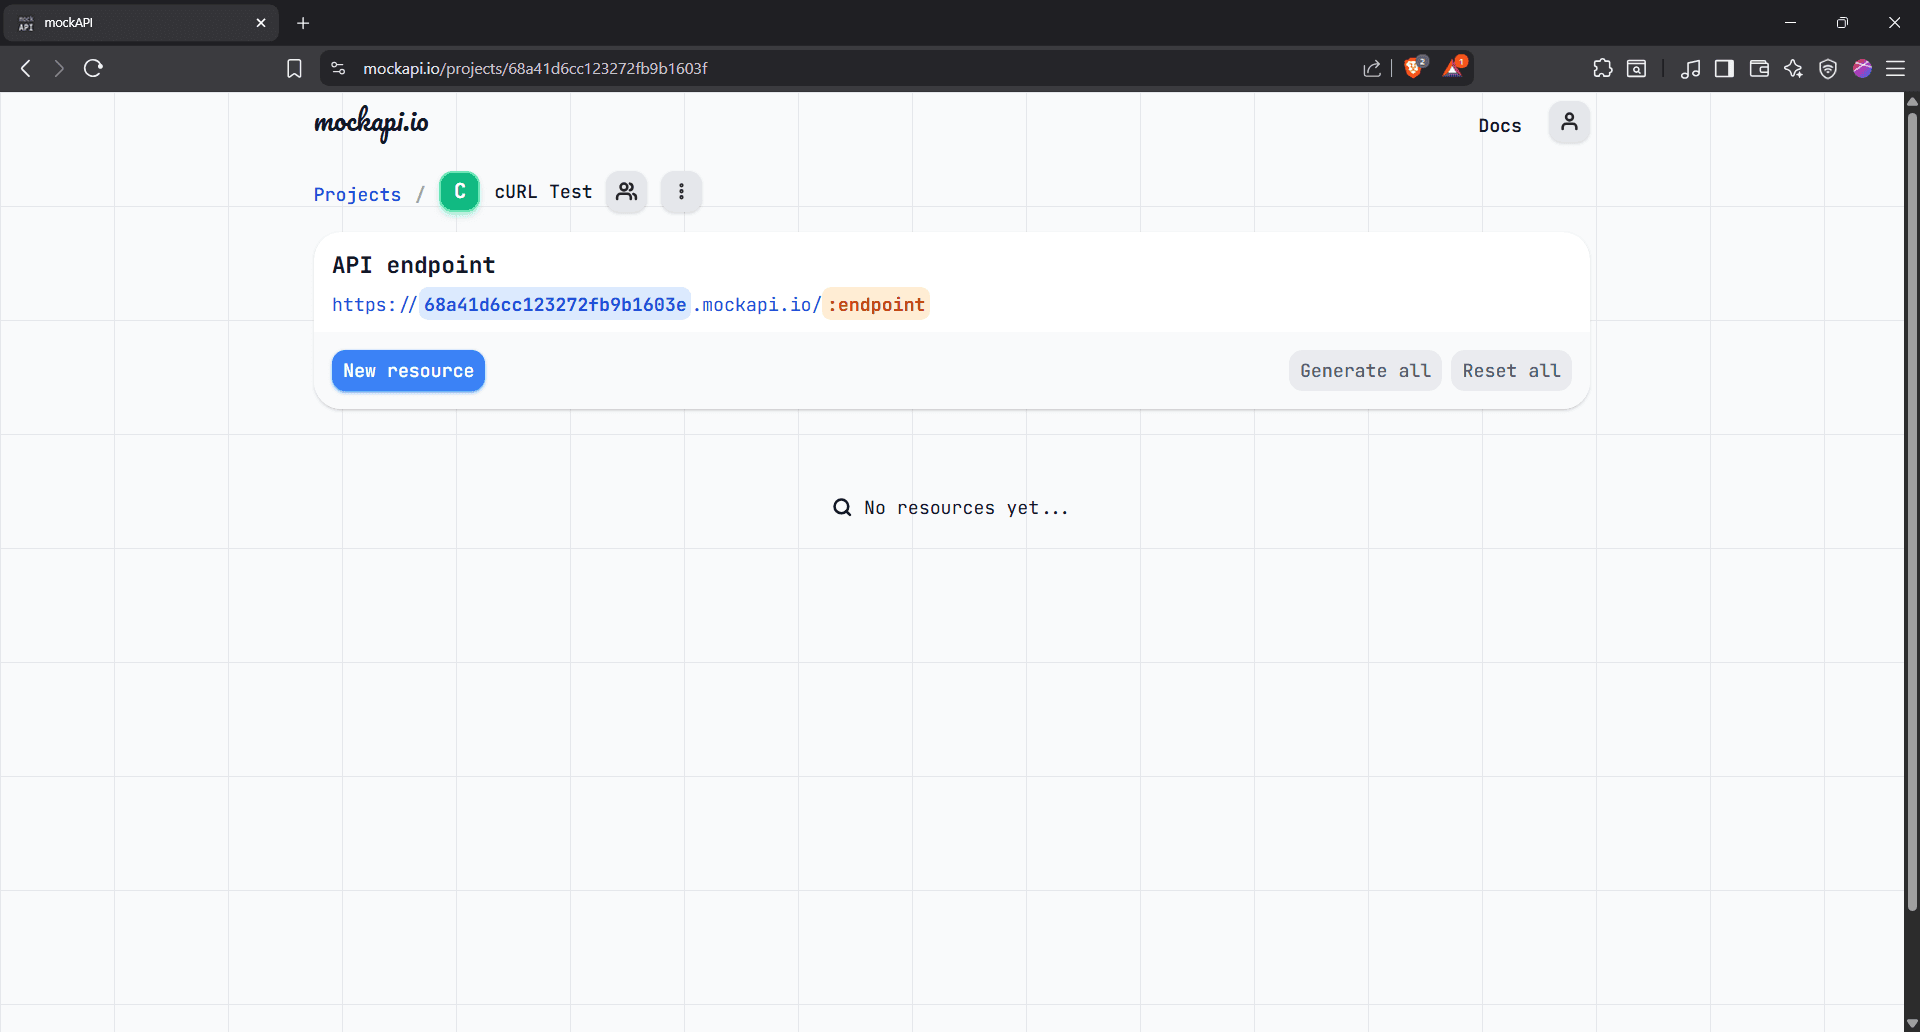
Step 4: Create a new resource
Hit 'New Resource' to create a new resource and name it "users."
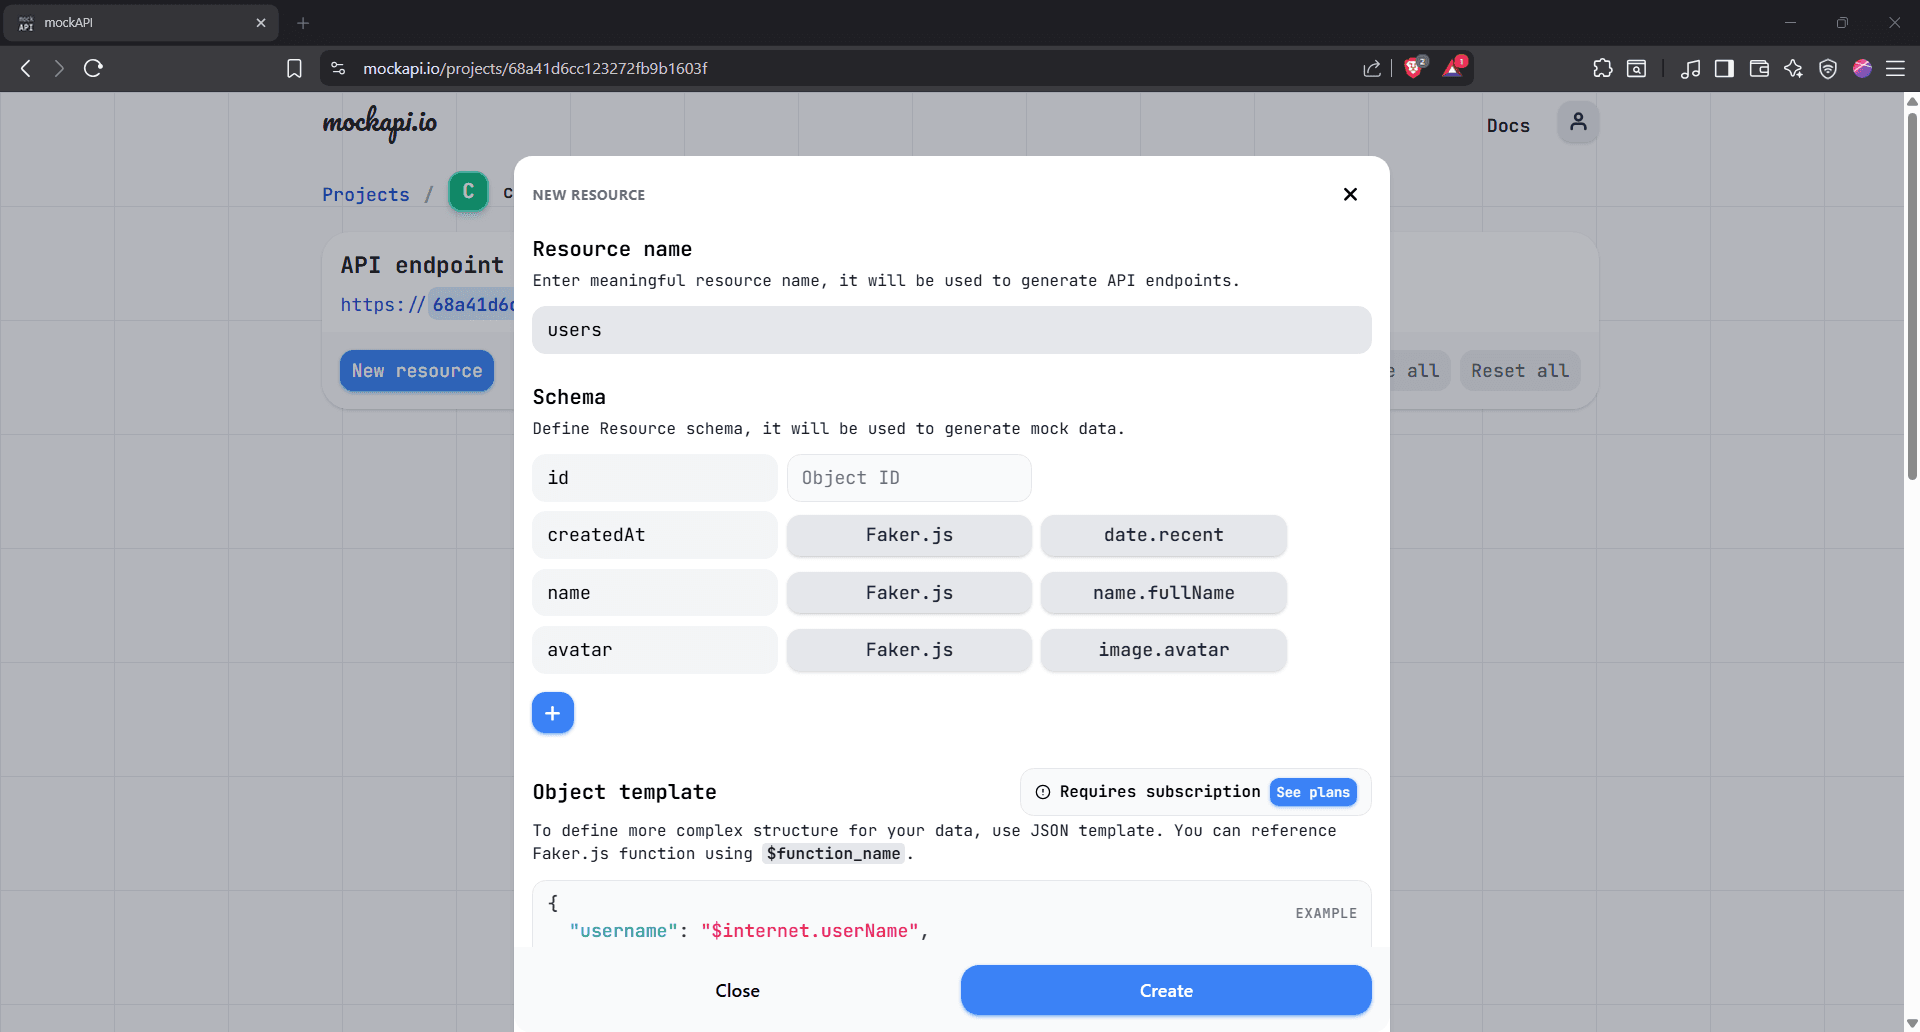
Step 5: Add custom fields to the Schema
You can already see some default fields like 'id', 'createdAt', and more. Click the blue '+' button to add your own default fields. Below is what we're going with for illustrative purposes:
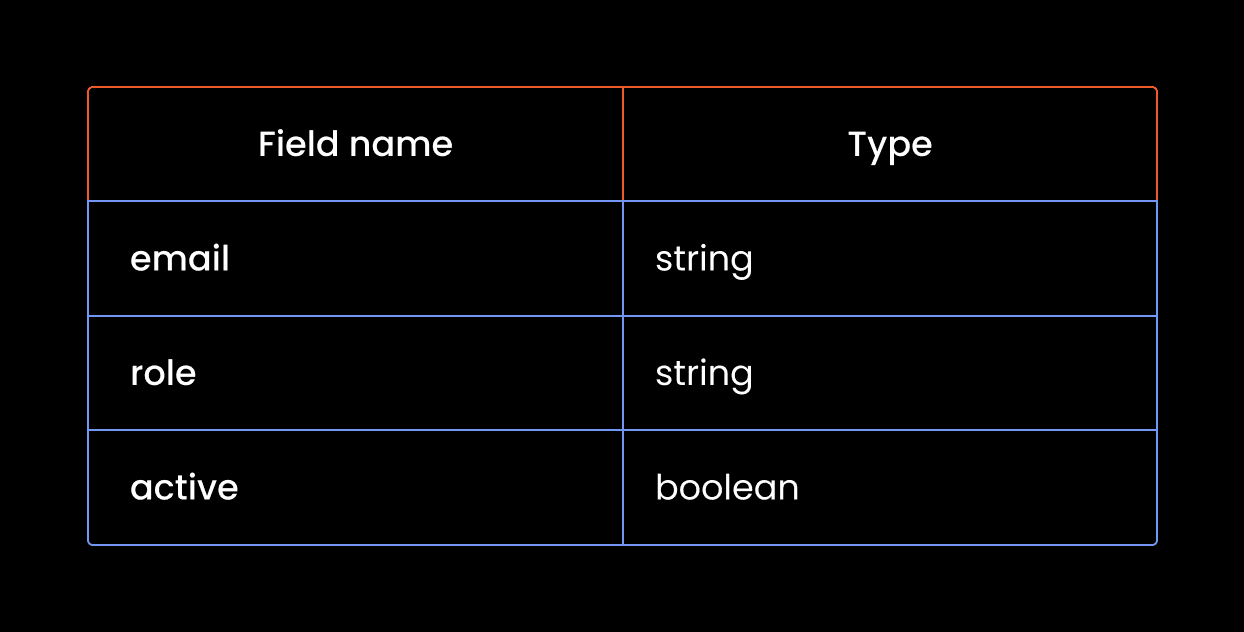
Here's what that looks like in MockAPI's schema:
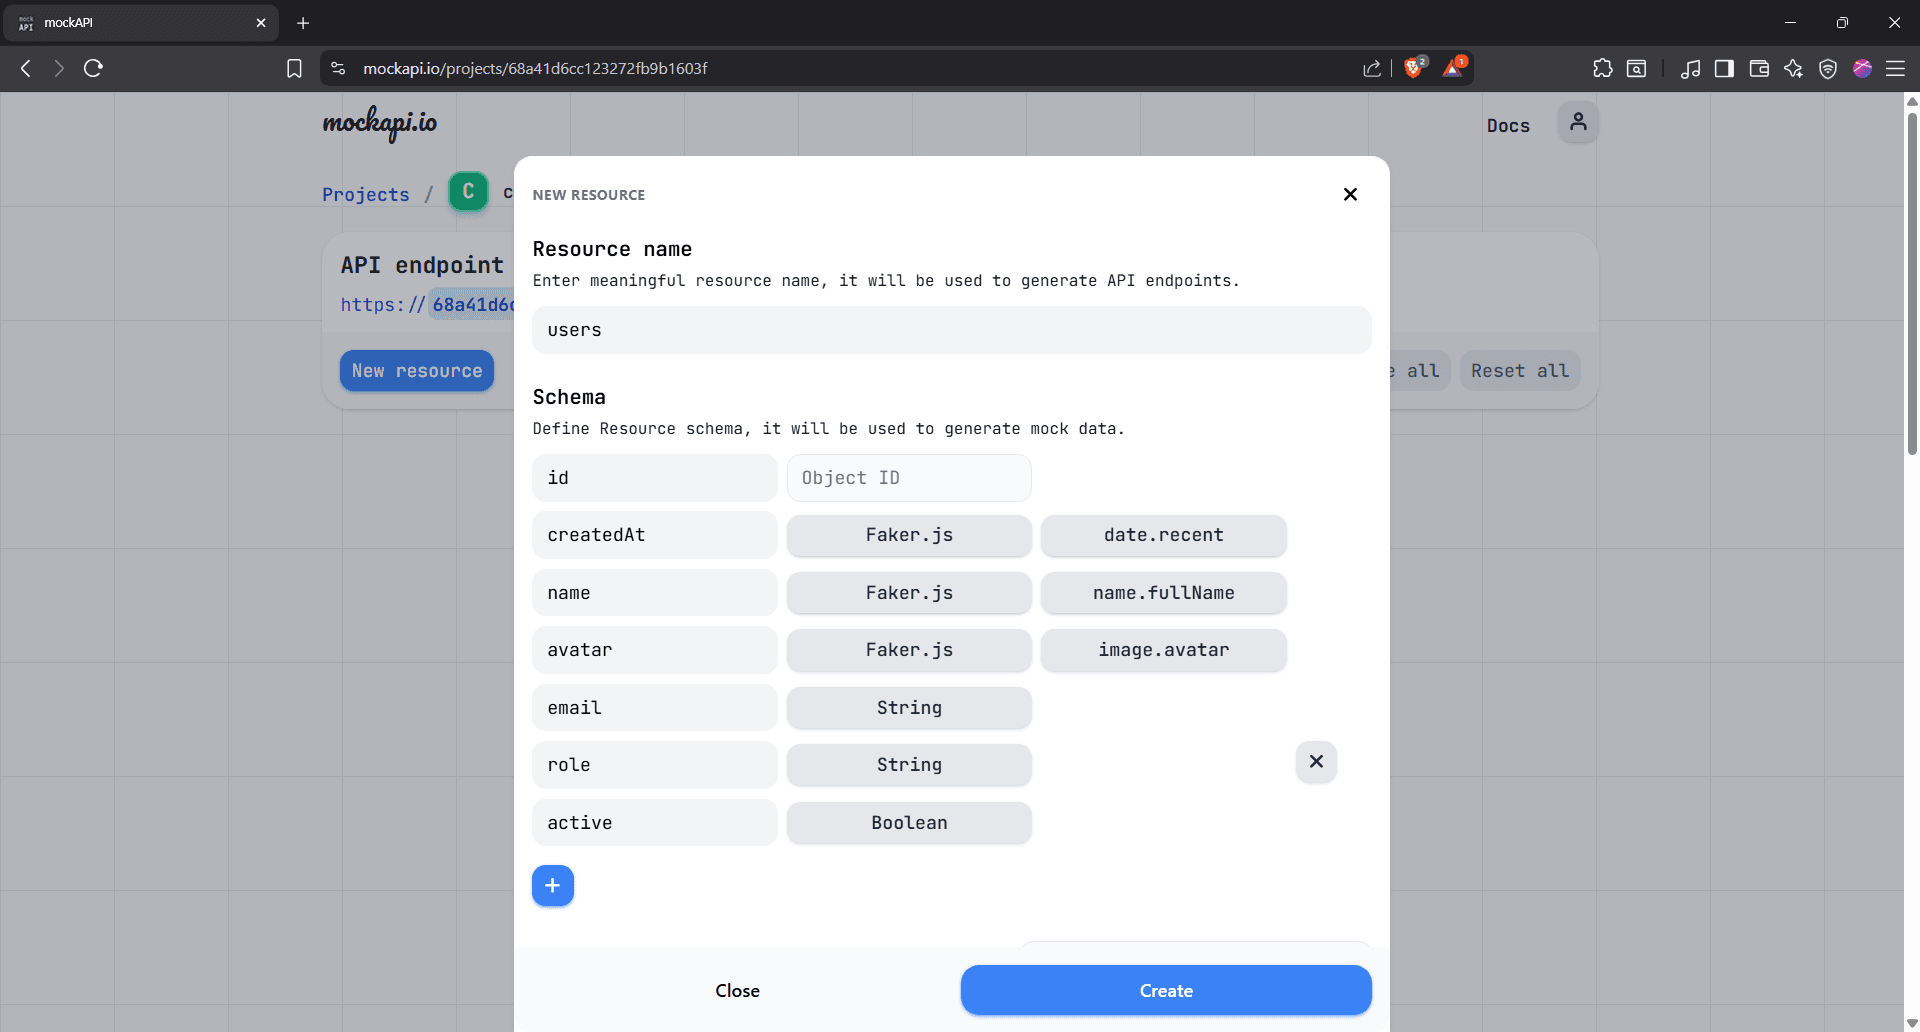
Click the 'Create' button.
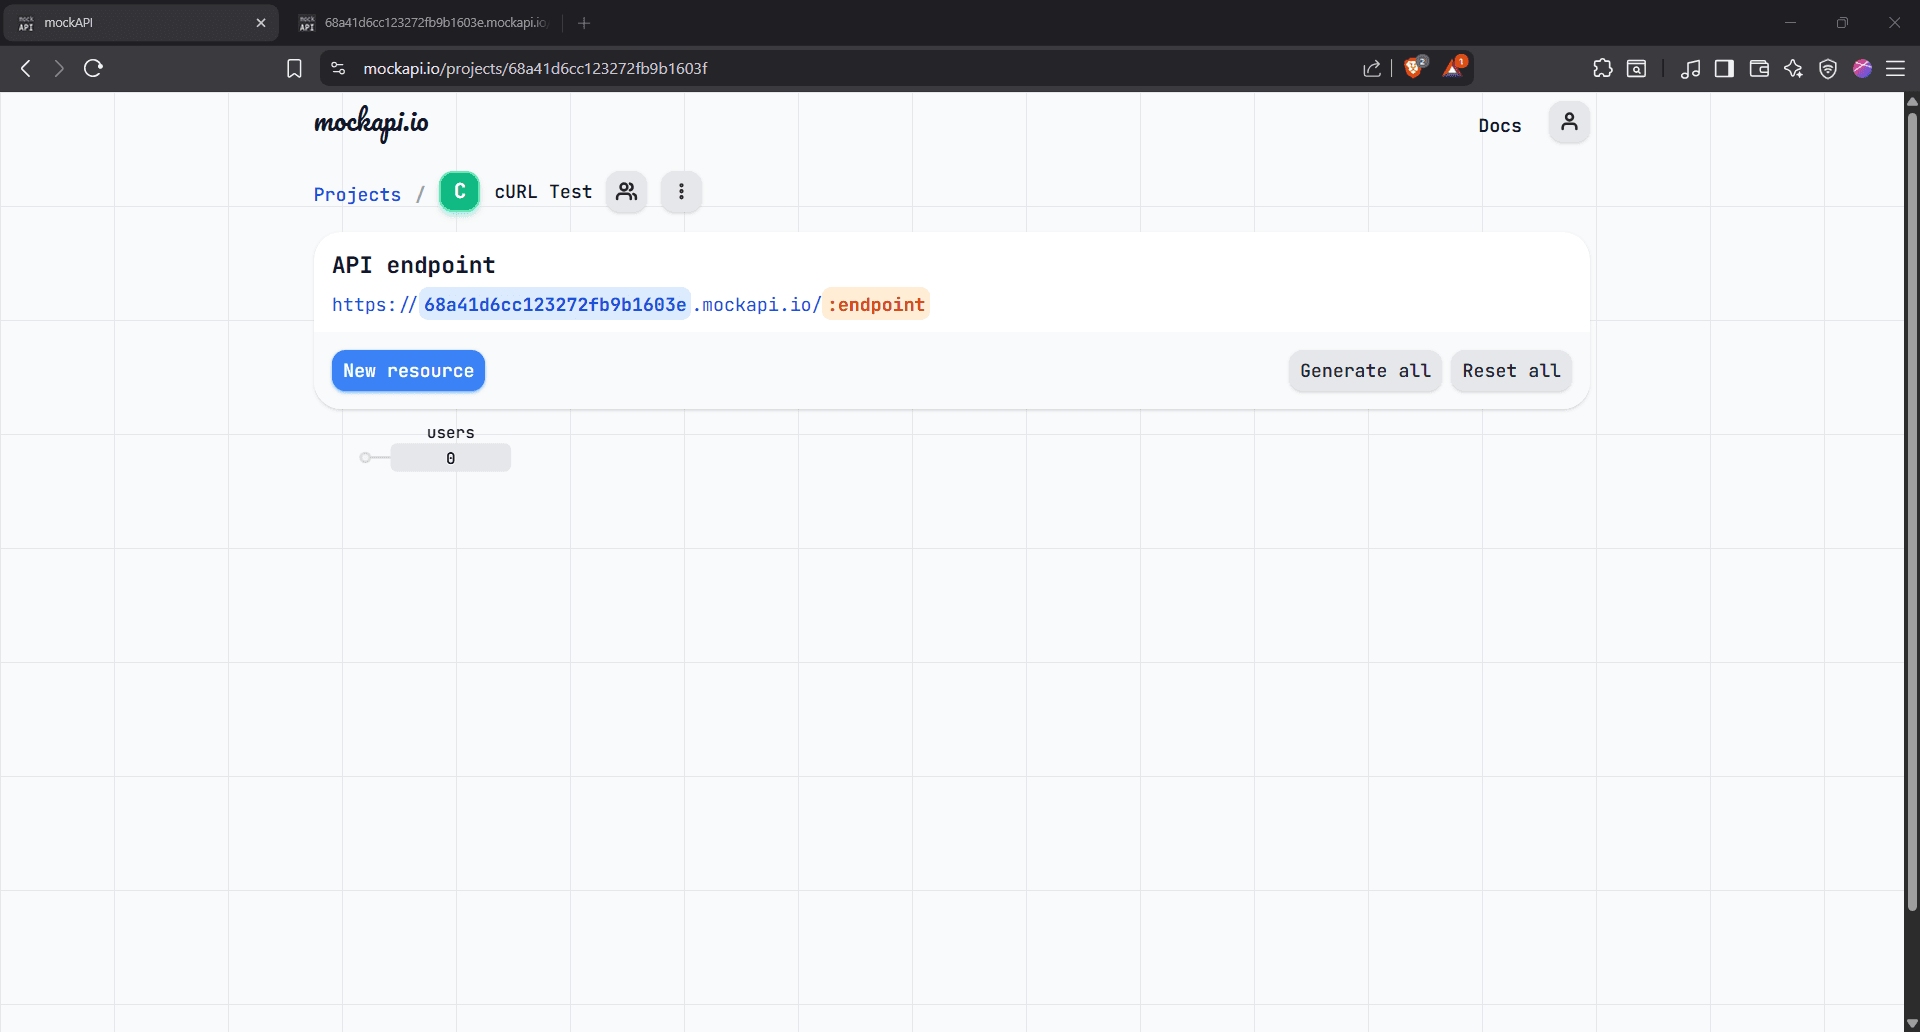
Step 6: Open the resource
Your “users” resource is ready. Click the users box to open the data view, where you can add records manually or use cURL to create, modify, and update them automatically.
You’ll find your full endpoint URL in the address bar, copy it, and keep it safe.
Mastering cURL syntax using API requests
Now open your terminal. It’s time to cURL up our sleeves and send some API requests:
Basic cURL syntax
Below is the basic cURL command:
curl [OPTIONS] [URL]
It has three core parts:
- curl: The command-line tool
- [OPTIONS]: Flags that modify the request (we’ll cover these shortly)
- [URL]: The target address you’re sending the request to
With that foundation in place, let's now talk about the different types of requests you can send using cURL.
Sending GET requests with cURL
The first type of request is GET, and it's quite literally used to get data.
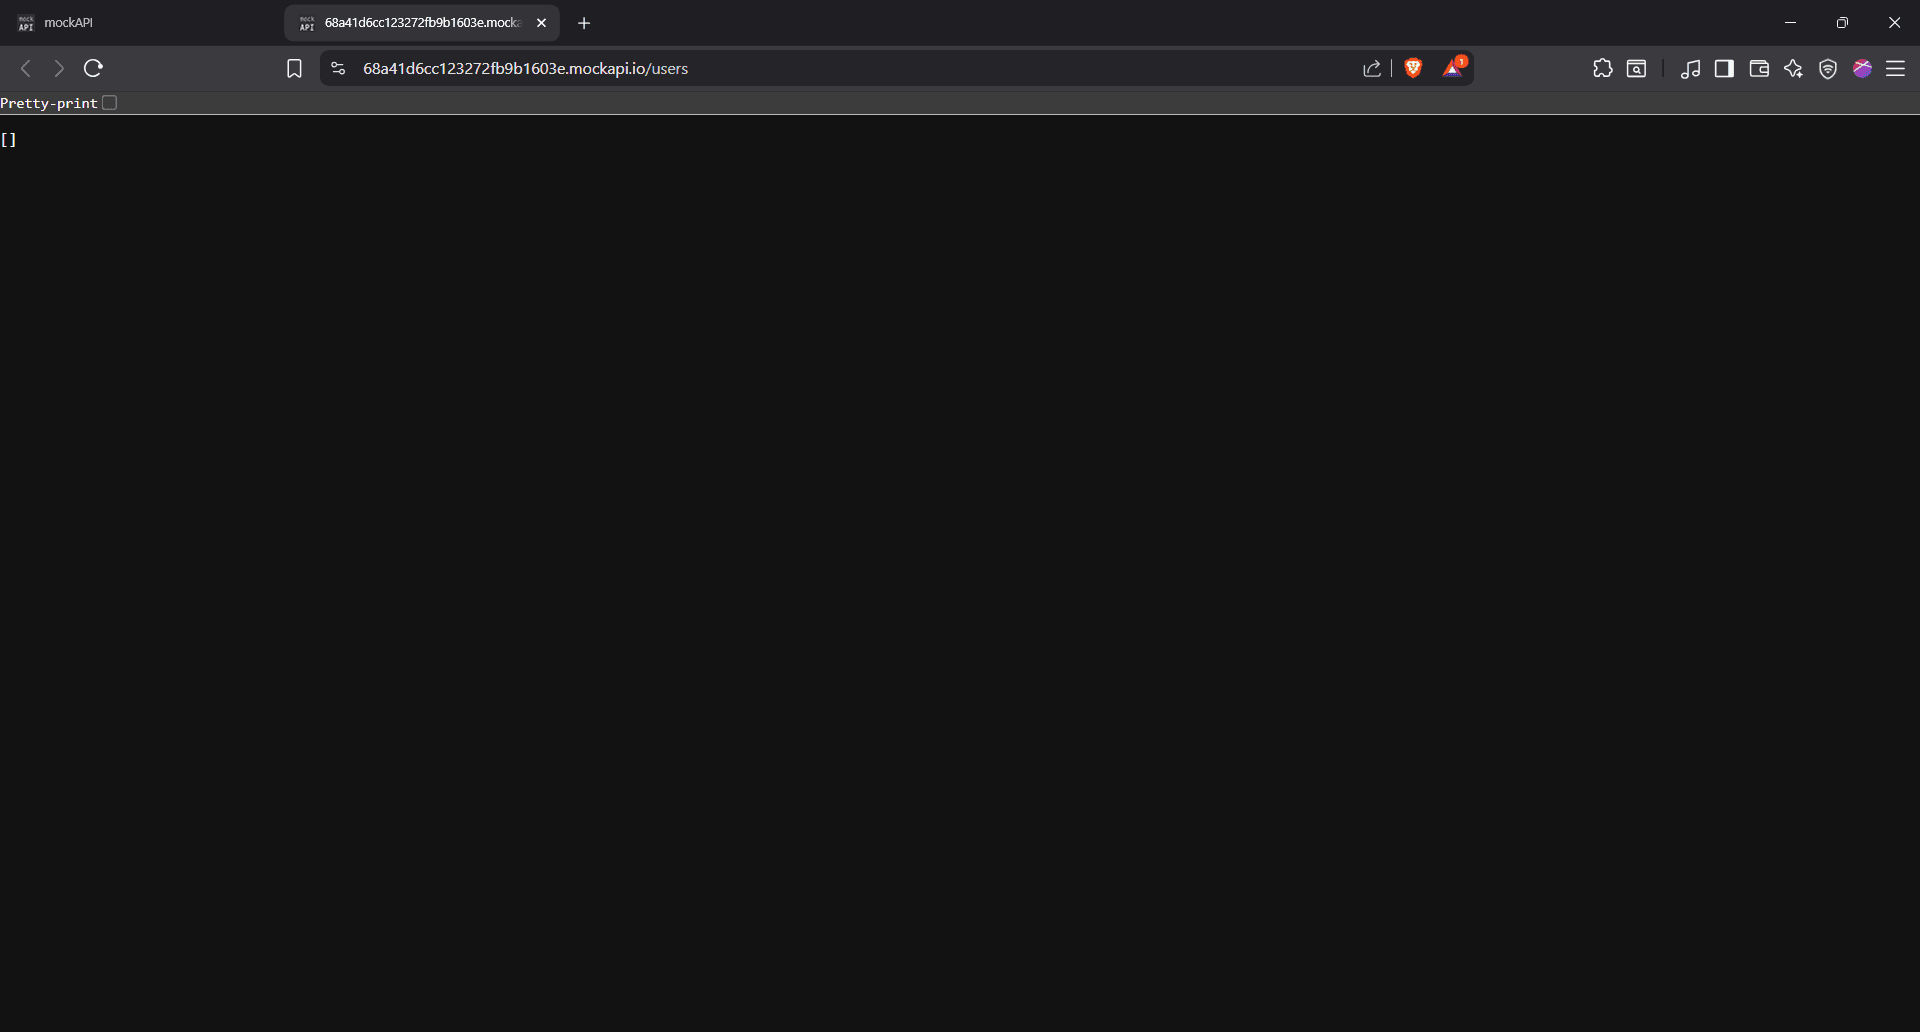
In our MockAPI setup, we'll use it to send API requests that fetch the users in our resource. Just type the cURL command in your terminal, followed by the endpoint we copied earlier:
curl https://68a41d6cc123272fb9b1603e.mockapi.io/users
Here's the output:
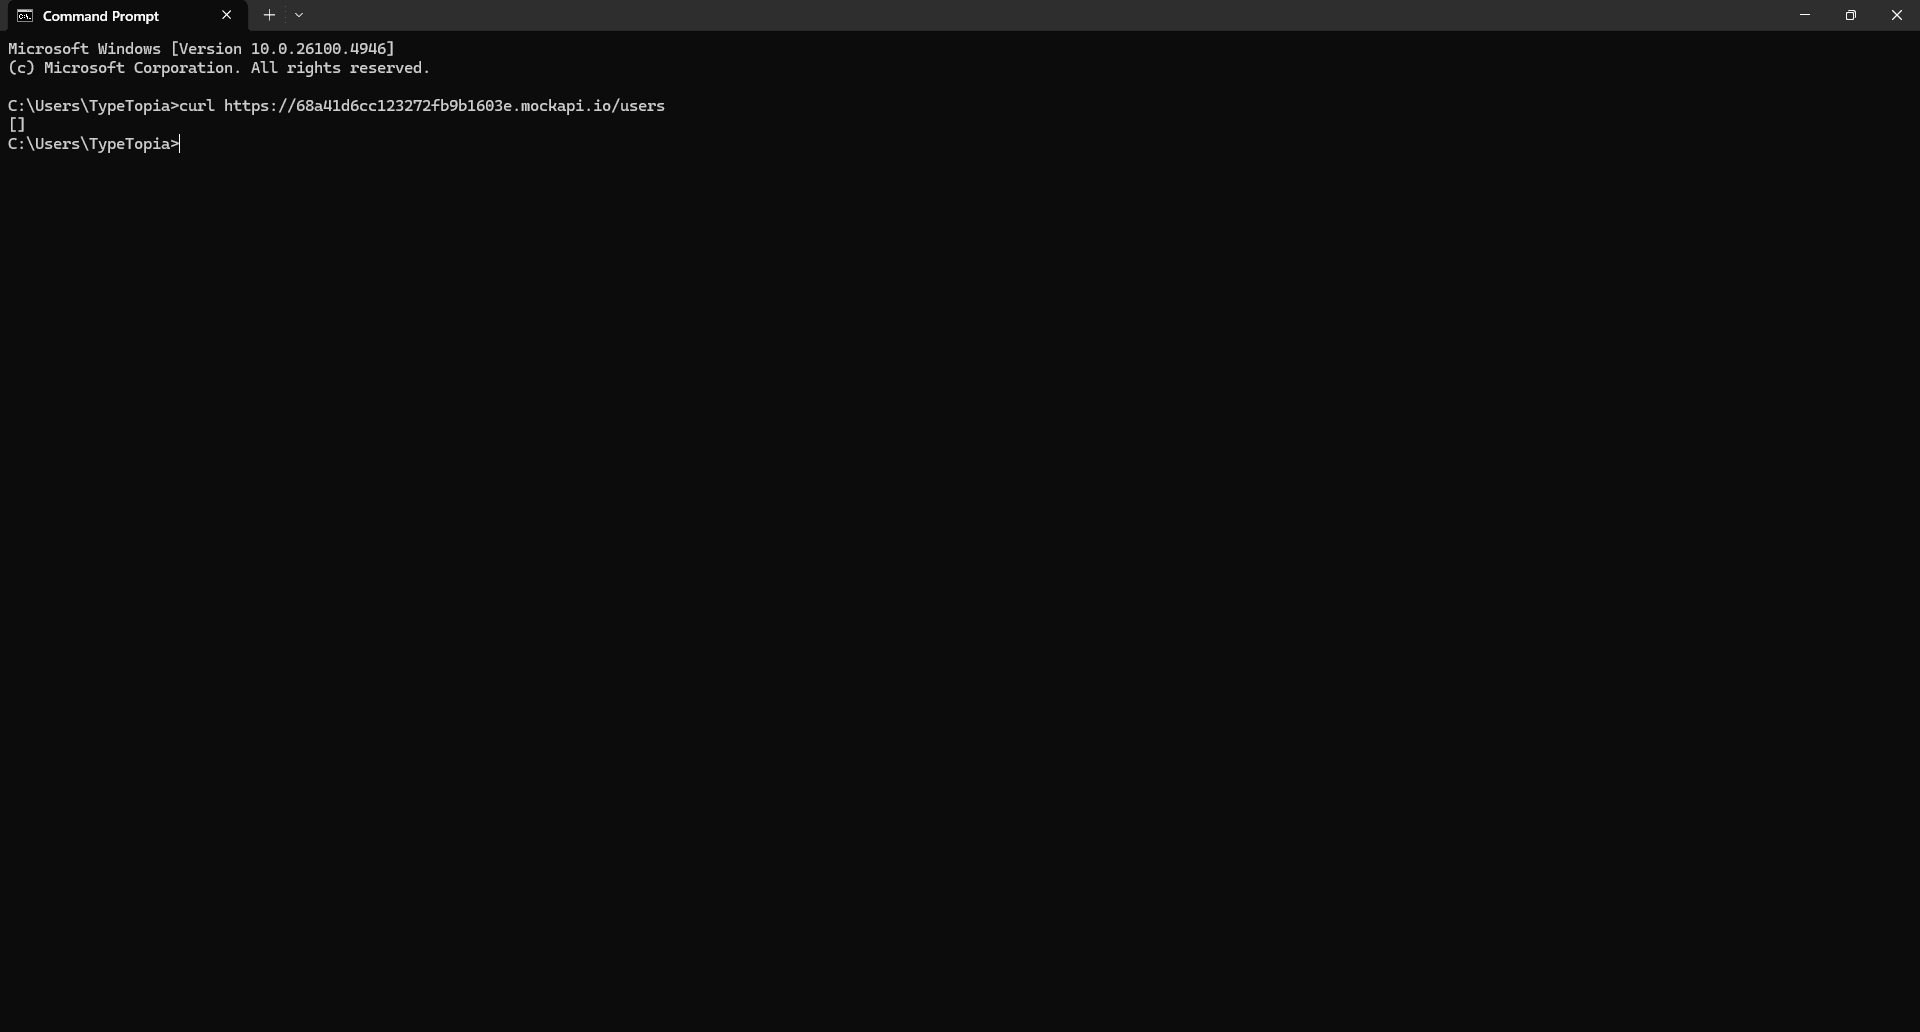
You got nothing. Because we didn’t add any actual data, we just defined the fields. And that brings us to the second type of API request.
Sending POST requests to add new data
Since our resource is empty, let's try and add a couple of users using the POST request. Here is a table with mock data:
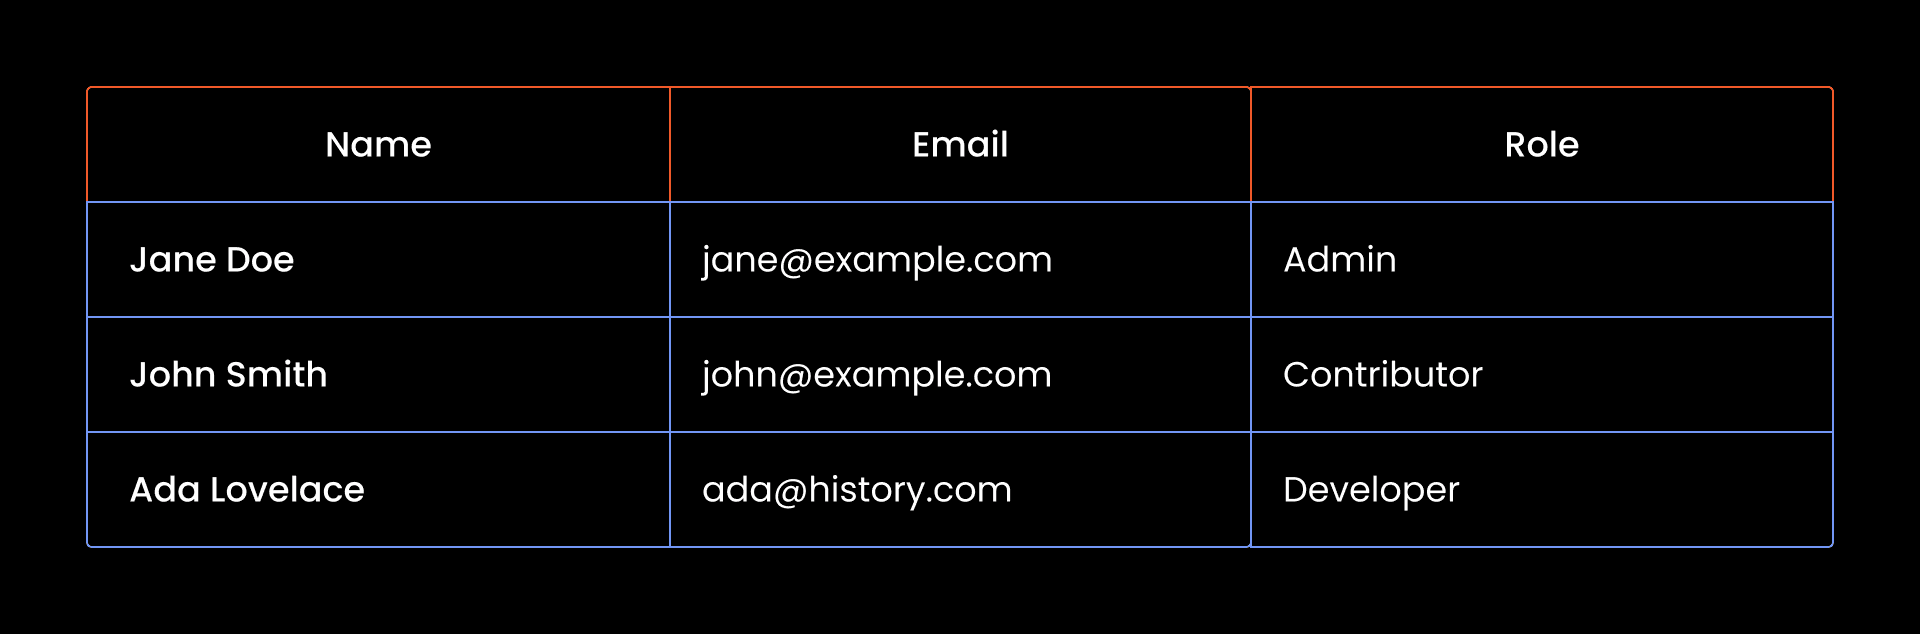
Now we need to translate all this into a cURL command that sends a POST request to our MockAPI endpoint:
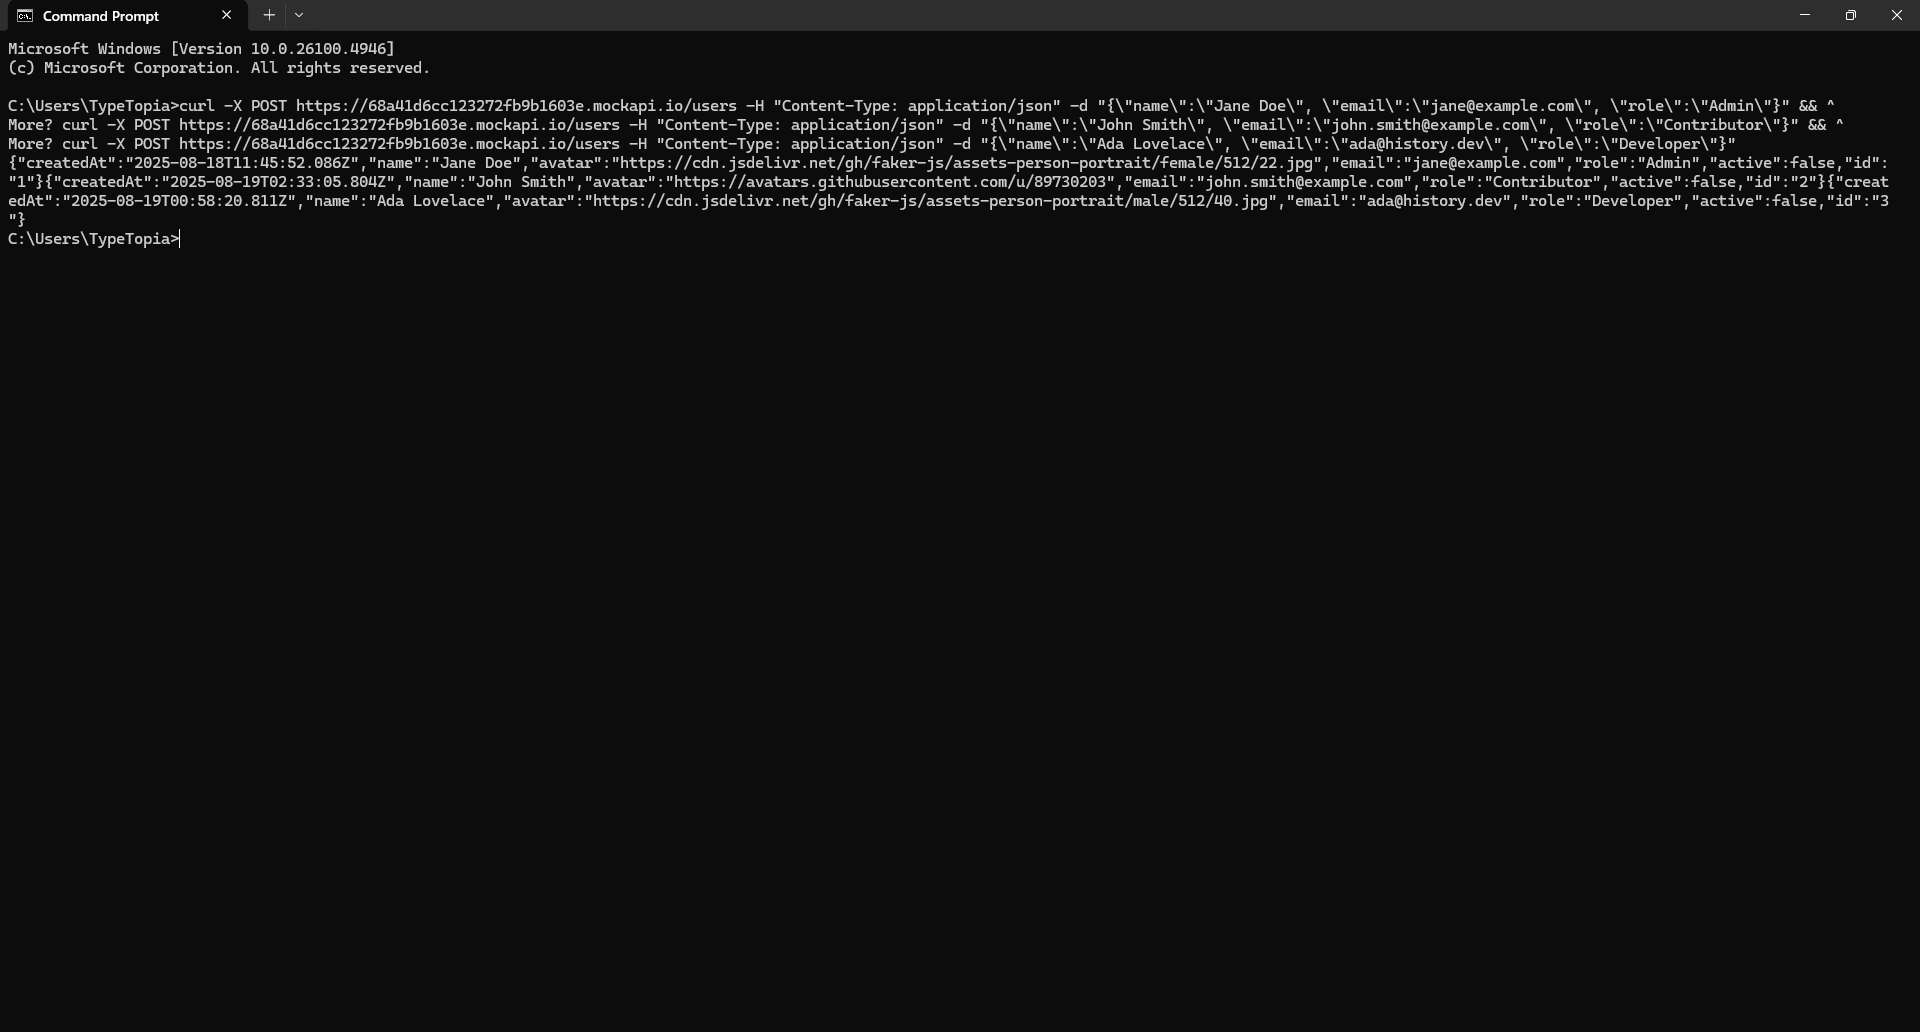
curl -X POST https://68a41d6cc123272fb9b1603e.mockapi.io/users -H "Content-Type: application/json" -d "{\"name\":\"Jane Doe\", \"email\":\"[email protected]\", \"role\":\"Admin\"}" && ^

curl -X POST https://68a41d6cc123272fb9b1603e.mockapi.io/users -H "Content-Type: application/json" -d "{\"name\":\"John Smith\", \"email\":\"[email protected]\", \"role\":\"Contributor\"}" && ^

curl -X POST https://68a41d6cc123272fb9b1603e.mockapi.io/users -H "Content-Type: application/json" -d "{\"name\":\"Ada Lovelace\", \"email\":\"[email protected]\", \"role\":\"Developer\"}"
Let's unpack this cURL command so it doesn't look like a bunch of symbols:
- curl
This is the tool we are using to send the POST request.
- -X
-X is part of a group of cURL command options called flags. Think of them as little switches you flip to change how cURL behaves. You use them to tell cURL what kind of request to send (like POST instead of GET), how to format the data (like JSON), whether to include a header, or even where to save the response. Here is a breakdown of common cURL command options:
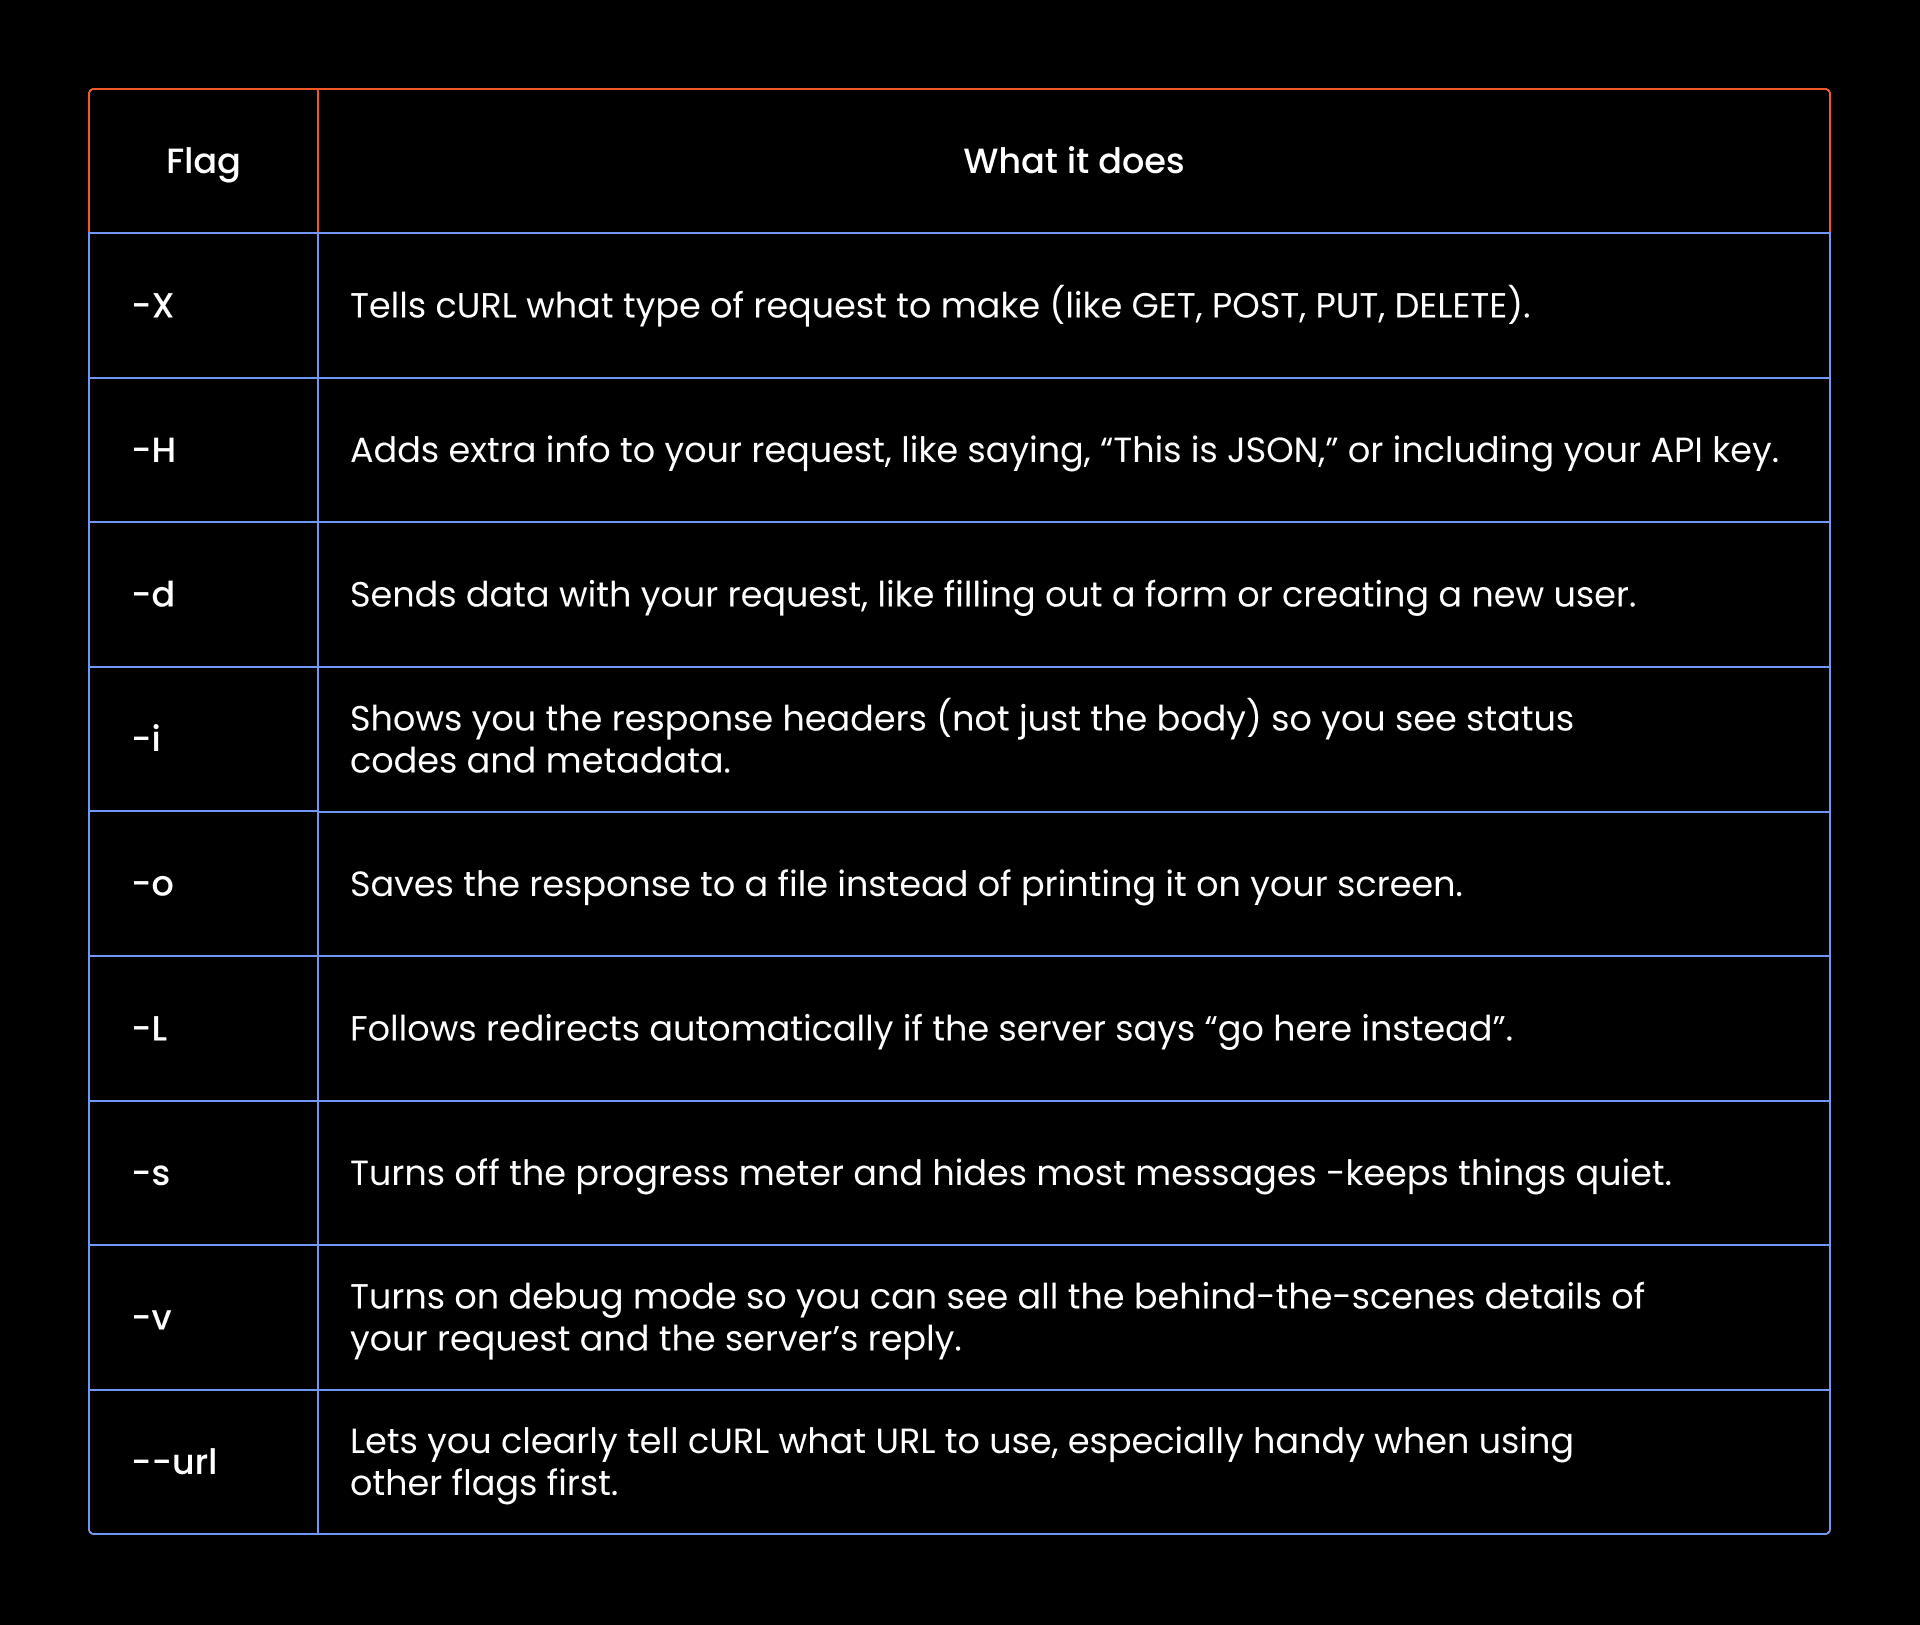
We used the -X cURL command option and then POST right after. This tells cURL that you are making a POST request.
- https://68a41d6cc123272fb9b1603e.mockapi.io/users
This is the endpoint you copied earlier from MockAPI. It’s where your POST request goes to add new user data into the users resource.
- -H "Content-Type: application/json"
This flag adds extra info to your POST request. In this case, you're telling the server, “Hey, the stuff I’m sending is JSON.”
- -d
Next, we start with the -d flag to let cURL know that we are about to send some data in the request body.
- the JSON payload: "{\"name\":\"Jane Doe\", \"email\":\"[email protected]\", \"role\":\"Admin\"}"
Now, to understand why we wrapped the whole thing in quotes and added all those backslashes, it helps to first look at the actual JSON in its clean, readable form:
{
  "name": "Jane Doe",
  "email": "[email protected]",
  "role": "Admin"
}
Simple, right? But try typing this directly into your terminal like so:
curl -X POST -H "Content-Type: application/json" -d {
  "name": "Jane Doe",
  "email": "[email protected]",
  "role": "Admin"
} https://example.com/users
It won’t work. Doesn’t matter if you’re on command prompt, Bash, or Zsh, your payload will almost certainly break. Here’s why:
First, when CMD sees the curly brace after -d, it might assume you’re opening a code block, especially in scripting contexts. Then there’s the spacing. Your terminal won’t treat the payload as a single, continuous argument. It’ll break it up into separate tokens: {, "name":, "Jane Doe", and so on, none of which get passed properly to cURL.
That’s why we escape the double quotes and flatten the entire payload into one long string. You’re sending JSON inside a string, inside a terminal command. And that changes everything.
So to escape this confusion, we use the backslash to escape the internal quotes:
"{\"name\":\"Jane Doe\", \"email\":\"[email protected]\", \"role\":\"Admin\"}"
This tells CMD, “Hey, the quotes inside are not the end of the string, they’re just part of the JSON content I want to send.”
- &&
Let’s talk about these two symbols. MockAPI, as great as it is for demos, only lets you send one request at a time (No batch operation support). But we want to add three users. Doing that with three separate POST requests? Way too slow.
That’s where && comes in. It tells your terminal: “Only run the next command if the one before it worked.” So, we chain three cURL POST requests in one line, each waiting for the last to succeed before running.
- ^ (caret symbol)
In Windows CMD, each line is normally treated as a separate command. If you press Enter without finishing the command, CMD tries to run it, and that’s where things break.
That’s why we use the caret symbol (^). It tells CMD that the current line isn’t done. That way, it continues reading on the next one.
So even though you’re writing across multiple lines, CMD treats it as one single POST request. The caret just keeps it readable without confusing the terminal.
After this point, we just repeat the same syntax for our two remaining users. Go ahead and paste that full command into your terminal. You’ll likely get a warning like this one:
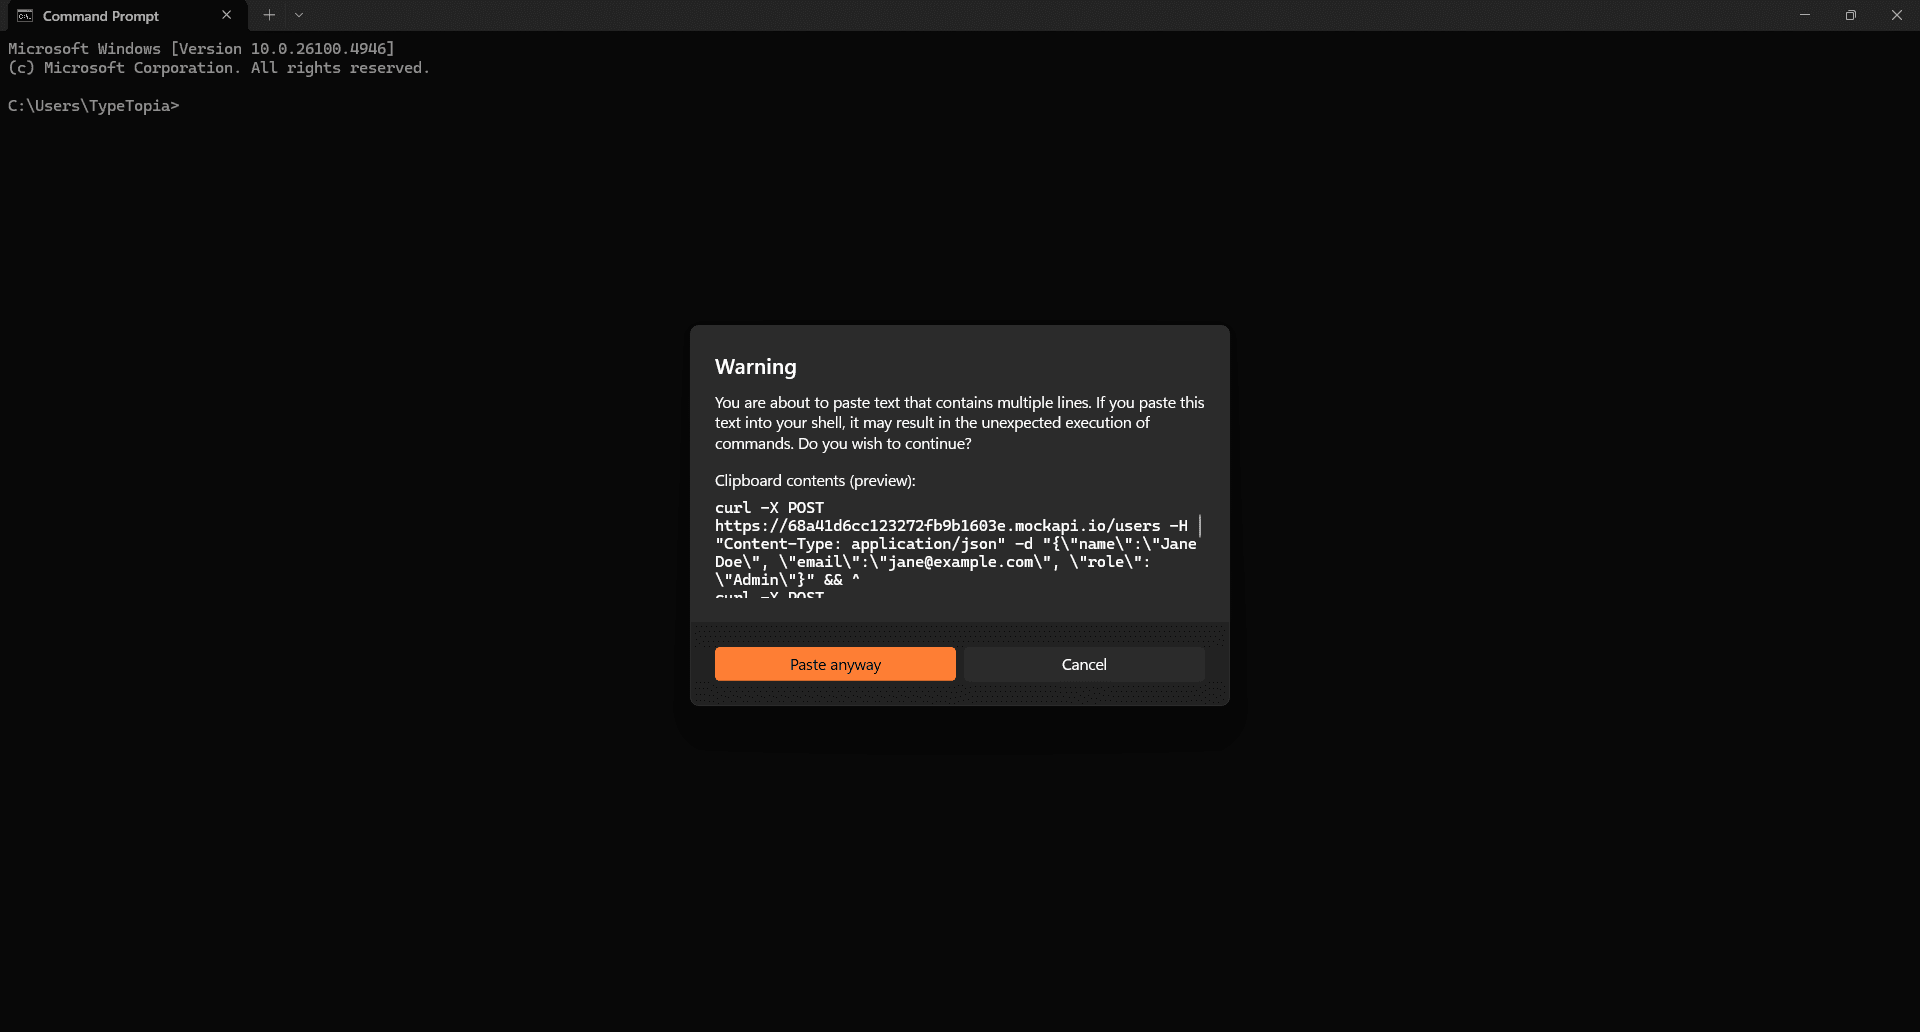
No stress. We already used the caret (^) to split the lines properly. Just click on 'Paste anyway.'
Once you do, cURL will fire off each POST request, filling in the fields one by one. To confirm it worked, head back to your MockAPI resource and hit 'Refresh.'
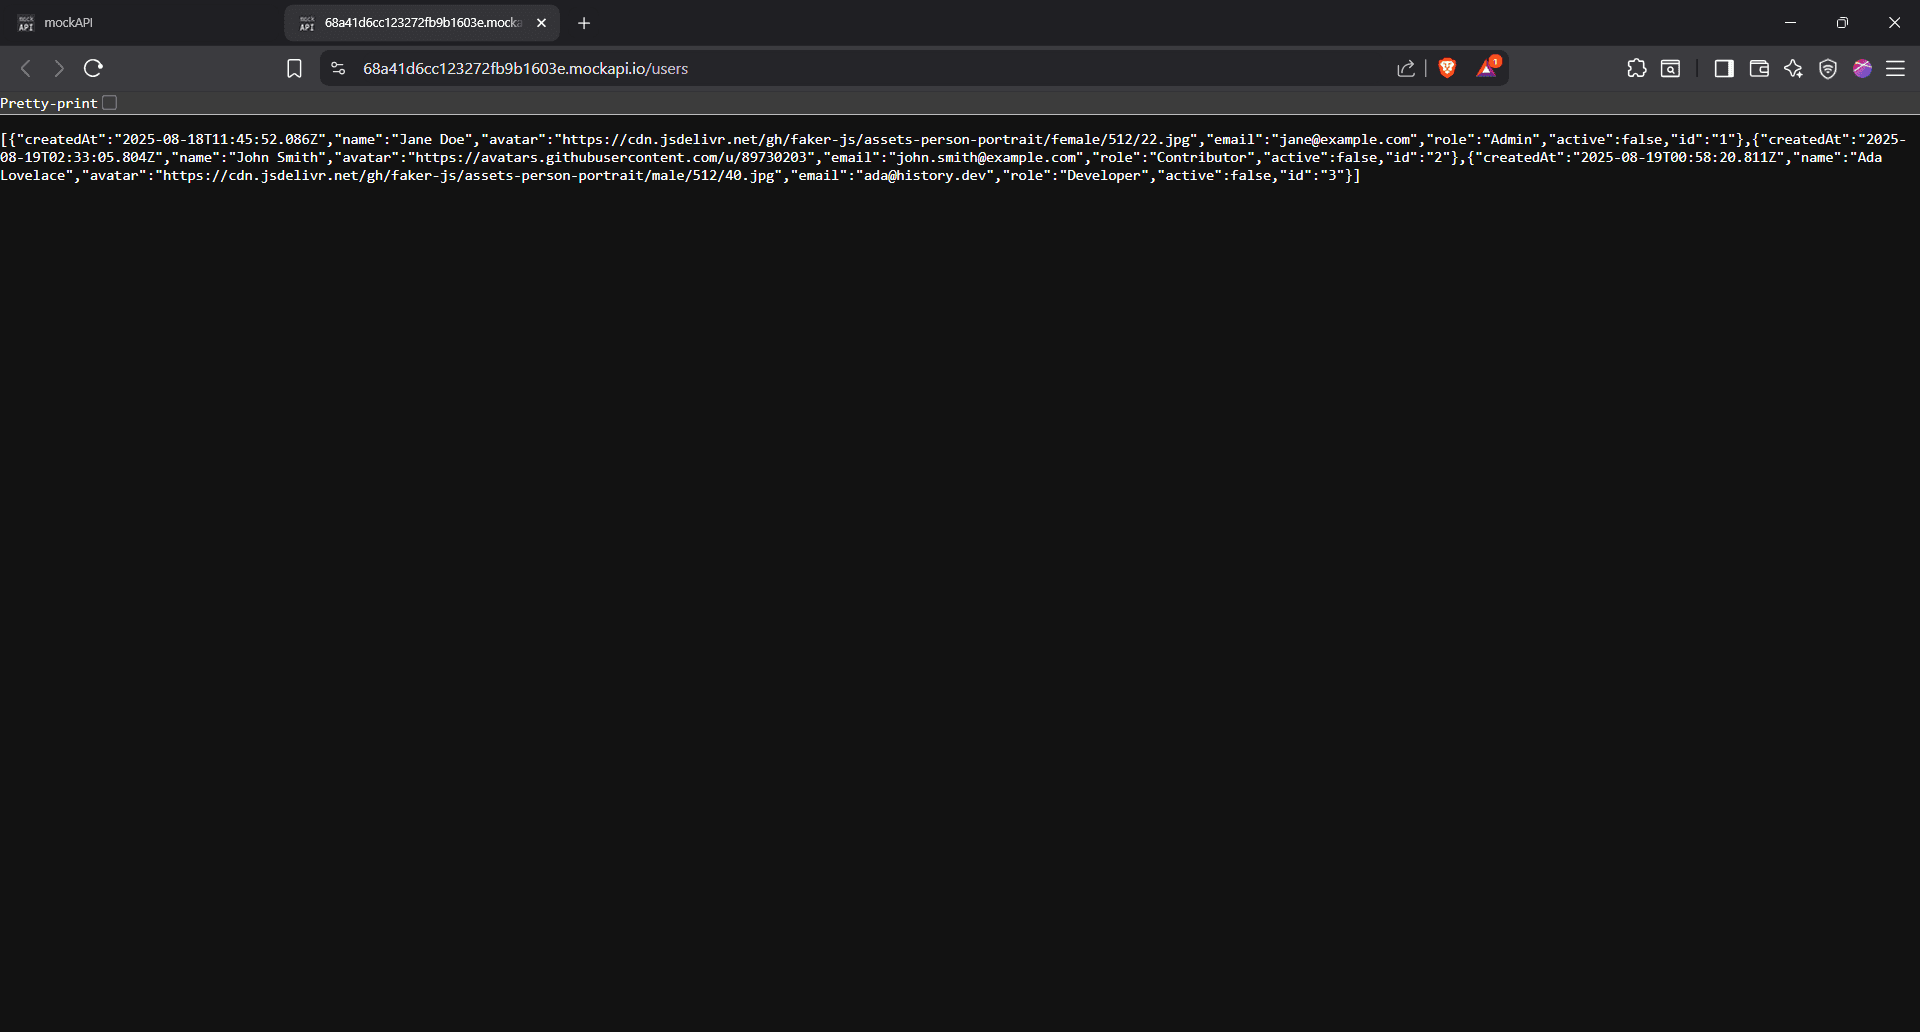
What you’re seeing here is the raw JSON response returned by MockAPI after we sent those POST requests using cURL.
Each user is wrapped in curly braces {}, and all three, Jane Doe, John Smith, and Ada Lovelace, are listed in one long array. This means all your cURL commands went through successfully.
Here’s a quick rundown of what you’re seeing for each user:
- "createdAt" is when MockAPI logged the request
- "name", "email", and "role" are exactly what you sent
- "avatar" is the profile picture URL
- "active" just says whether the user is marked as active (we set them all to false)
- "id" is automatically generated
In short, if this is what you see, it worked. You sent the data, and MockAPI listened. And that's how the POST request works in cURL!
Replacing data with PUT requests
The PUT request comes in handy when you need to replace existing data inside a resource. Say we’ve got a new developer joining the team. It’s time to update our database.
Before we do that, let’s take one more look at the data inside the curly braces in our users resource:
[
  {
    "createdAt": "2025-08-18T11:45:52.086Z",
    "name": "Jane Doe",
    "avatar":
"https://cdn.jsdelivr.net/gh/faker-js/assets-person-portrait/female/512/22.jpg",
    "email": "[email protected]",
    "role": "Admin",
    "active": false,
    "id": "1"
  },
  {
    "createdAt": "2025-08-19T02:33:05.804Z",
    "name": "John Smith",
    "avatar": "https://avatars.githubusercontent.com/u/89730203",
    "email": "[email protected]",
    "role": "Contributor",
    "active": false,
    "id": "2"
  },
  {
    "createdAt": "2025-08-19T00:58:20.811Z",
    "name": "Ada Lovelace",
    "avatar":
"https://cdn.jsdelivr.net/gh/faker-js/assets-person-portrait/male/512/40.jpg",
    "email": "[email protected]",
    "role": "Developer",
    "active": false,
    "id": "3"
  }
]
Now it’s easier to see what we’re working with. Each user has an ID at the end: "id": "1", "id": "2", "id": "3". That’s our reference point.
If we want to update the developer slot, we’ll target the user with "id": "3".
Ada Lovelace is out, and Ian Deacon is stepping in. We’ll use a PUT request to completely replace the user data tied to ID 3.
Here’s the updated JSON payload we want to send:
{
  "name": "Ian Deacon",
  "avatar":
"https://cdn.jsdelivr.net/gh/faker-js/assets-person-portrait/male/512/12.jpg",
  "email": "[email protected]",
  "role": "Developer",
  "active": true
}
And here’s the cURL command that makes it happen:
curl -X PUT ^
-H "Content-Type: application/json" ^
-d "{\"name\":\"Ian Deacon\",
\"avatar\":\"https://cdn.jsdelivr.net/gh/faker-js/assets-person-portrait/male/512/12.jpg\", \"email\":\"ian.deacon@example.com\",
\"role\":\"Developer\", \"active\":true}" ^
https://68a41d6cc123272fb9b1603e.mockapi.io/users/3
Here's what all this means:
- curl
Our command-line tool. No explanation needed here.
- -X PUT ^
The -X flag tells cURL we’re making a PUT request. We use the caret (^) to break the line.
- -H "Content-Type: application/json" ^
The -H flag lets us add a header. In this case, we’re telling cURL we’re sending JSON data. Another caret to keep the line clean.
- -d "{\"name\":\"Ian Deacon\", \"avatar\":\"https://cdn.jsdelivr.net/gh/faker-js/assets-person-portrait/male/512/12.jpg\", \"email\":\"[email protected]\", \"role\":\"Developer\", \"active\":true}" ^
The data flag says: “Hey cURL, we’ve got data in the body.” The actual JSON is wrapped in quotes and escaped with backslashes to keep CMD from misreading it. Then we break again with a caret.
- https://68a41d6cc123272fb9b1603e.mockapi.io/users/3
Finally, we aim the whole thing at our target API endpoint. Notice the difference? This time, the endpoint includes /3 at the end. That’s the ID of the user we’re updating.
Enter this code into your terminal. If you get a warning, you’re good to hit 'Paste anyway.'
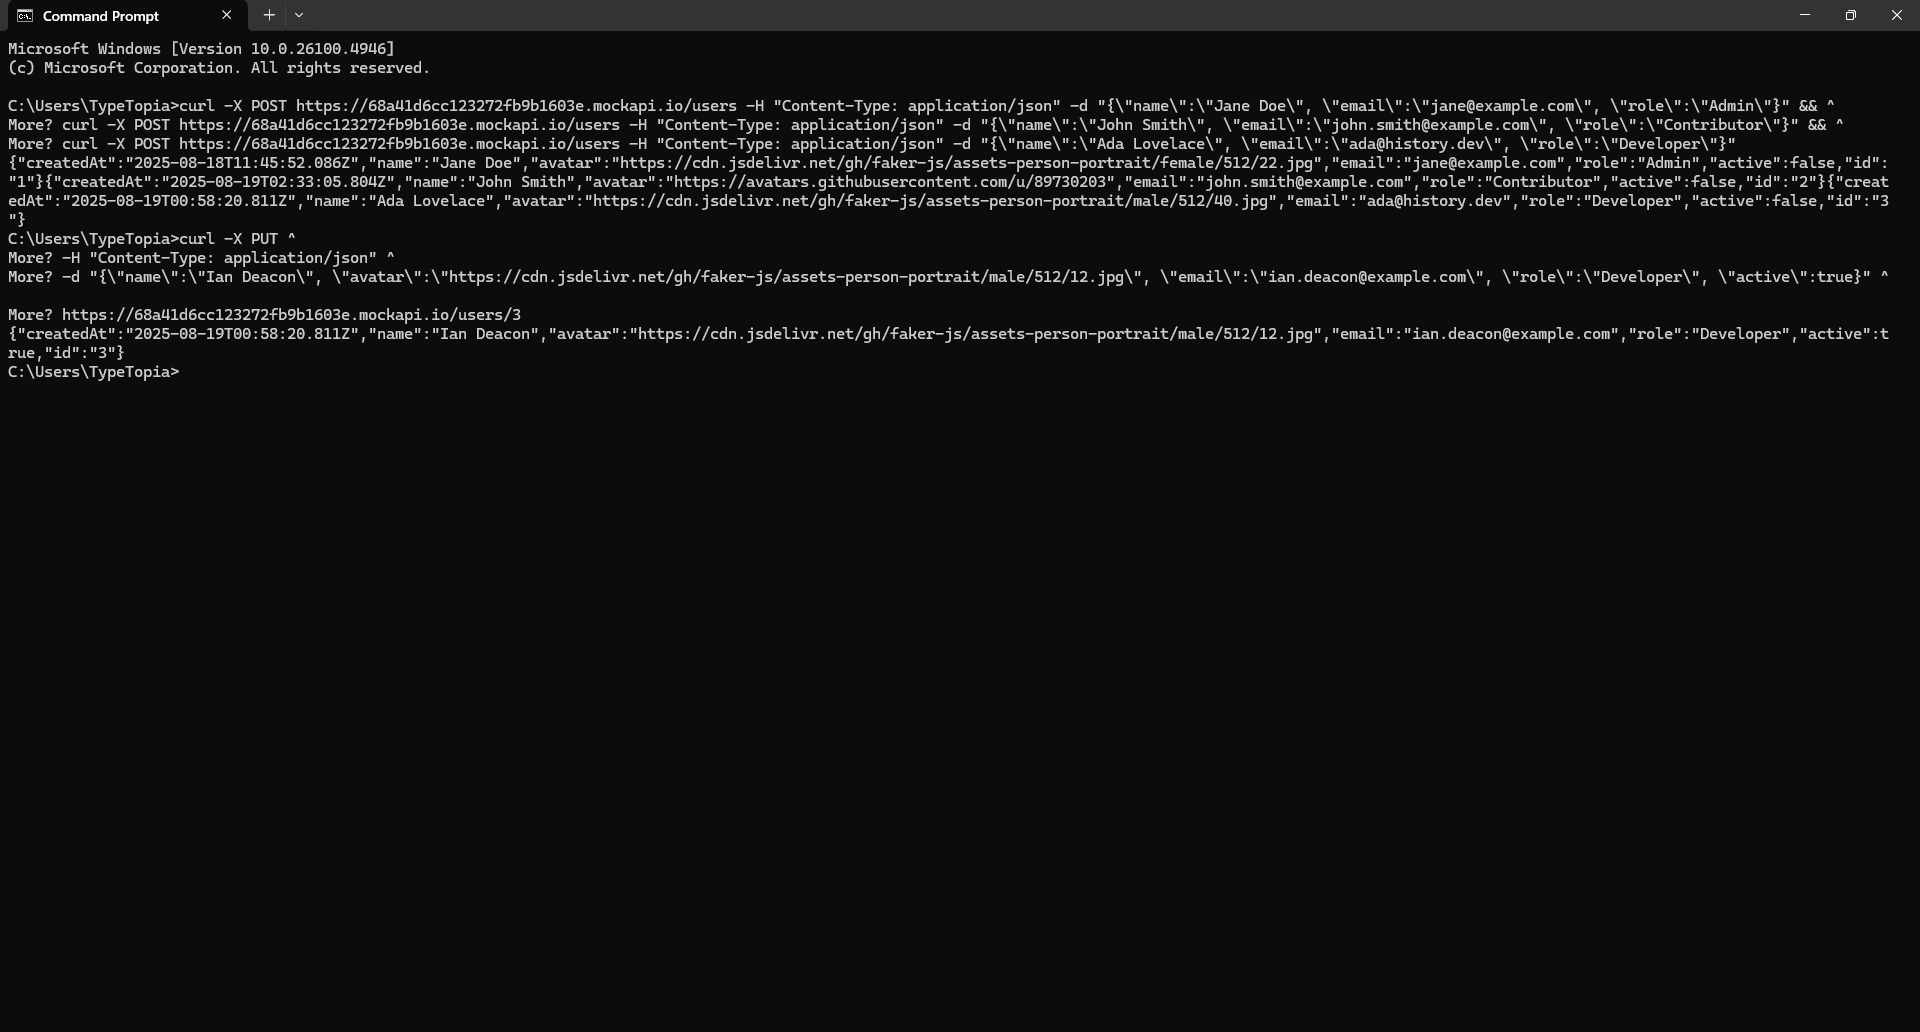
And just like that, we’ve swapped out Ada Lovelace for Ian Deacon.
You can see the full cURL command we ran in CMD using the PUT request. We aimed it at /users/3 (the same ID Ada had) and replaced her data with Ian’s: new name, new email, new avatar, and we even marked him as active.
The response confirms the swap was successful. To confirm this, head on to the resource page and hit 'Refresh.'
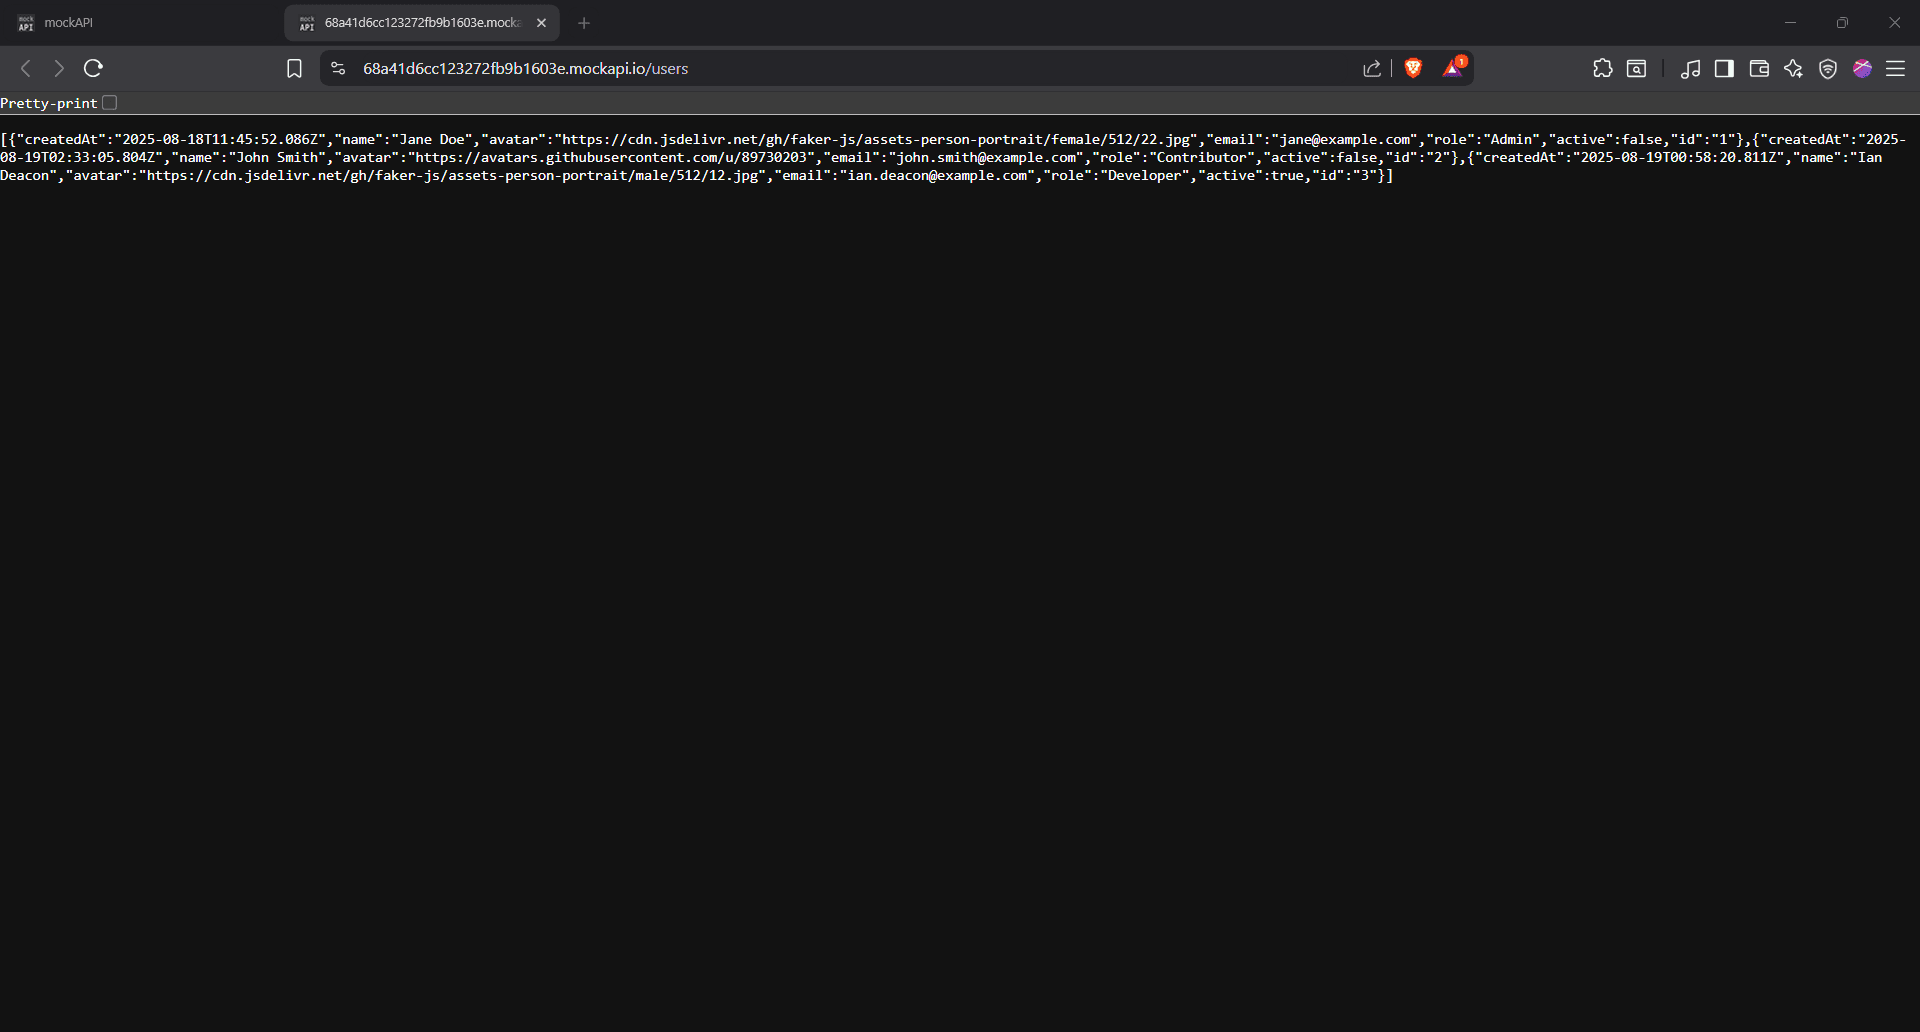
You can now see Ian Deacon sitting right there as our developer with ID 3.
Updating fields with PATCH requests
Jane Doe just got promoted. She’s now the CEO. We need to reflect that in our API.
That’s where the PATCH request comes in. It’s perfect when you want to update just one piece of data without touching the rest.
In this case, we already know Jane has an ID of 1, so we aim right at that. And since we’re only changing her role, we just pass that one field in our payload.
Here’s the data in JSON:
{
  "role": "CEO"
}
And here’s the cURL command:
curl -X PATCH ^
-H "Content-Type: application/json" ^
-d "{\"role\":\"CEO\"}" ^
https://68a41d6cc123272fb9b1603e.mockapi.io/users/1
Getting the hang of the syntax already? Let's break it all down:
- curl X PATCH ^
We’re telling cURL this is a PATCH request using the -X flag. Then we end the line with the caret symbol.
- -H "Content-Type: application/json" ^
The -H flag sets the header to JSON, same drill as before. Caret again to break the line.
- -d "{\"role\":\"CEO\"}" ^
Here we use the -d flag to pass the data. We’re just updating one field, role, and assigning it a new value.
- https://68a41d6cc123272fb9b1603e.mockapi.io/users/1
Finally, we hit the API endpoint directly, targeting user ID 1.
Paste this cURL command in and hit enter (ignore the error as before).
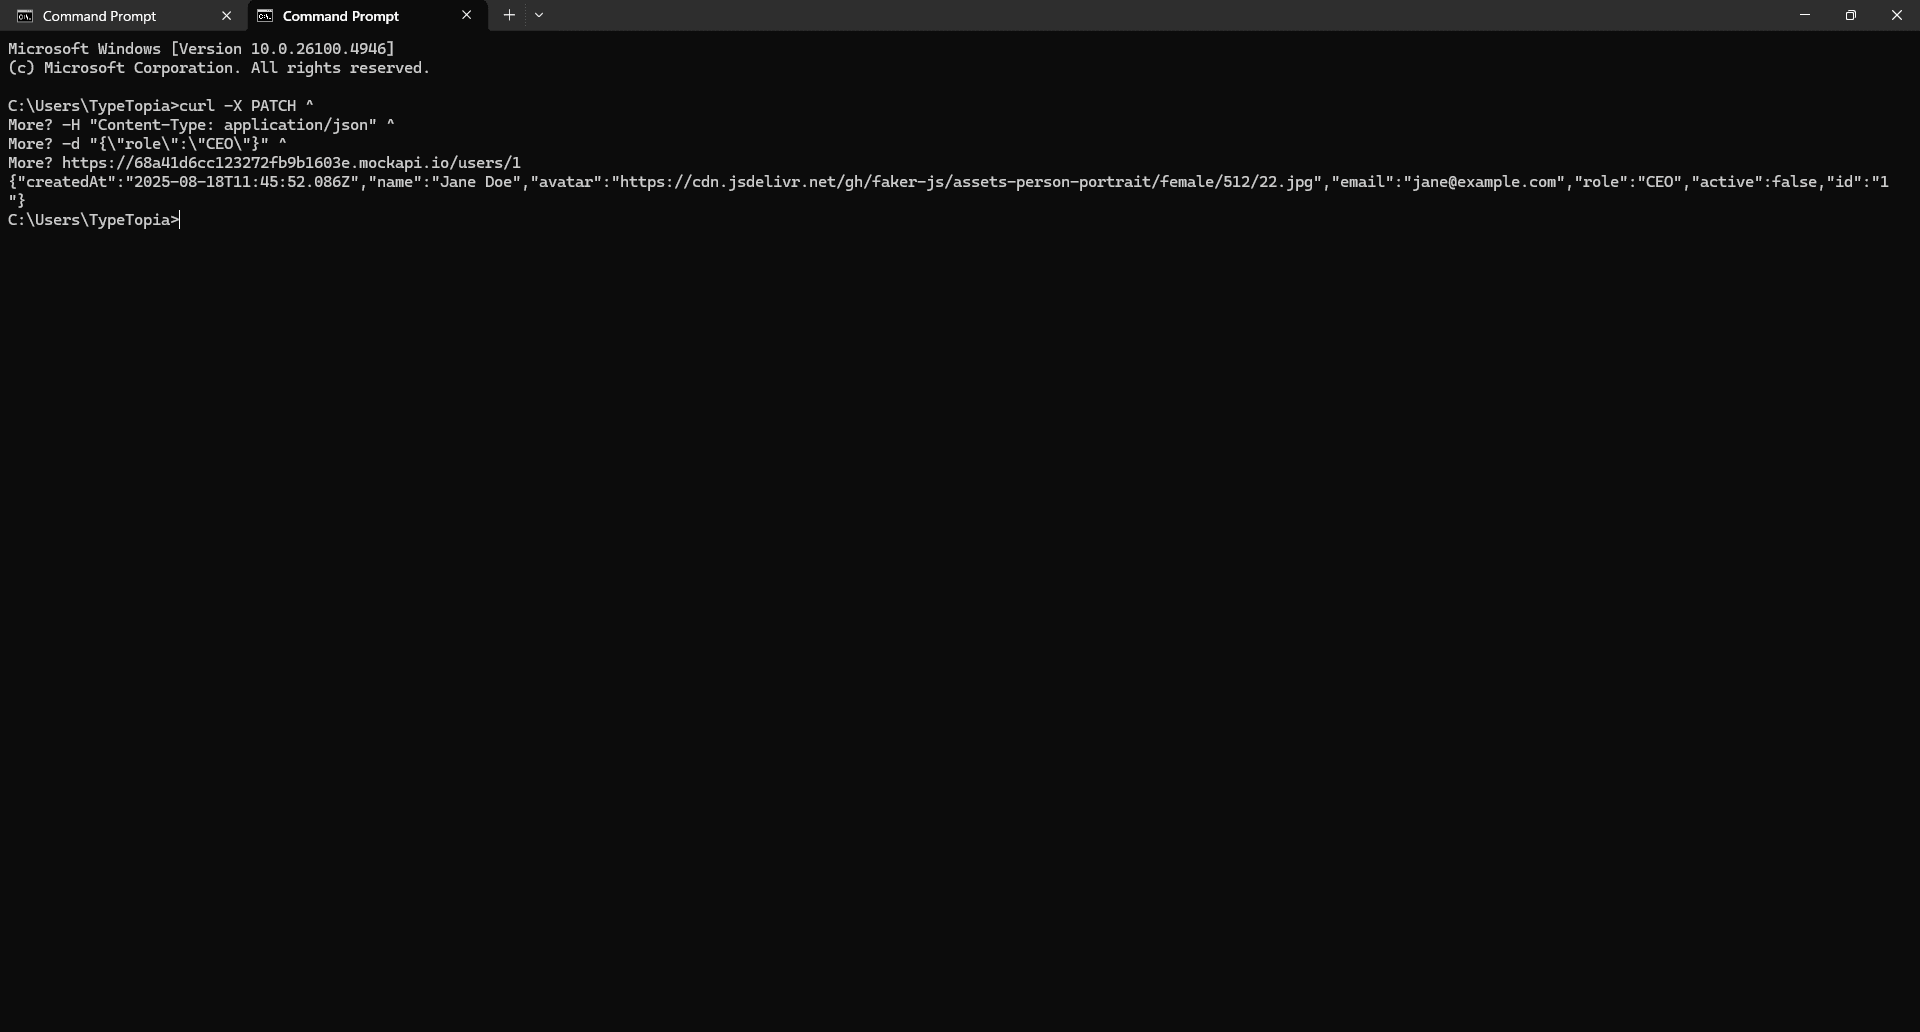
We can clearly see cURL successfully updated the role from Admin to CEO. This change is also reflected in the resource:

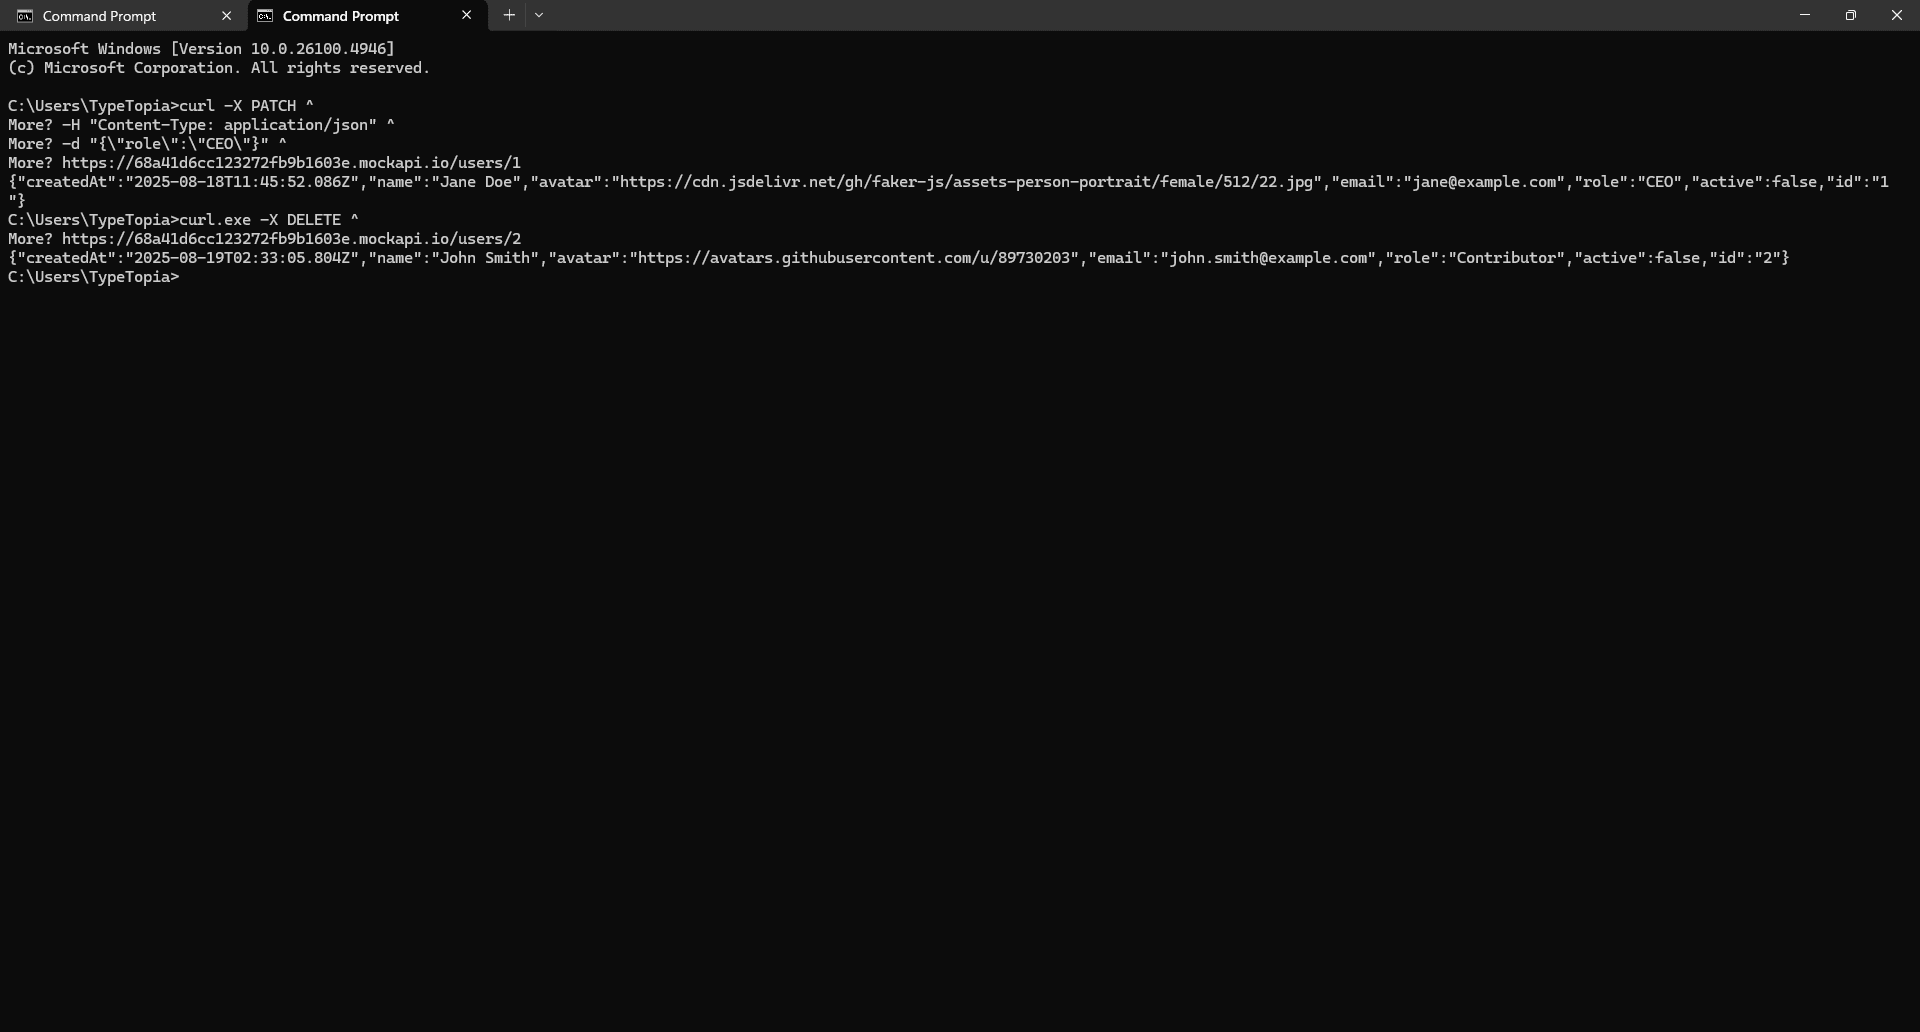
Deleting records with DELETE requests
Let’s say the company just got acquired, and John, our contributor, was let go. cURL makes it easy to reflect that in our API. Just run:
curl.exe -X DELETE ^
https://68a41d6cc123272fb9b1603e.mockapi.io/users/2
Same flow as before: we start with cURL, use the -X flag to declare our API request type (in this case, DELETE), and then target John’s unique endpoint, /users/2.
Paste the cURL command, ignore the error, and hit 'Enter.'
Head back to your API and refresh:
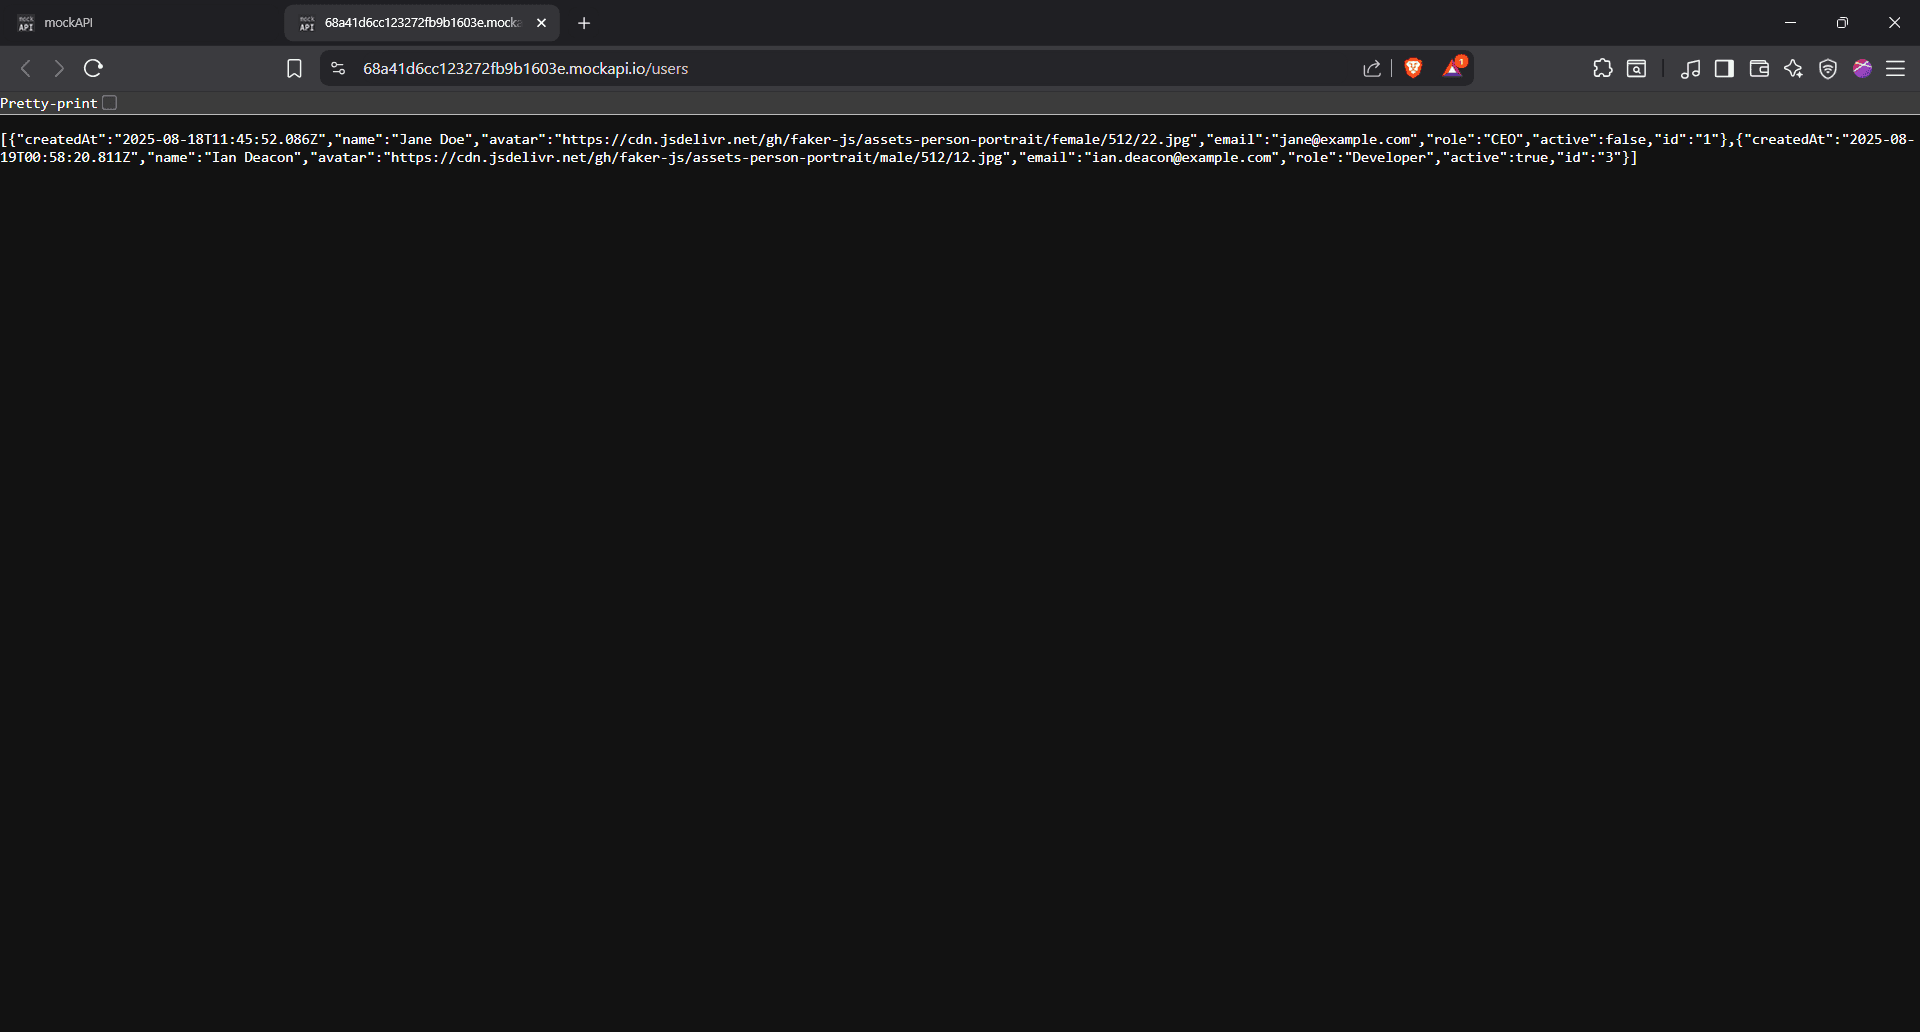
John’s gone. ID 2 was successfully deleted from the API.
If you want to delete another record, say ID 1, all you need to do is change the number at the end of the endpoint:
https://68a41d6cc123272fb9b1603e.mockapi.io/users/1
That's it!
Why is the cURL command so powerful?
With that out of the way, let’s talk about what makes cURL one of the most relied-on tools in any serious terminal workflow.
It's protocol agnostic
Take a situation where you’re tasked with backing up your company’s key resources. Some logs come from cloud servers, available over HTTPS. Daily reports are sitting on a legacy on-premise server, only reachable via FTP.
Then there’s confidential Intellectual Property (IP) only accessible through Secure Copy Protocol (SCP) from a locked-down bastion. Managing all of this usually means juggling different tools or writing custom clients for each protocol.
But not with cURL. This is where its protocol agnosticism shines. You can hit each of those sources using the same cURL command format.
Here is a basic GET request cURL command using the -i flag with GitHub’s public API:
curl -i https://api.github.com
To understand what’s happening under the hood, you need to know about libcurl, the portable C library that powers every cURL command you run. Behind the scenes, it handles the network logic: protocols, connections, data transfers, retries, and errors. All of it.
Once you run the command, the first thing cURL does is parse the URL scheme. That https:// prefix matters because it tells cURL which protocol handler to use from libcurl. In this case, it asks, “Do we have a handler for HTTPS?” and libcurl responds with a yes.
A handler is a self-contained protocol module inside libcurl that knows how to talk to a specific protocol. For HTTPS, it knows how to open a secure connection, send the request, format headers or commands, receive and parse the response. That's how we got the response above.
Now, let’s say you want to query the GNU Bash release directory. Even though this directory is hosted over FTP, you can still use the same familiar syntax:
curl -i ftp://ftp.gnu.org/gnu/bash/
This is the essence of protocol agnosticism. You just swap the URL, and cURL figures it out. Here are the main protocols it supports:
- HTTP: The web’s backbone; REST APIs, websites, etc.
- HTTPS: Secure HTTP for encrypted connections
- FTP: File Transfer Protocol for remote directories and legacy systems
- FTPS: FTP over SSL/TLS for secure file transfers
- SFTP: SSH file transfer protocol, often used in secure enterprise environments
- SCP: Secure Copy Protocol, also over SSH
- SMTP: Sending email
- SMTPS: Secure SMTP
- POP3: Receiving email
- POP3S: Secure POP3
- IMAP: Another email protocol
- IMAPS: Secure IMAP
- LDAP: Accessing directory services
- LDAPS: Secure LDAP
- DICT: Dictionary protocol (for definitions)
- FILE: Accessing local files with file:// URIs
- TELNET: For working with telnet services
- TFTP: Trivial File Transfer Protocol (used in embedded systems)
- RTMP: Real-Time Messaging Protocol for streaming
- RTSP: Real-Time Streaming Protocol for media
- GOPHER: A pre-HTTP content protocol, still supported for legacy reasons
- SMB / SMB2: Windows network file sharing
It’s platform agnostic
Another factor that makes cURL so powerful is the fact that it’s platform agnostic. That doesn’t just mean it runs on any platform - it means it runs without any modification on any platform.
The exact same command we used earlier to get information from GitHub or the GNU Bash directory will give you the same result whether you're on Linux, macOS, Windows, or anything else.
This is all made possible by libcurl, the brains behind cURL. Like we mentioned before, it’s a portable (emphasis on portable), lightweight C-based networking engine.
libcurl can run anywhere a C compiler exists, meaning you can run the same cURL command on a 2013 ThinkPad running Debian, a Docker container on an ARM server, or a Windows 11 machine using PowerShell.
It’s purpose-agnostic
cURL doesn’t care what your role is. It’s not built just for data analysts or web scrapers. The only thing it cares about is whether you speak the language of the internet.
Think of cURL as the train cars moving data in and out of the web. libcurl is the engine underneath, powering those movements across any track (protocol).
That’s why cURL fits so many roles:
- Developers
When you're building for the web, you need reliable, testable requests. cURL can be the default bridge between your code and the outside world. You can craft any request with any header, payload, or protocol, and cURL will run it without fuss.
- Security engineering
cURL can help you test for server vulnerabilities, validate TLS configurations, and benchmark firewall or WAF responses, all through simple, scriptable commands that reveal exactly how systems behave.
- Data professionals
If your job involves collecting data from websites, cURL can help automate the process. However, for dynamic or JavaScript-heavy sites, it’s often better to pair cURL with another tool, as it’s limited in handling client-side rendering.
- Finance and research
Finance professionals often use cURL to poll financial news APIs like Benzinga, Reuters, or Finviz, allowing them to stay updated on market trends automatically without relying on manual checks. In research, cURL helps pull scientific data from sources like PubMed or submit jobs to remote compute services.
If your industry depends on data, and that data is accessible via a URL, then cURL can be a powerful ally. But let’s be real: it’s not magic. It struggles with JavaScript-heavy pages and can’t slip past advanced bot defenses on its own.
Where cURL fails
Say you're trying to grab data on the best phone cases from Amazon. Seems simple, right?
You run this cURL command:
curl -i
https://www.amazon.com/Best-Sellers-Cell-Phones/zgbs/wireless/7072561011
Here’s what you get back:
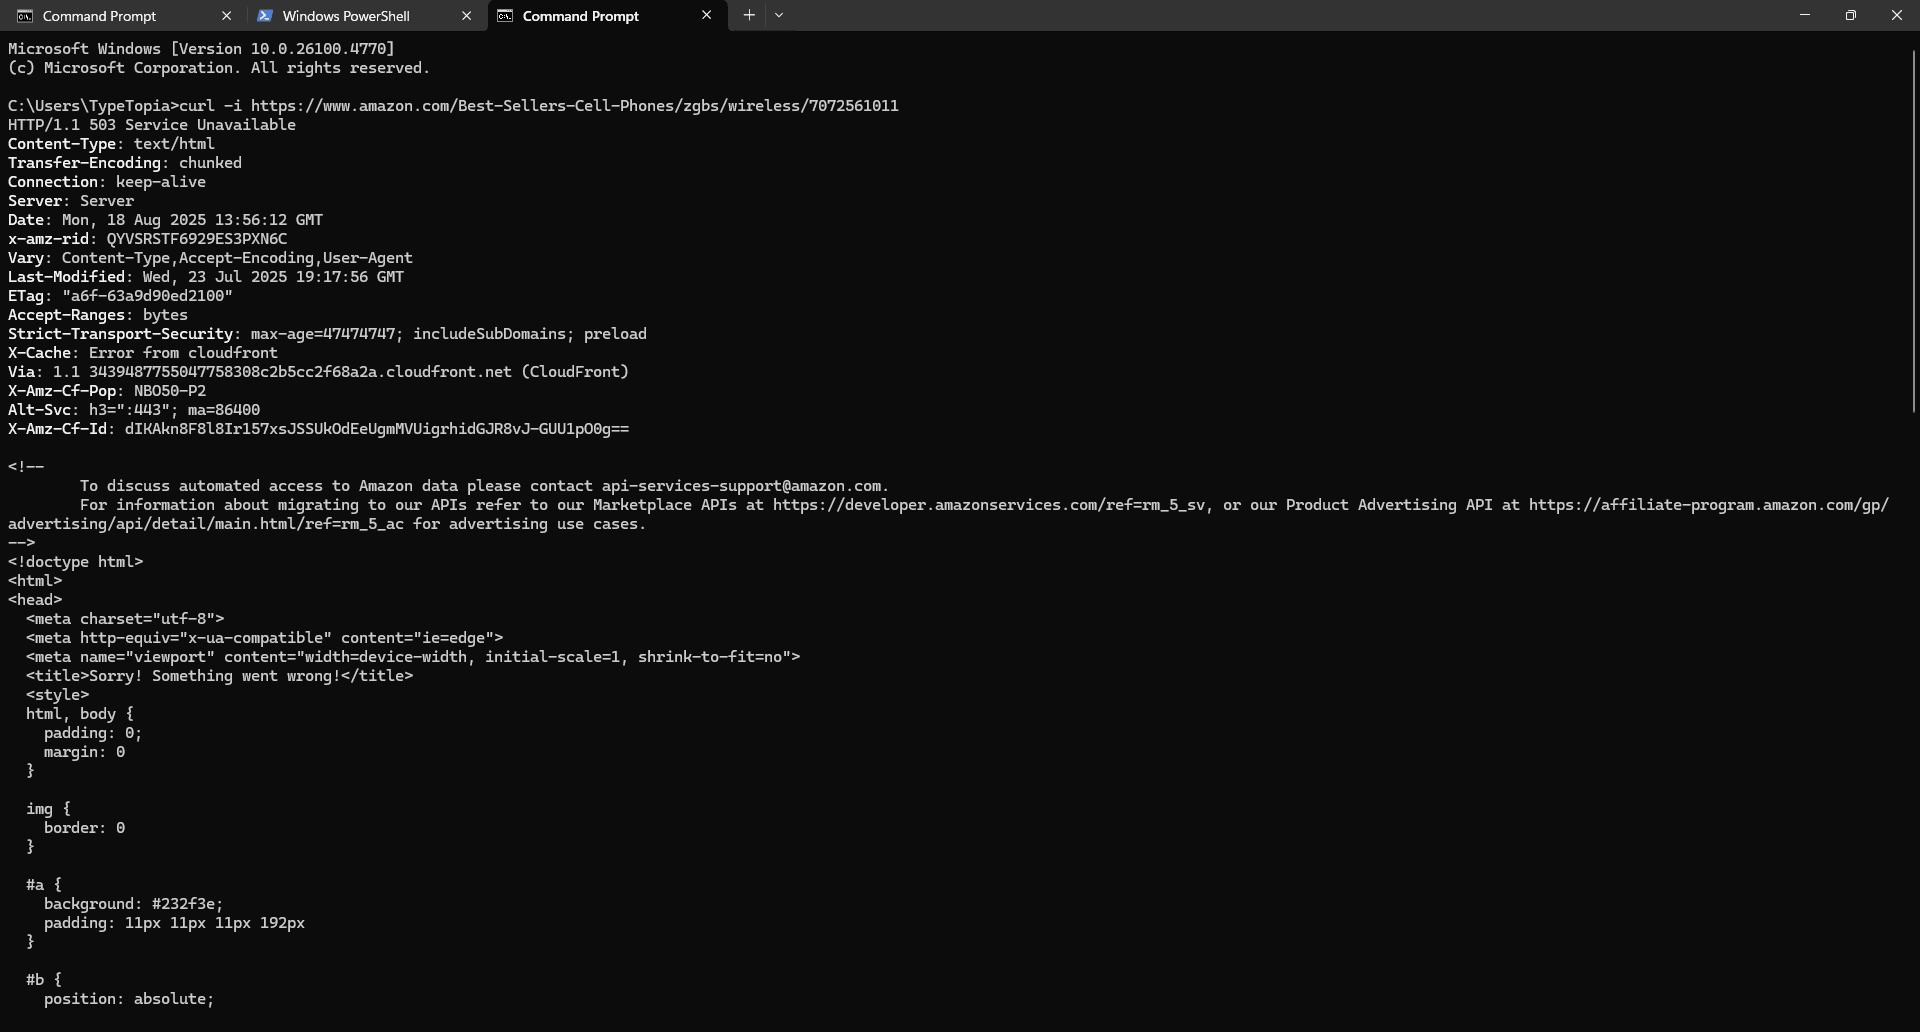
You’ll notice a 503 status code. That means the server is up, but it’s not letting you in. Why? Because cURL is blind to JavaScript. It can’t handle dynamic rendering, and it won’t sneak past Amazon’s layered anti-bot defenses. It only gets raw server responses, and Amazon isn’t serving anything useful here.
In short, cURL works best when the content is either openly accessible or designed to be pulled without resistance. If it’s locked up behind JavaScript, firewalls, or rate limits, you’ll need to bring in heavier tools.
Your first move? Open the browser’s network tab and check if the data loads from a clean API or JSON file. If so, great, cURL might still work.
If not, time to bring in headless browsers like Selenium. They simulate real user sessions and render the page just like a browser would. From there, pair that with smart scraping strategies: backoff logic, residential proxy rotation, and realistic user behavior.
That combo can help you send believable requests from stable IPs that don’t raise red flags.
Troubleshooting common cURL errors
By now, you know what is cURL, how to install it, how and why it works. But it’s not always smooth sailing. Things sometimes break. That's why it’s just as important to know the common cURL errors and how to troubleshoot them when they show up.
Connection errors
Sometimes, you run a cURL command and get hit with this:
curl: (7) Failed to connect to example.com port 443: Connection refused
cURL reached the server, but the door slammed shut. Here’s why that might happen:
- Wrong port: You’re asking for HTTPS on port 443, but the server’s only serving plain old HTTP on port 80.
- Firewall blocks: The server might be blocking your IP, your region, or the entire port through a firewall.
- Service is down: Maybe nginx or Apache isn’t running, or it’s misconfigured and not listening for requests.
- DNS mismatch: The domain resolves, but the server doesn’t recognize it or isn’t set up to serve it.
Bottom line: the server’s there, but it’s not letting cURL in. Your job is to figure out which of the locks is blocking your key. There are plenty of ways to do this, depending on your target website.
Ping the target
The first thing you can do is ping the website to check if it’s reachable at the network level. If the ping goes through but cURL fails, then the server’s alive, so the issue is likely the port or the service.
ping yourtarget.com
Test port connectivity with netcat (or telnet)
Once you’ve confirmed the server is reachable with ping, the next step is to check if the specific port you’re trying to talk to is actually listening.
That’s where nc comes in. Use this command:
nc -zv yourtarget.com 443
Here’s the breakdown:
- nc is short for netcat
- -z tells it to probe the port without sending data
- -v makes it verbose, so you get clear feedback
- 443 is the port - standard for HTTPS
If the port is open and accepting connections, you’ll get a success message. If not, it’ll tell you exactly what failed. This is how you know whether the service is live or if cURL is hitting a dead end.
You can also use telnet if netcat isn’t installed. Just run this command:
telnet example.com 443
Switch to verbose mode to see what cURL sees
When things aren’t going your way, flip on verbose mode. This lets you trace every step of the connection so you can spot exactly where the failure is happening.
Run it using this cURL command:
curl -v https://yourtarget.com
You’ll see the full play-by-play.
Use traceroute to see where the packet dies
If you're behind a firewall or proxy, traceroute helps you track every hop your request takes before it hits the server or doesn’t. You’ll see exactly where the trail goes cold.
Here’s how to run it:
traceroute yourtarget.com
This gives you a map of the route.
SSL certificate errors
SSL stands for Secure Sockets Layer, while TLS stands for Transport Layer Security. These are the protocols that keep your connection to the internet secure.
You use them every day without thinking. That little lock icon in the URL bar when you type https://? That’s SSL in action.
An SSL certificate is like a digital passport for a server. It confirms the server’s identity, proves the connection is encrypted, and shows it was signed by a trusted authority.
A typical SSL cert contains:
- The server’s public key
- The domain it’s valid for (like api.example.com)
- The Certificate Authority (CA) that issued it
- The validity period
- A digital signature from the CA
Errors happen when something about the certificate doesn’t check out. Here’s what usually goes wrong:
- Self-signed certificate: The server signed its own certificate instead of using a trusted authority
- Expired certificate: The certificate’s validity window closed. It’s no longer considered safe.
- Hostname mismatch: You hit abc.com, but the certificate says xyz.com
- Untrusted root: The issuing certificate authority isn’t in your trusted certificate store
- Clock skew: Your system clock is off, so even valid certificates might look expired or not yet active
If you're trying to access a site you don't control, the first move is to check with the site owner. Open the site in your browser, click the lock icon, and inspect the certificate. That’ll usually tell you whether it's expired, self-signed, or issued by a CA that isn’t trusted by your system.
If the problem is an untrusted certificate authority, don’t just bypass it. You can point cURL to a trusted CA manually using this cURL command:
curl --cacert /path/to/trusted-root.pem https://yourtarget.com
That way, you stay safe without switching off SSL verification. But if you control the server, the best bet is to renew the certificate. Only bypass certificate validation when absolutely necessary.
Timeouts and slow responses
Depending on your IP, your target, and what kind of data you're trying to pull with cURL, your request might feel like it’s hanging forever. That doesn’t always mean the server is down.
It might be unavailable, overwhelmed, or actively dragging its feet. Some targets hint at a response but stall instead, either by design or due to misconfiguration. Here's how you can resolve this problem.
Ping your target
Start by pinging the target:
ping yourtarget.com
If there’s no response, the issue could be network-level. Maybe the server is down, DNS is misconfigured, or a firewall is blocking the request.
Your job now is to narrow that down.
Check if the port is open
Next, confirm that the port you’re trying to reach is actually listening. Netcat or telnet can help here.
Netcat:
nc -zv yourtarget.com 443
nc stands for netcat. -z tells it to scan the port without sending data, and -v gives you a verbose output so you can see what’s happening.
If netcat isn’t available, try telnet, it’s more universally installed and easier to type:
Telnet:
telnet yourtarget.com 443
Trace the connection phases with verbose mode
If you're still in the dark, switch to verbose mode. It’ll show you every phase of the connection so you can spot exactly where things stall.
curl -v https://yourtarget.com
Use it when you need to see what cURL sees.
Time the steps with curl -w
This one’s a bit longer to set up, but dead simple once you do. It lets you time how long each phase of the connection takes, so you can see exactly where the delay is.
- Step 1: Open a text editor
Launch a blank text editor to create your custom output format.
- Step 2: Paste the timing template
Add cURL timing variables to track each stage of the request.
DNS Lookup:  %{time_namelookup}s
Connect:     %{time_connect}s
SSL Handshake: %{time_appconnect}s
Start Transfer: %{time_starttransfer}s
Total:       %{time_total}s
What you just did is set up a custom output so cURL can show you exactly where the slowdown is happening. Each line tracks a phase in the request:
- DNS lookup: How long it took to turn the domain into an IP
- Connect: Time taken to open a connection to that IP
- SSL handshake: How long it took to negotiate a secure connection
- Start transfer: When the server actually started sending data
- Total: The full time the whole thing took from start to finish
- Step 3: Save the file and copy its path
Save the file as curl-format.txt (choose 'All Files' in the 'Save as type' box to avoid .txt.txt). Copy the path to that file.
- Step 4: Run the timing command
Use the -w flag to run cURL with your format file and view timing breakdowns. Here is the cURL command:
curl -w "yourfilepath" -o NUL -s https://yourtarget.com
You'll see exactly how many seconds it took for your request to pass through each of the stages we talked about earlier.
cURL vs wget: Which tools should you use?
People who ask what cURL is often also wonder how it compares to wget.
At a glance, they look the same, both grab data from URLs, live in the terminal, and get tossed into scripts. It’s easy to mix them up. But they’re not identical.
So what’s the real difference? Where do they overlap? And when should you pick one over the other?
Understanding how cURL and wget work
On one side, you’ve got cURL. We’ve already walked through it in detail. On the other side, there’s wget. It’s just as handy.
The name says it all: web get. That’s literally what it does. You give it a URL, and it grabs the file. Nothing fancy. Just fetch and save. It’ll even download recursively if you ask.
Here’s a basic command to show you how it works:
wget https://wordpress.org/latest.zip
That’ll pull the latest WordPress zip file into your current directory. Easy, right?
Let’s stack cURL and wget side by side for a second:
- They both support http, https, and ftp
- They both work with proxies
- You can use either to download files from URLs
- Both offer authentication methods
- Both can follow redirects (-L in cURL, --max-redirect in wget)
- Both shine in shell scripts and cron jobs
The differences between cURL and wget
The difference is in how cURL and wget behave by default.
Interactivity and customization
The first real split between these tools is how much control they give you over the transfer.
- Custom HTTP methods
With cURL, you get full command over your requests: PUT, DELETE, PATCH, whatever the job calls for. We covered this earlier. wget? You’re mostly stuck with GET and POST. That’s it.
- Custom headers
If you’re working with APIs, you’ll almost always need headers. cURL makes it easy with auth tokens, user agents, content types, whatever you need. wget can fake a user agent, but that’s about where the road ends.
- Form submissions
cURL can mimic browser-style form submissions using POST. wget can send data too, but it’s blunt because it wasn’t built for that kind of finesse.
- Cookie handling
Both tools support cookies. With cURL, you control it manually using -b and -c. wget is simpler, just tell it once, and it’ll save and send cookies automatically.
- FTP uploads
Need to upload via FTP or SFTP? cURL handles it cleanly. wget doesn’t upload, it downloads.
File downloading & resuming
wget handles this like a champ. Just pass -c. If your download crashes halfway, it checks the local file, matches it with the server’s version, and picks up exactly where it left off. Here is the wget command:
wget -c https://example.com/yourfile.zip
cURL can resume, too, but only if a partial file exists, the server supports range requests, and you don’t mess up the syntax (-C - matters). If redirects or cookies are involved, you’re on thin ice.
Essentially, wget was made to survive real-world mess. cURL just can if you baby it. Here is the cURL command to resume file downloads:
curl -C - -O https://example.com/yourfile.zip
If you’re trying to download an entire website, wget is the move. It can mirror full sites, including the HTML, images, scripts, structure, everything.
Just add --mirror to your command and it gets to work. cURL was not built for that. It downloads one file at a time, and that’s the end of it.
Security and authentication
When talking to modern APIs, working over encrypted connections, or needing to pass credentials securely, cURL is the better option. It lets you:
- Attach client-side certificates for mutual TLS
- Point to custom CA bundles
- Lock down cipher suites when dealing with strict compliance rules
- Force specific SSL/TLS versions, which matters when you're working with legacy APIs or locked-down financial systems
wget can handle HTTPS and verify the certificate, but that’s where the road ends.
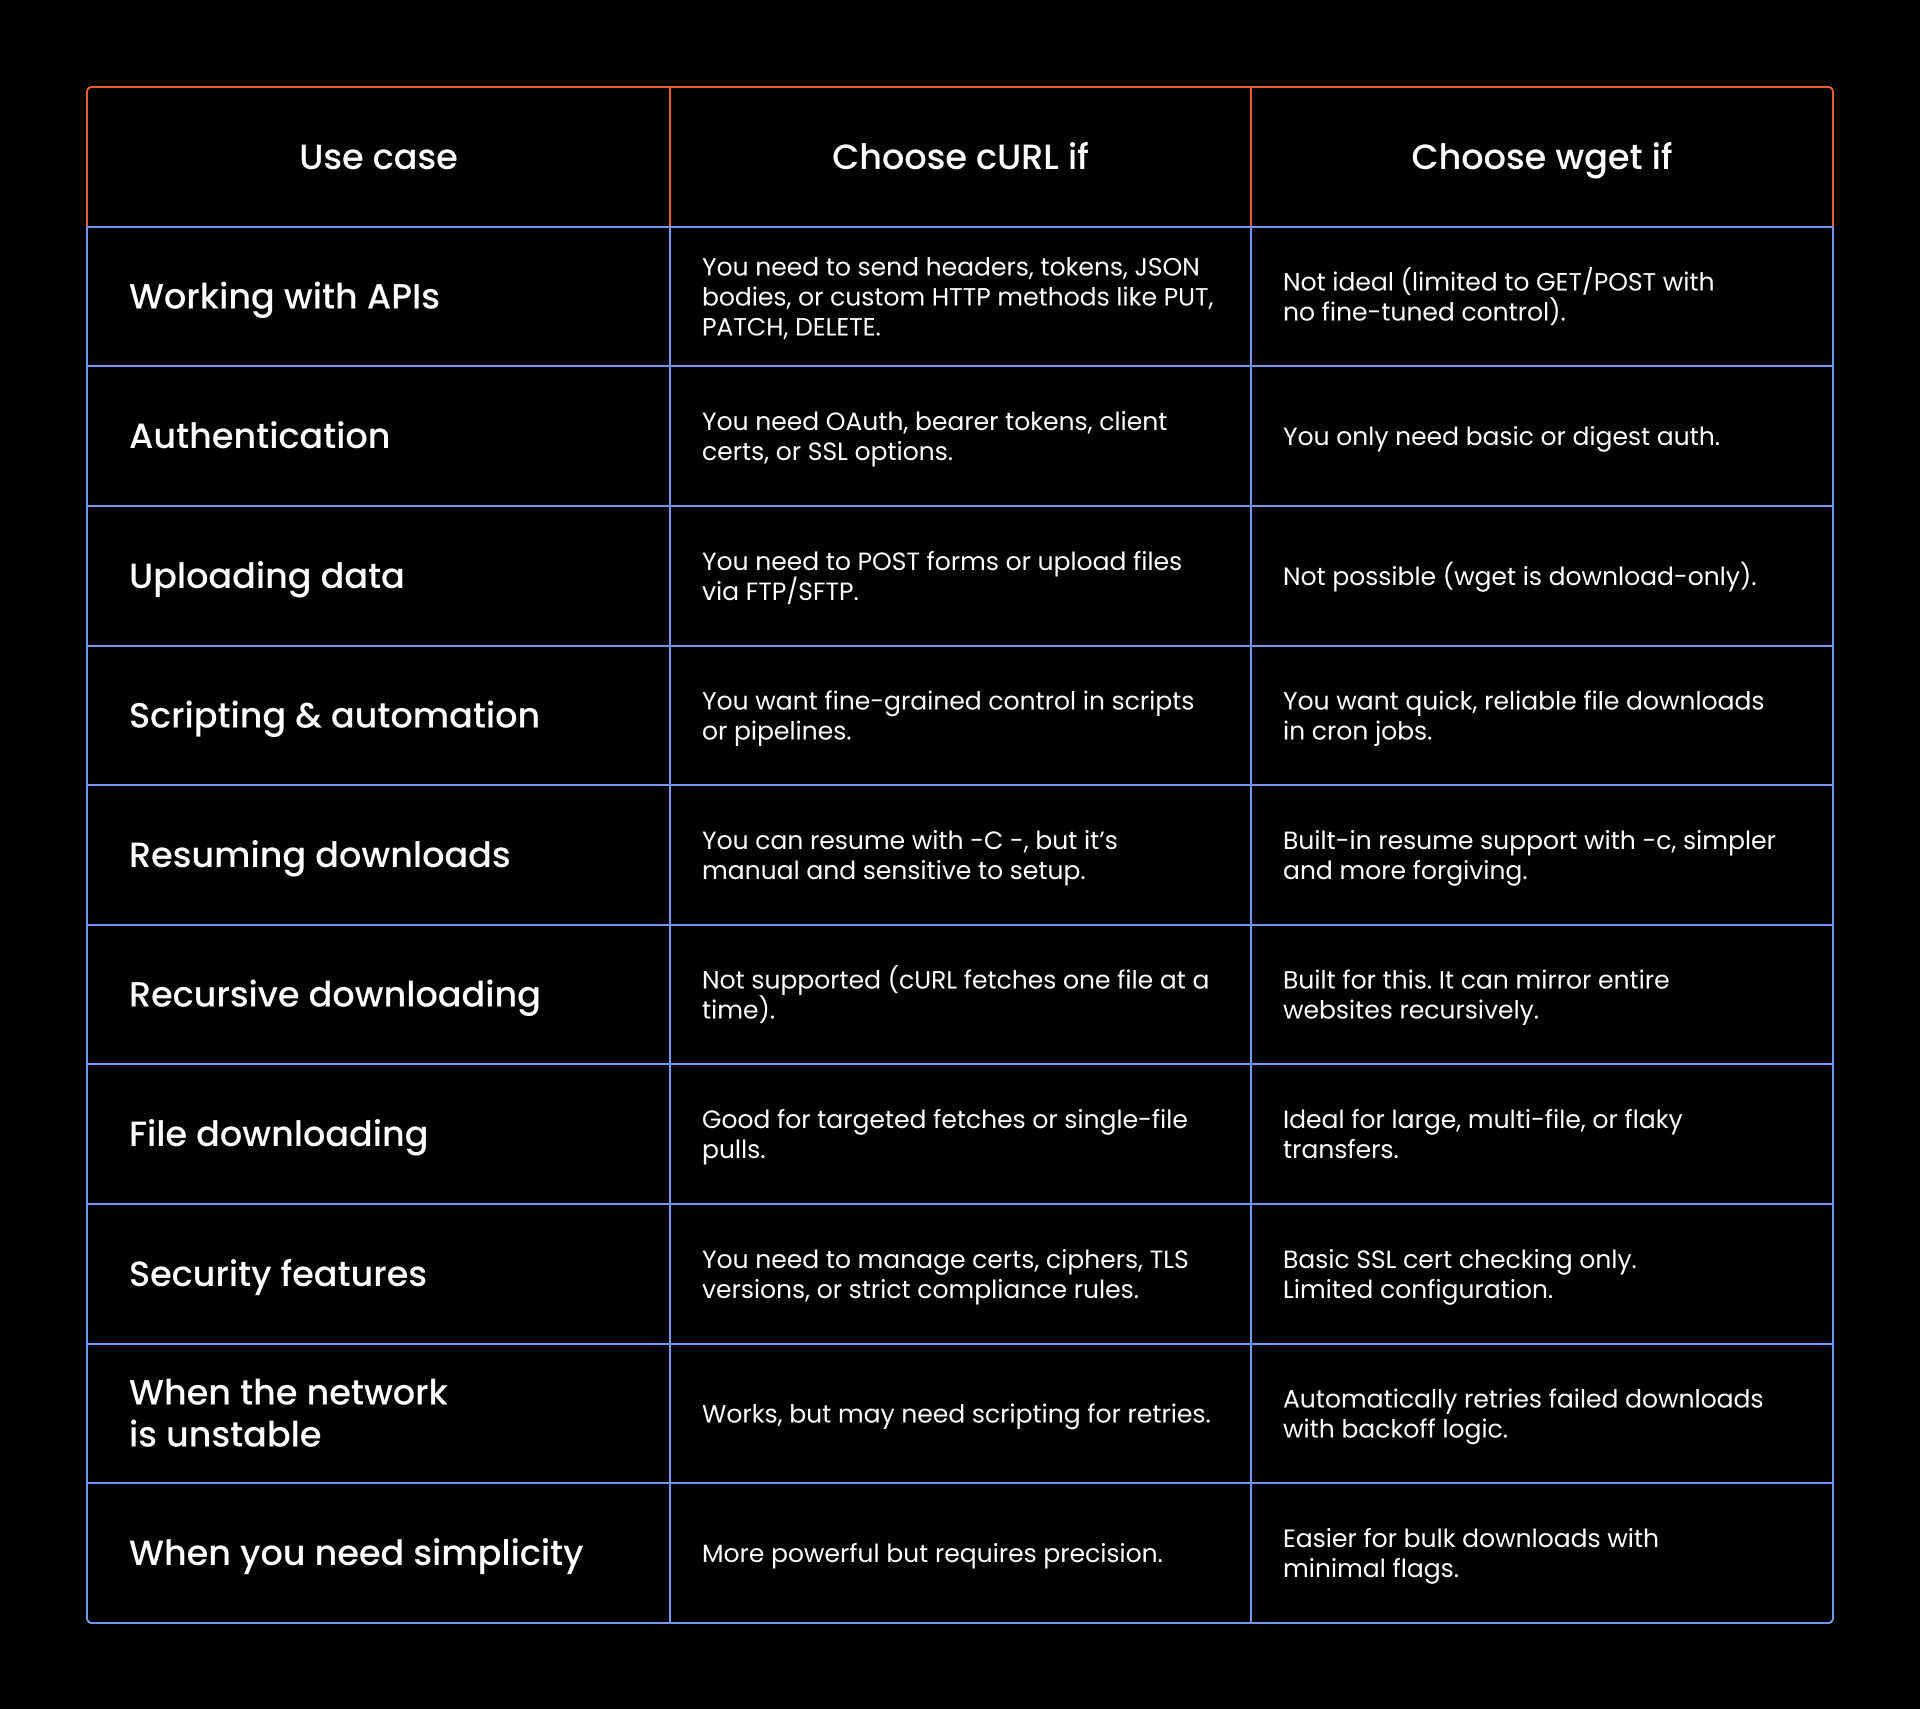
When should you use each tool?
Conclusion
You’ve made it this far, well done! You now understand what is cURL, how it works, what it does best, and when it shines. You’ve seen the syntax, the flags, the edge cases.
Maybe you’re already thinking about how to weave it into your workflow, or maybe you’ve realized your use case needs something more powerful, like Selenium or a proxy rotation engine.
But if all you need is a no-fuss tool to download files over HTTP, wget might be the simpler, sturdier choice. Either way, you’ve got options now, so go forth and cURL with confidence.
Want to level up your cURL game with proxies and more? Join our Discord community.
What is cURL command?
A cURL command is a way to transfer data to or from a URL right from your terminal. You use it to make HTTP requests, download files, test APIs, send data, or debug web traffic. Think of it as a command-line tool that talks to the internet.
What does cURL stand for?
It stands for Client URL. It’s called that because it’s a tool that lets your machine (the client) interact with URLs across dozens of protocols, hence client URL.
Is cURL installed by default?
If you're on Linux or macOS, cURL usually comes pre-installed. You can open a terminal and run curl --version to check. On Windows, it’s included by default starting with Windows 10 version 1803. But if it’s missing or acting weird, you can always install or update it using the methods we described.
What is cURL used for?
cURL is used for transferring data to or from a server using supported protocols like HTTP, FTP, and more. It’s commonly used to test APIs, download files, and interact with URLs from the terminal.