
Proxy Helper is a straightforward Google Chrome extension for simplified proxy management. Because Chrome does not have built-in proxy settings, it uses a system-wide networking configuration. This tool lets you set a proxy connection within the Chrome browser while letting other traffic through the original internet service provider.
What Is Proxy Helper?
Proxy Helper is a free and minimalistic Google Chrome extension that you can use to manage multiple proxy profiles without leaving the browser. You can get the Chrome Proxy Helper extension from the Chrome Web Store and install it following the step-by-step guide below. This extension supports the major proxy types, like residential and datacenter proxy servers.
It also has several features to set proxy connections quickly and switch from one proxy server to another with only a few clicks. Chrome Proxy Helper lets you specify a proxy type: HTTP, HTTPS, SOCKS (4 or 5), or QUIC proxy protocol. It also supports password authentication if your chosen proxy configuration demands logging in.
This extension lets you upload a PAC script to automate proxy management. PAC stands for proxy auto-configuration. To enable it, go to the PAC script options in the extension, select a remote PAC script URL, or upload a PAC script file from your computer.
Lastly, there's a bypass list option. There, you can specify which domains will never use a proxy connection but utilize system proxy settings. Overall, Proxy Helper is a compact and beginner-friendly Chrome browser tool that almost anyone can learn within an hour.
How to Install Proxy Helper
Before changing proxy settings within the Chrome browser, you need to locate and install Chrome Proxy Helper extensions. Follow these steps:
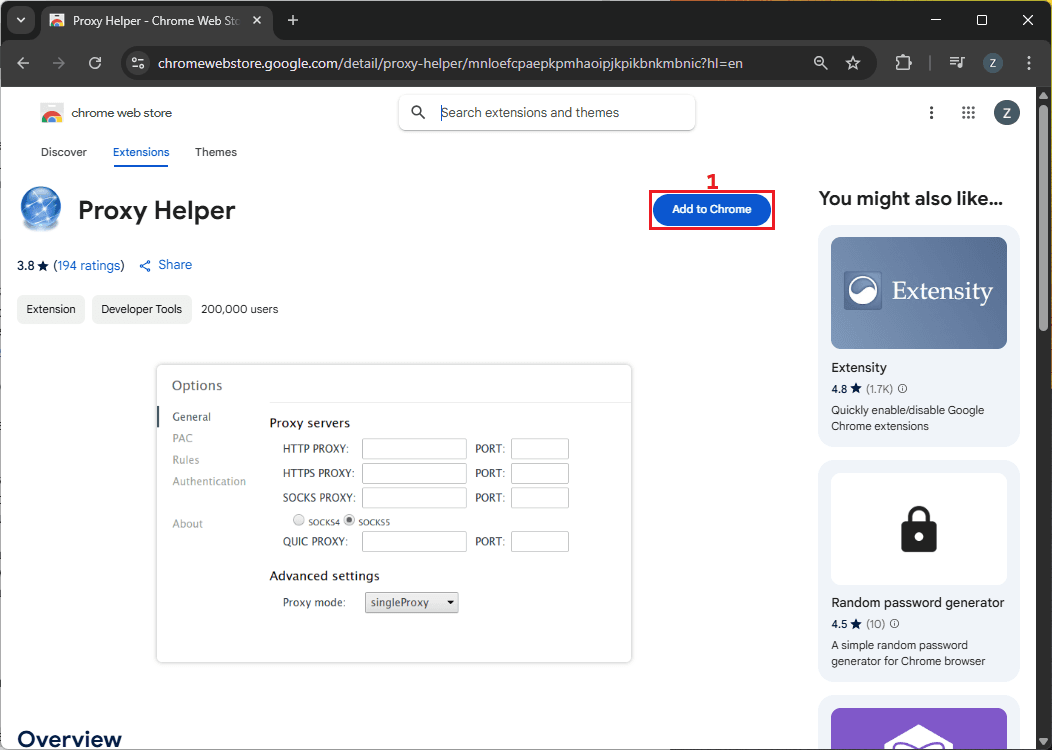
1. Click on the 'Add To Chrome' button on the right side of the screen.
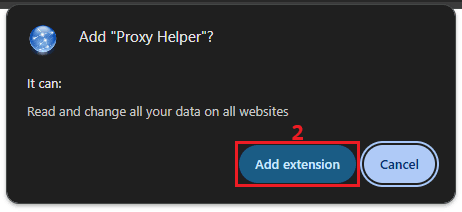
2. Select 'Add extension' in the pop-up notification.
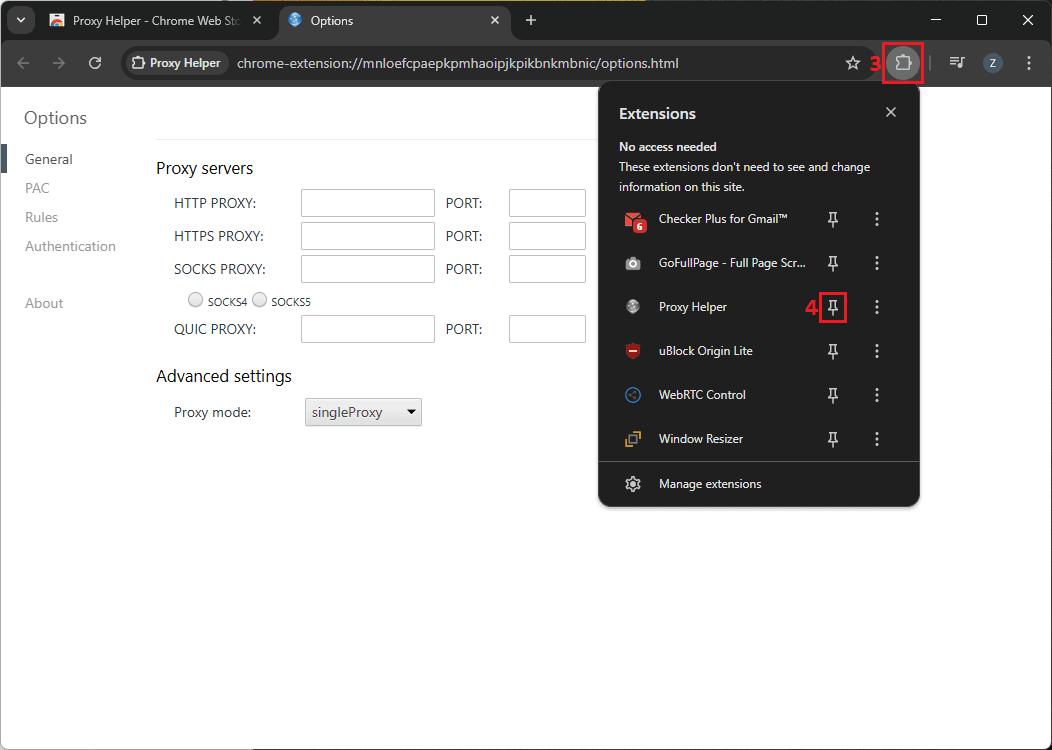
3. You can click on the puzzle icon 'Extensions' in the upper right and pin Proxy Helper to your extensions display for easy access.
How to Set Up a Proxy in Proxy Helper
Now that you have installed the extension, let's see how to set proxy connection within it. We will use a MarsProxies residential proxy server as an example.
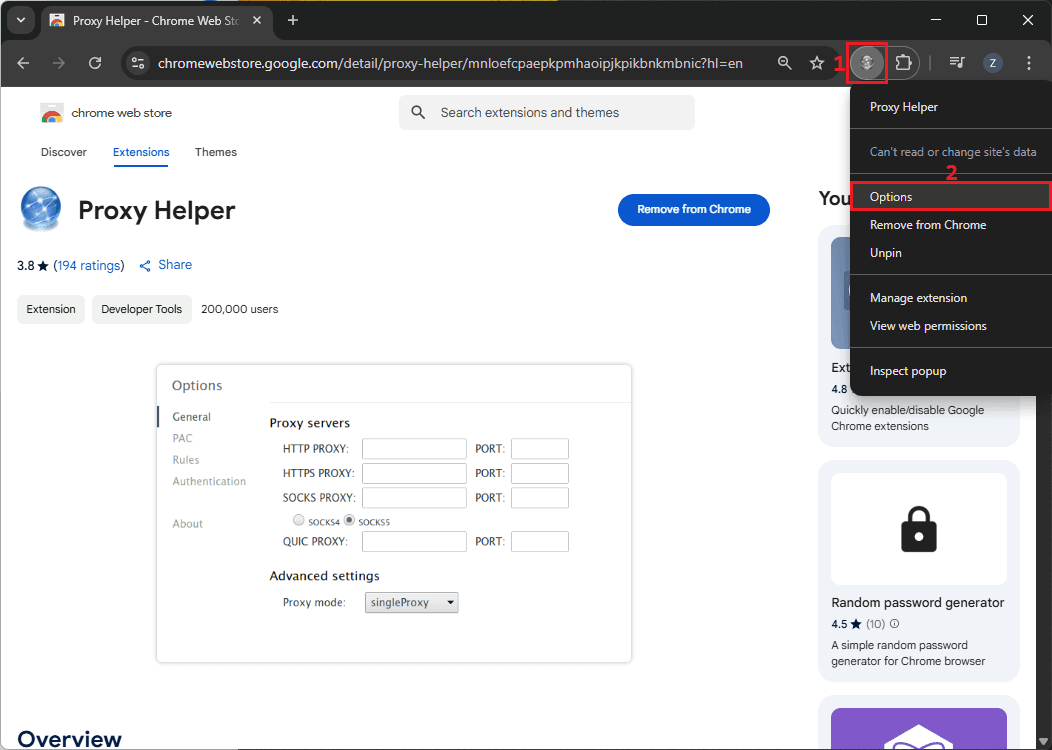
1. Right-click on the Chrome Proxy Helper extension in the extension bar and select 'Options'.
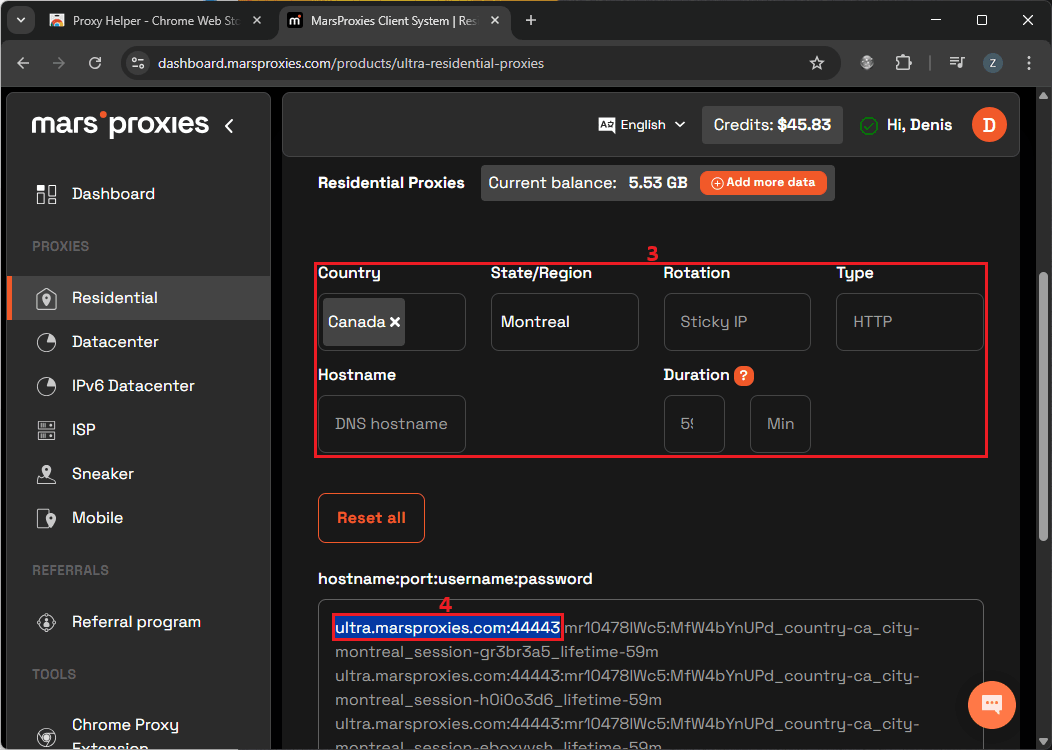
2. You will need to get your proxy server address from the MarsProxies dashboard. Make sure you whitelist your IP address if you use authentication via IP. In our example, the proxy server address looks like this: 'ultra.marsproxies.com:44443'.
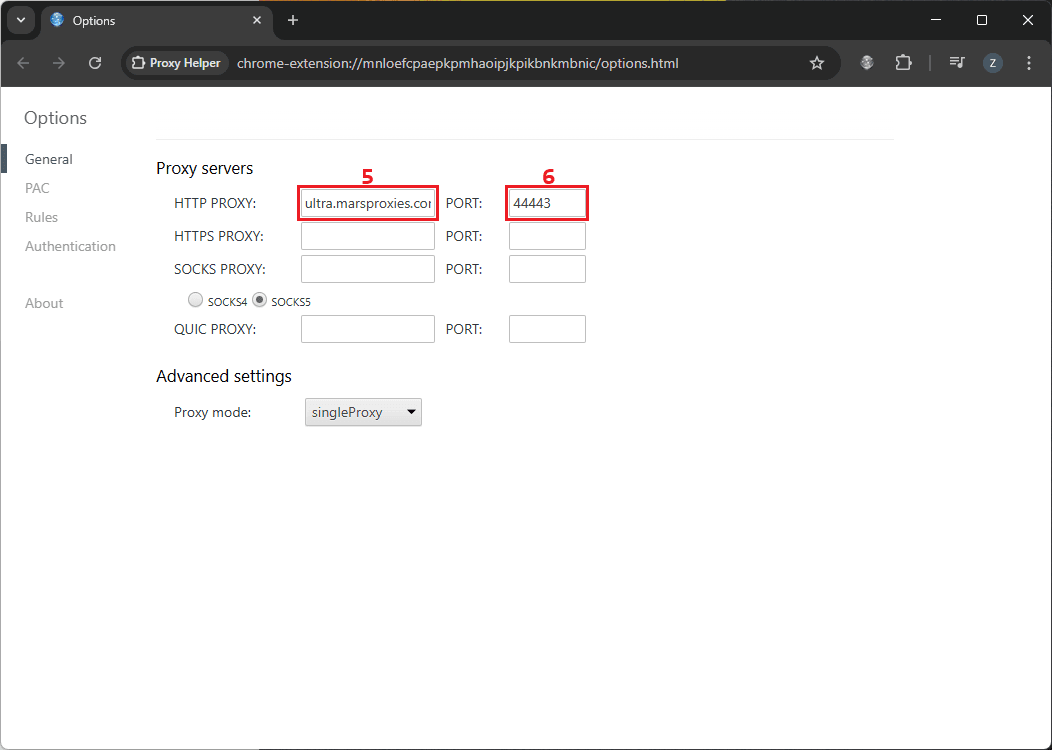
3. Go back to the Proxy Helper extension options. Copy the 'ultra.marsproxies.com' into the 'Proxy server' field and the '44443' into the 'PORT' field. Make sure you choose the correct proxy protocol.
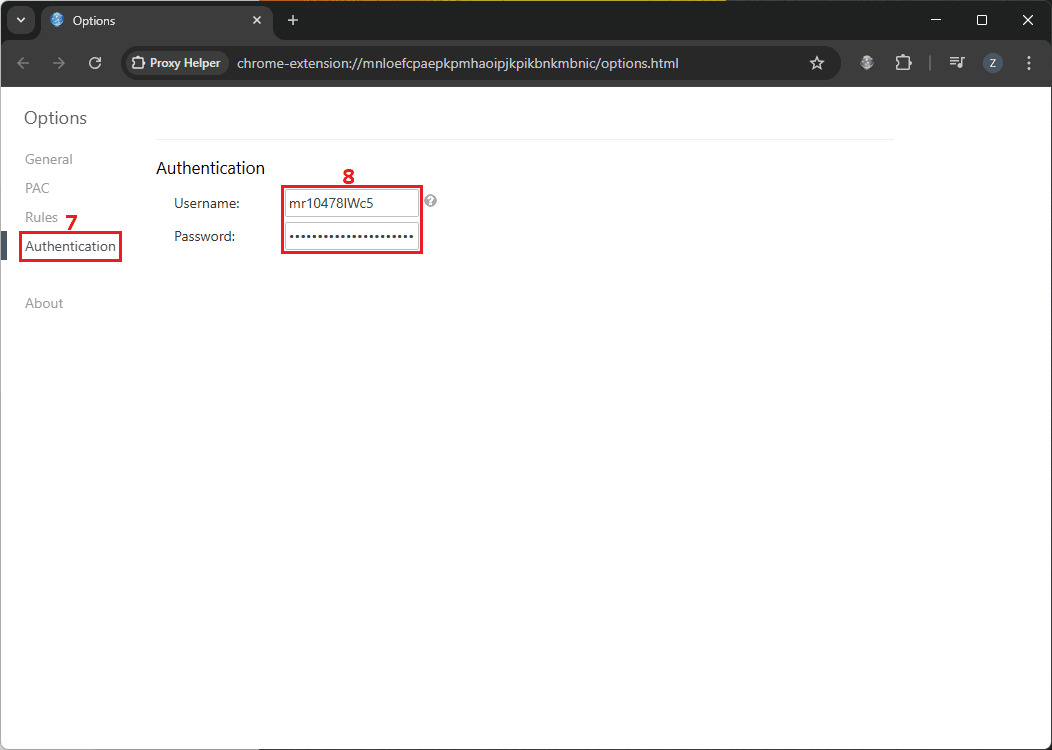
4. (for password authentication) If you choose to authenticate proxy via username and password, choose the 'Authentication' tab in the extension's menu. Copy the username and password from the MarsProxies dashboard and input them into respective fields.
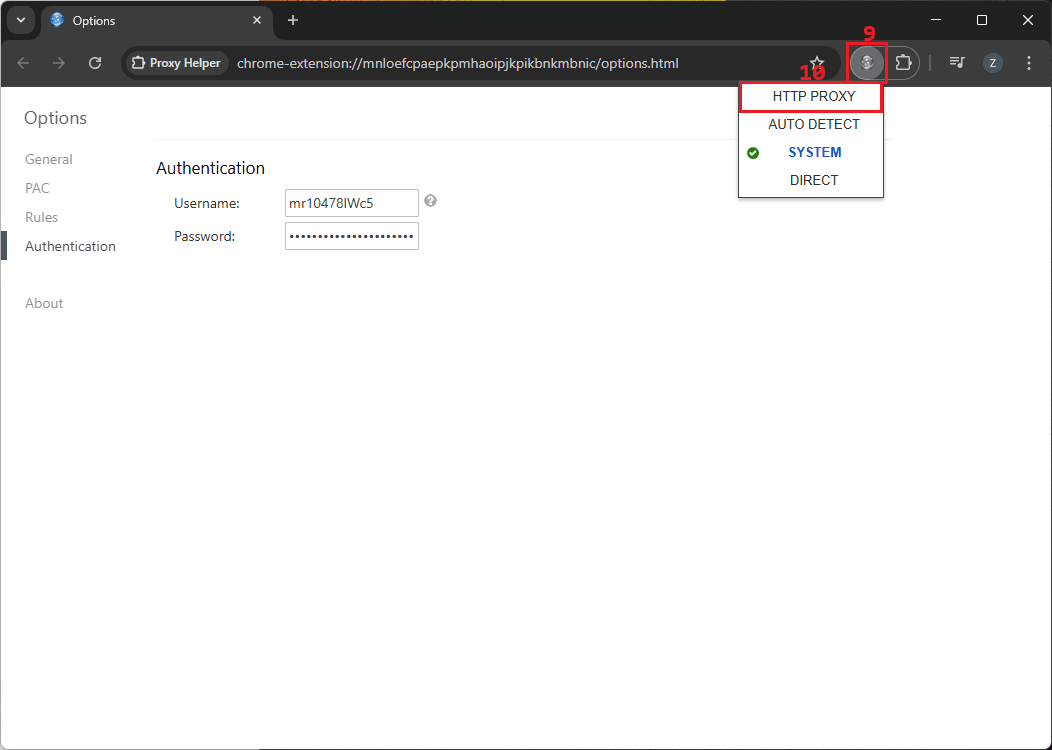
5. Left-click on the Proxy Helper icon in the extension's bar and left-click on the newly created proxy connection protocol. In our case, it's HTTP PROXY.
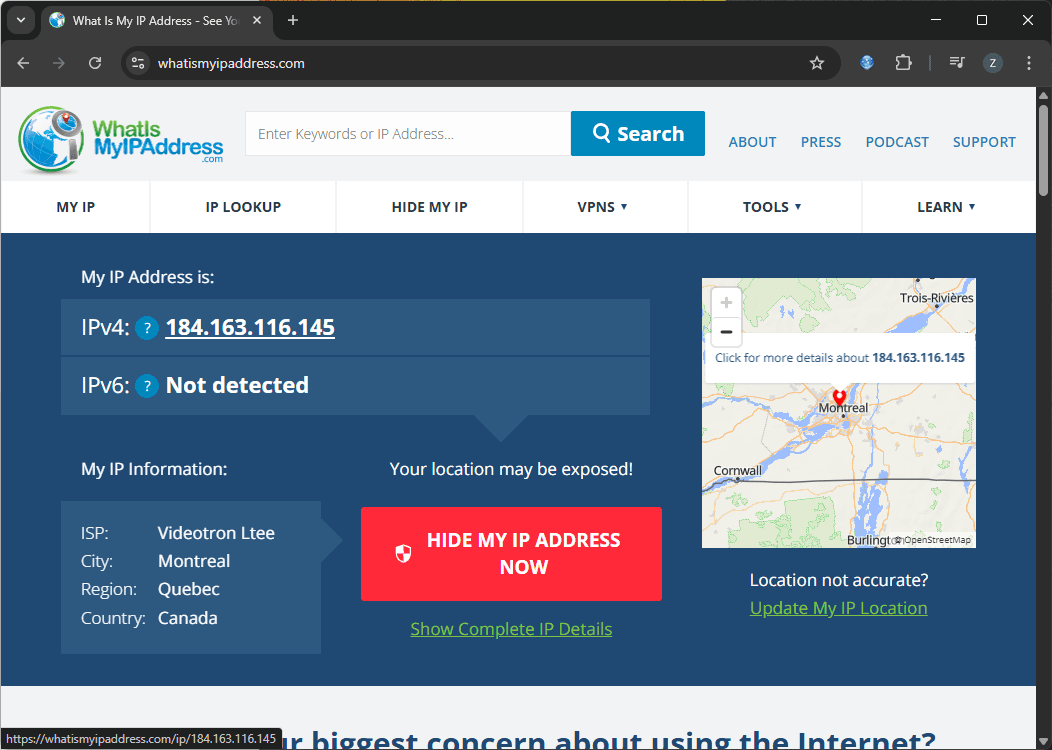
6. You can visit a website like www.whatismyip.com to verify whether your IP address was changed successfully.
Remember that this applies proxy settings only within the Chrome browser, and all other traffic utilizes the original connection. Also, you can upload a PAC script, select a proxy mode, or use the bypass list while you set proxy connection.
Advanced Features & Settings
Although compact, this tool has some advanced features to make your proxy management easier.
Traffic Targeting
There is a 'Proxy mode' option in the advanced settings menu. It allows setting proxies solely for HTTP, HTTPS, or FTP traffic, using one proxy for all, or setting up a fallback proxy in case of disconnect.
Bypass List
You can use this feature, officially called split tunneling, to modify proxy settings further to specify which websites utilize proxy connections.
Switching Between Multiple Proxies
You can create HTTP, HTTPS, SOCKS, and QUIC proxies in the extension and switch between them with only two clicks.
Exporting/importing Configs
If you use a specific proxy configuration, you can upload the PAC script from your device or point to an online PAC URL.
Troubleshooting Common Proxy Helper Issues
A few common issues may prevent you from successfully connecting to a proxy using this extension. Firstly, make sure that you have copied the proxy address and port number correctly. Double-check for typos and verify you have input the information into the correct proxy type, like HTTPS or SOCKS fields.
You must also whitelist your original IP address on the MarsProxies dashboard if you use the IP: AUTH option. Alternatively, make sure you copy the correct username and password into the extension's authentication fields.
If you still experience issues, try searching for extension-specific errors online. Simultaneously, keep in mind that proxies may conflict with VPN or other proxy connections, so make sure you are using only one proxy connection at a time.
Conclusion: Best Proxies to Use With Proxy Helper
As you can see, setting up this extension is a breeze. To make the best out of it, choose the correct proxy type for your tasks.
Residential proxies excel at private browsing, bypassing geographical restrictions, and masking your web scraping activities. Go for datacenter proxies whenever online anonymity is secondary and you need the best possible connection speed and uptime. Lastly, use reliable mobile proxy servers to get mobile IPs.
If you have more questions, feel free to contact our 24/7 customer support team. Alternatively, please drop by our growing Discord community for real-time assistance or simply share your experience with other proxy users.