MarsProxies and ixBrowser: Integration Tutorial
If you’ve been keeping up with our blog, you’re already familiar with anti-detect browsers. Solutions like ixBrowser enable you to take full control of the information websites gather about you. Your IP address, location, software, hardware - all this information (and more) is available to any web server you communicate with.
Anti-detect browsers enable you to modify your browser fingerprint and change all this information. As a result, you can create unique browser profiles and switch between them on a single device. This approach enables the user to manage multiple profiles on the same website or platform without being detected.
In this article, we’ll go over ixBrowser’s features and provide a step-by-step tutorial on how to set it up with MarsProxies.
ixBrowser Features Overview
Unlike all the solutions we’ve encountered so far, ixBrowser has a unique pricing approach. The browser is completely free, without any features behind a paywall. There’s a monthly fee for proxies, and that’s it. However, you have the option to configure your own proxies.
In terms of features, ixBrowser offers everything you’ll find in a well-rounded anti-detect browser:
- Browser fingerprint customization
Control all aspects and parameters of your browser fingerprint for seamless multi-accounting.
- Cloud synchronization
Your browser profiles and settings are stored in the cloud for easy synchronization.
- Team management
Create teams, assign roles, and collaborate with an unlimited number of people.
- Extension support
Install any Google Chrome extension and integrate it into your workflow.
Pricing is based on the type of proxies you need. One dedicated datacenter proxy with unlimited bandwidth will cost you $2.25/month. If you prefer to use a Static Residential (or ISP) proxy with unlimited bandwidth, it will set you back $3.99/month. Finally, residential proxies with non-expiring traffic and rotation between 180 countries go for $3.89/GB.
What Does MarsProxies Offer?
If you prefer to use your own proxies, there’s nothing standing in your way. With MarsProxies, you can get:
- 1M+ residential proxies worldwide (190+ countries)
- Country, state, and city-level targeting at no extra cost
- Never-expiring residential traffic
- HTTP/S and SOCKS5 support
- Rotating and sticky sessions (from 1 second to 7 days)
How to Use MarsProxies With ixBrowser
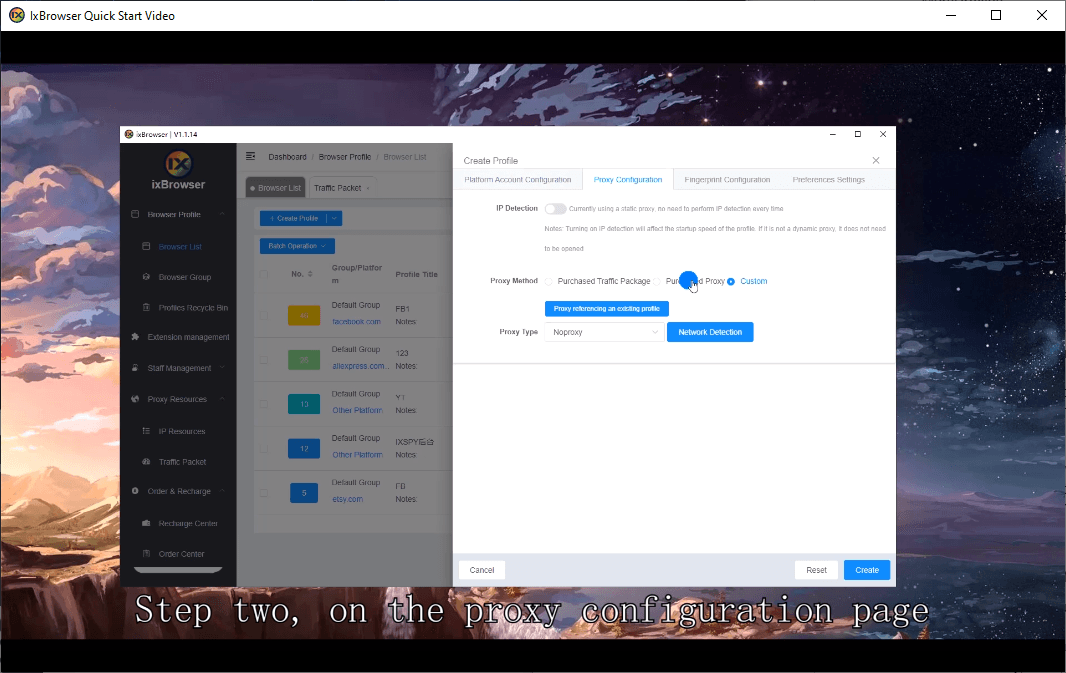
1. To get started, download the latest version of ixBrowser from the website. Launch it and sign up. Once you log in, you’ll be greeted with an introduction video. If this is your first time using an anti-detect browser, we strongly recommend you give it a watch. You can also head over to their Tutorial page for more useful content.
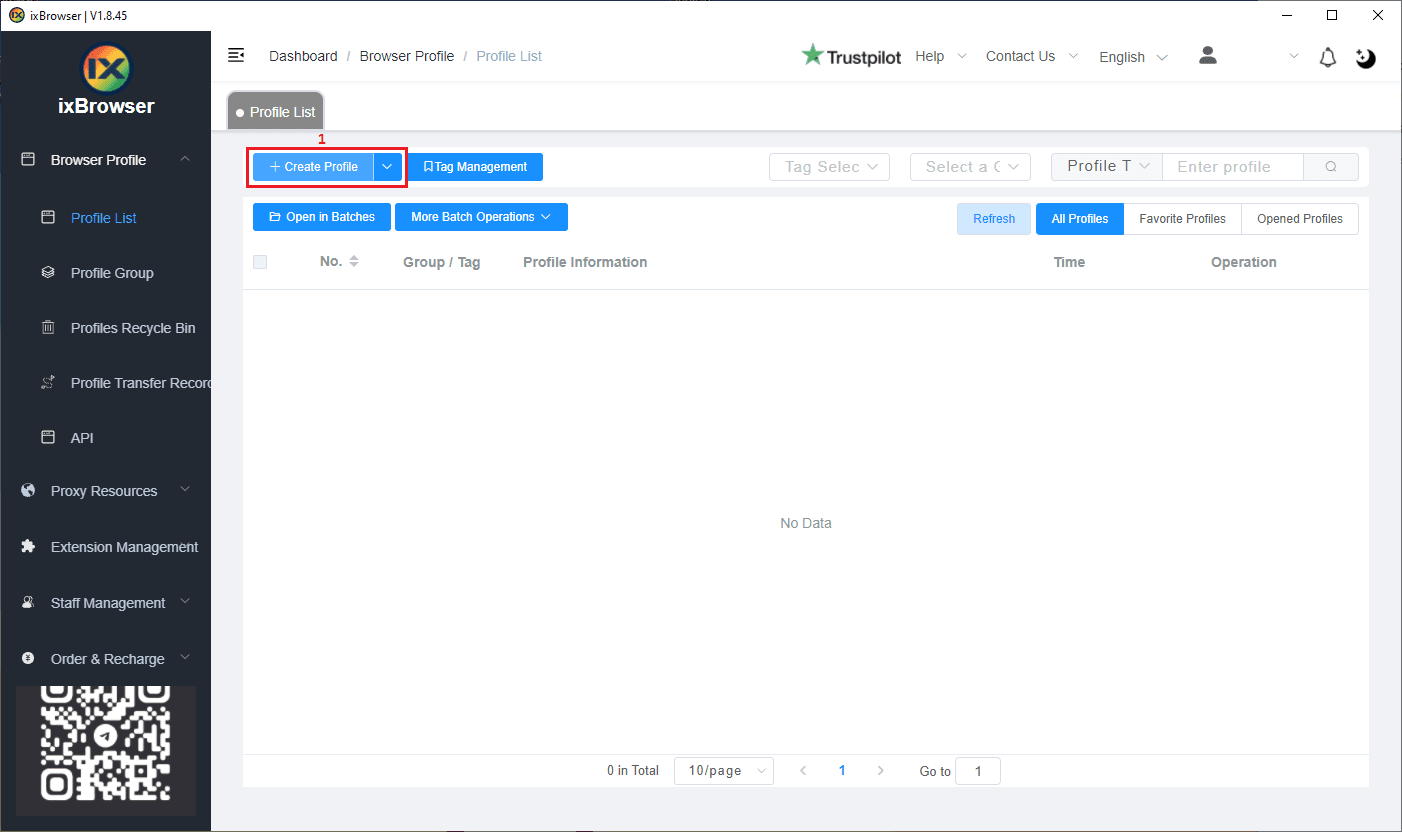
2. Once the video ends, click the Create Profile (1) button to create your profile.
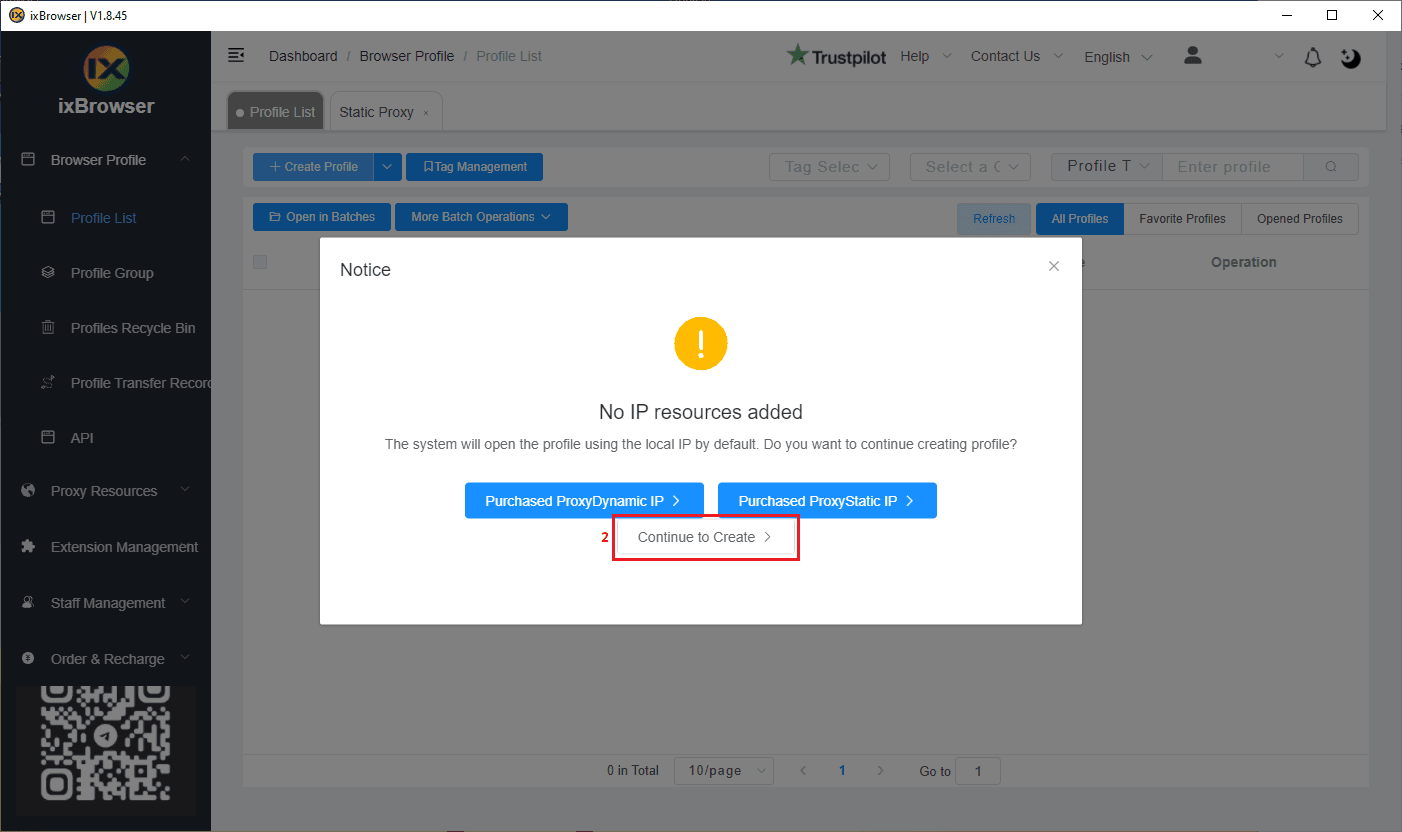
3. ixBrowser will warn you that you didn’t set up any proxies. You have three options here:
- Purchased ProxyDynamic IP (rotating residential proxies)
- Purchased PrxyStatic IP (static residential/ISP and datacenter proxies)
- Continue to Create
Click on Continue to Create (2) and add our proxies manually.
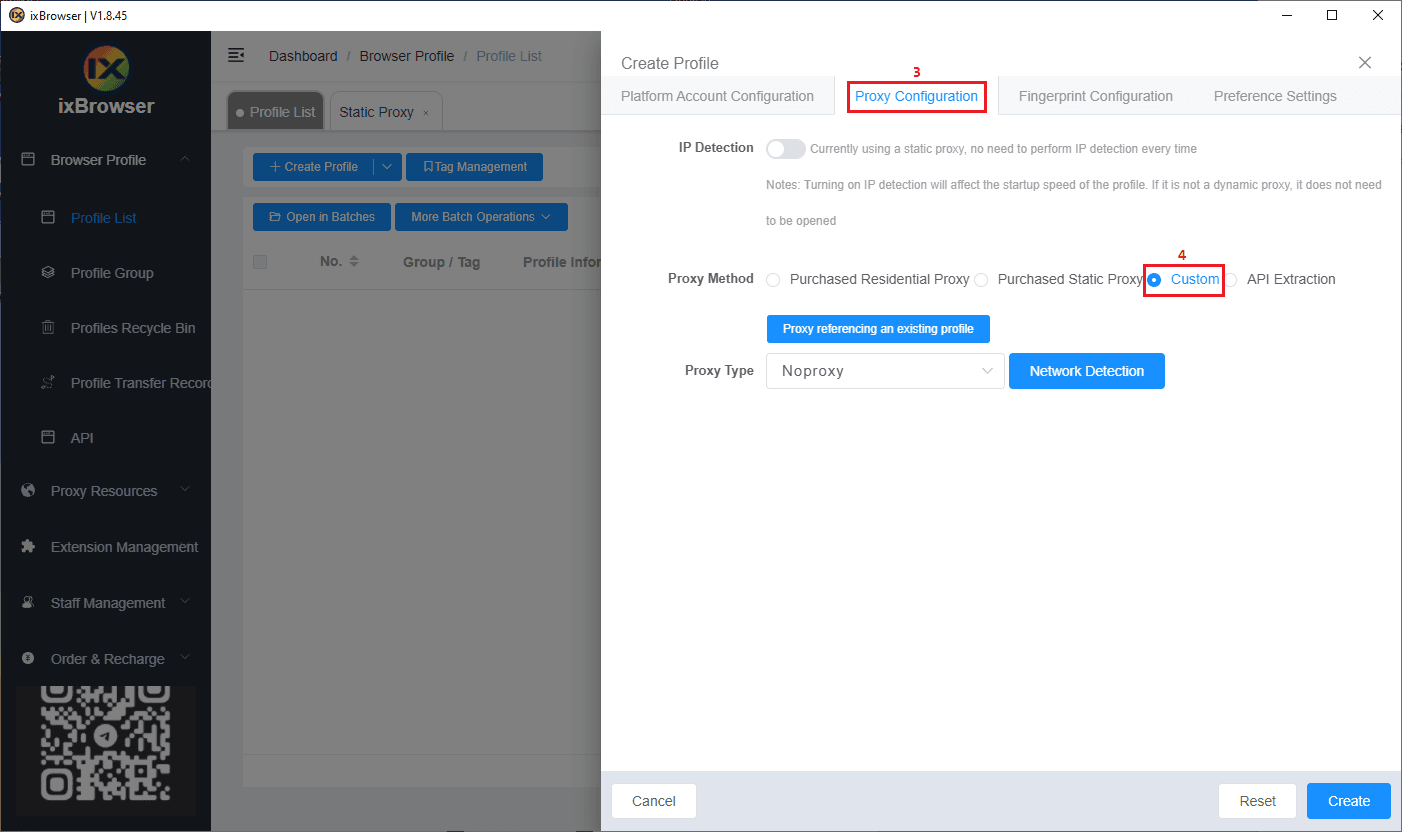
4. In the Create Profile section, click on the Proxy Configuration tab (3). For Proxy Method, select Custom (4).
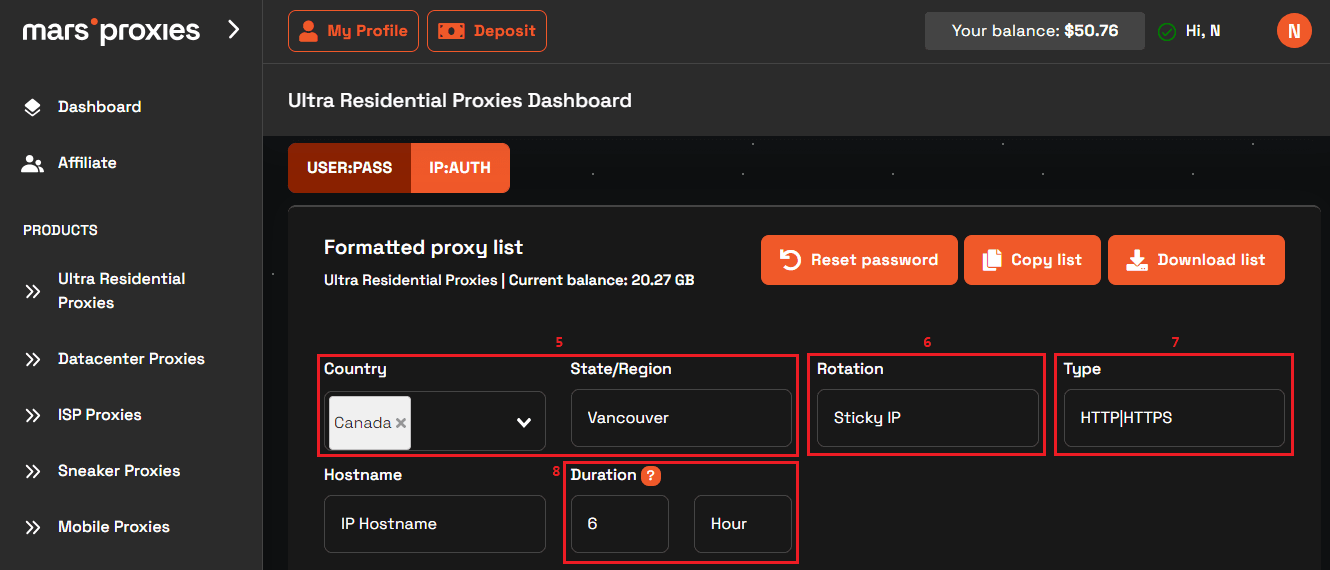
5. Now it’s time to open your MarsProxies dashboard and get your proxy credentials. We’ll use our Ultra Residential proxies from Vancouver, Canada (5), with sticky sessions (6), SOCKS5 protocol (7), and session duration of 6 hours (8).
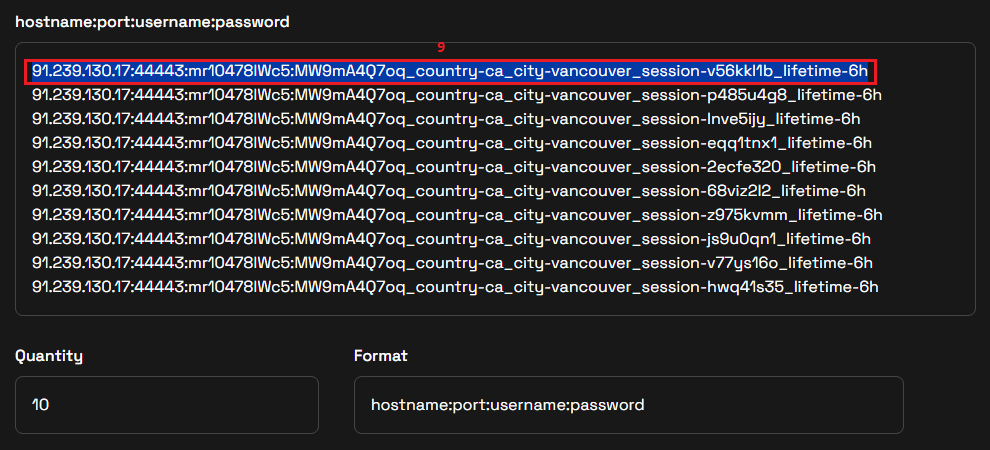
6. Once you configure your settings, get your credentials from the list (9). Each line here contains your hostname, port, username, and password.
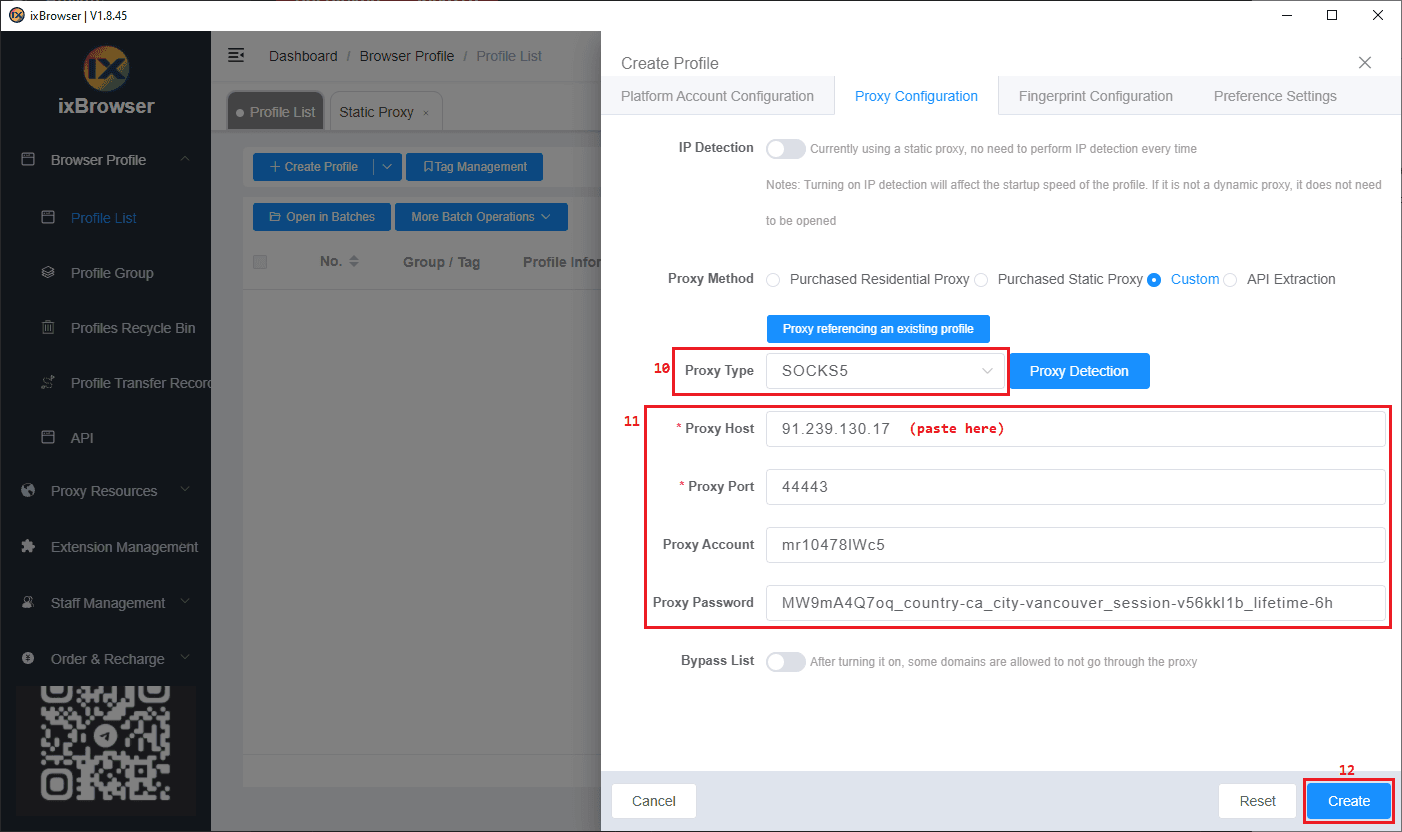
7. Now it’s time to transfer this information into ixBrowser. Choose SOCKS5 as the Proxy Type (10). Copy an entire line from the MarsProxies dashboard. Paste it in the Proxy Host field (11) and ixBrowser will fill all the necessary fields automatically. If other aspects of your profile are set up, click the Create (12) button.
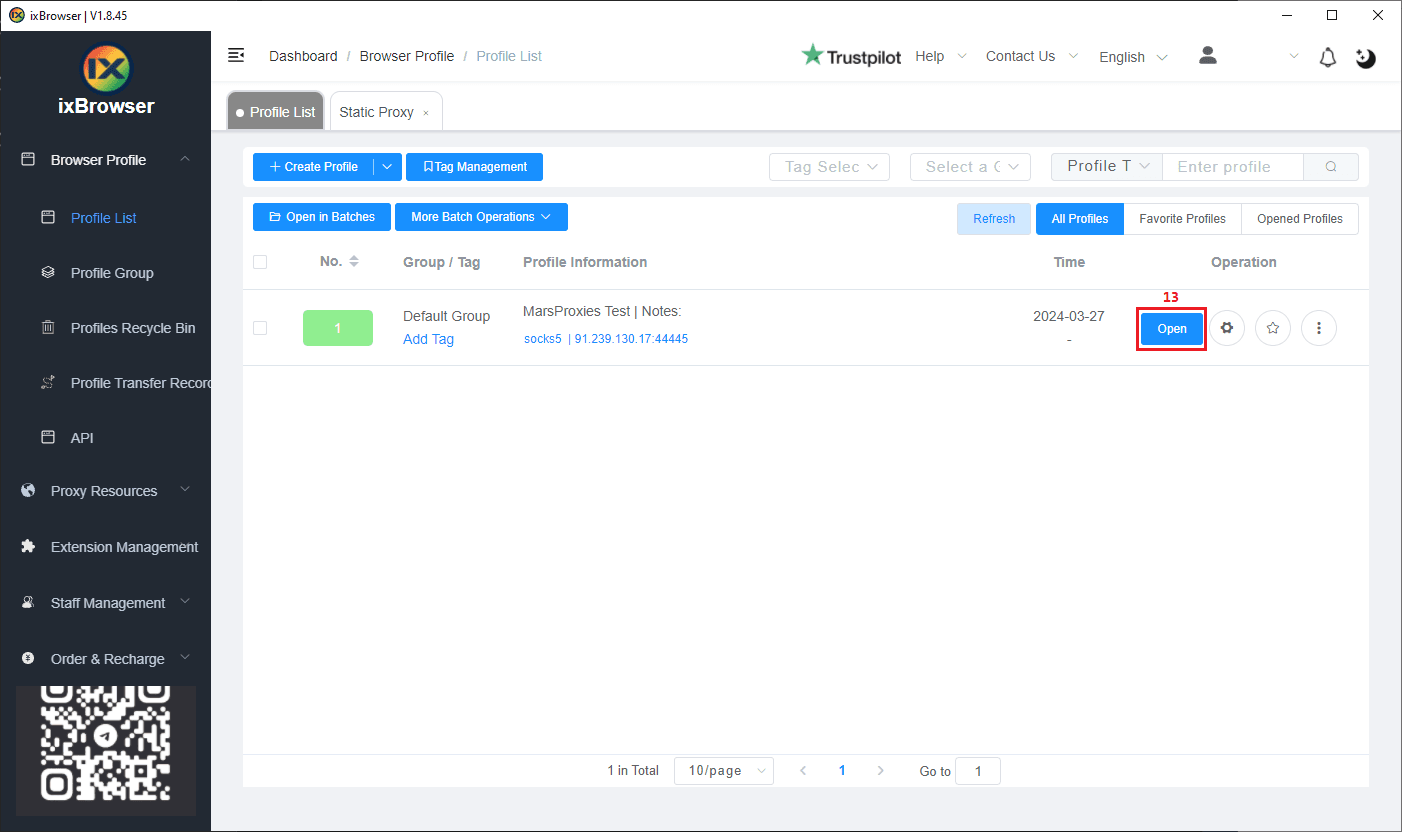
8. From the main menu, click the Open (13) button.
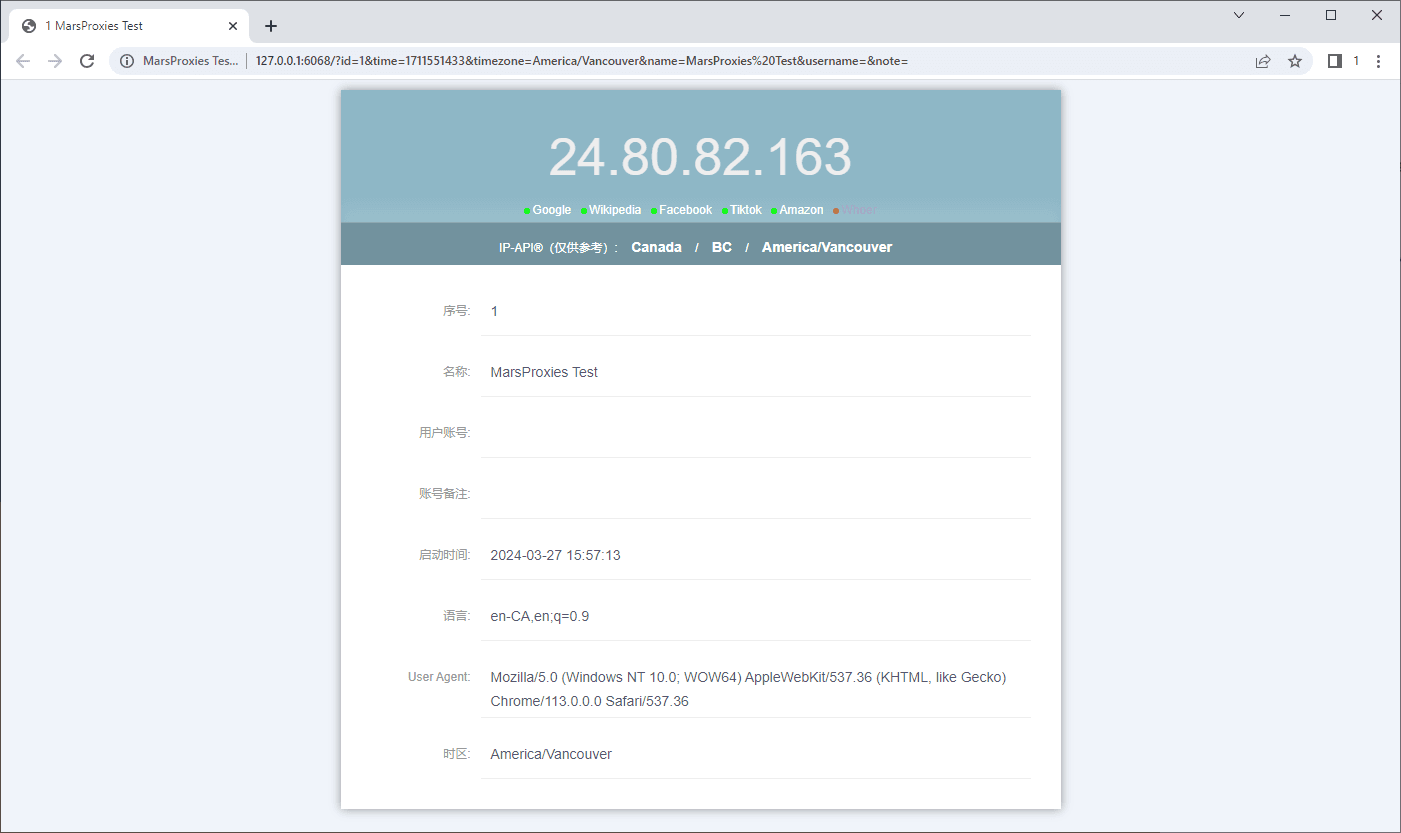
9. This will launch a browser window with your fingerprint settings and more information about your proxy.
10. Alternatively, you can visit a website like IPHey to confirm everything works correctly.
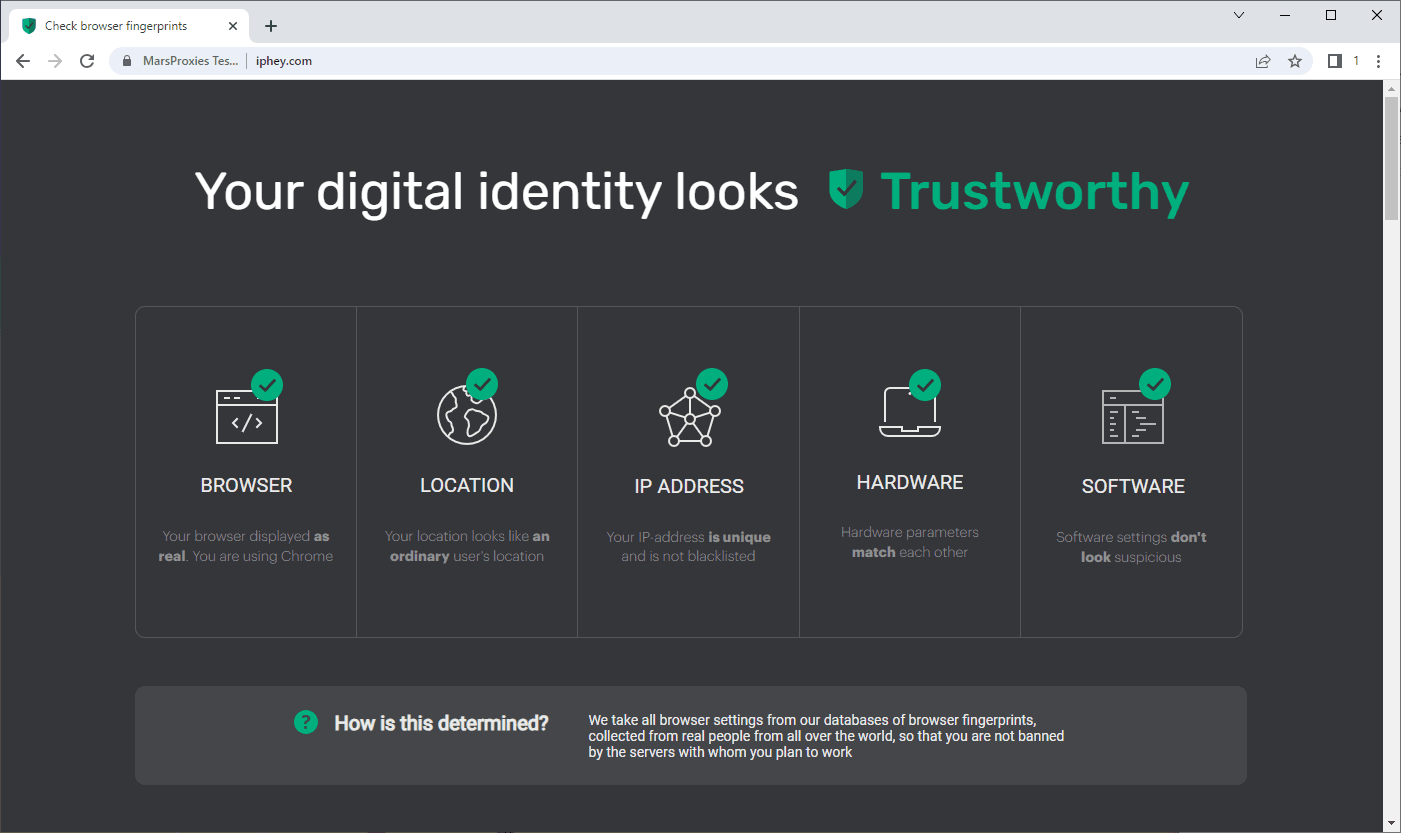
If everything looks okay, you’re ready to go!
Final Thoughts
Your browser fingerprint is only as reliable as the proxies you’re using. No matter which MarsProxies service you decide to use, you’ll be able to take advantage of ixBrowser without worrying about any restrictions.


