XLogin is an antidetect browser that can help you manage multiple browser profiles, each with its own fingerprint, geolocation data, user agents, and isolated cookies. These features are essential for keeping your activities unlinked and anonymous, such as managing multiple accounts on e-commerce websites, social media, cryptocurrency exchanges, etc.
However, XLogin alone is rarely enough to evade detection on modern websites with advanced anti-fraud and antibot systems. It only masks browser-level identifiers like fingerprints and user agents. Websites can still detect mismatches between profile data and IP address information.
Proxies are designed to mask your IP address, making your browser profiles nearly undetectable. Therefore, it’s a no-brainer that for maximum performance and efficiency, you should integrate XLogin and a proxy server. Find out how to do it in today’s article.
XLogin Features Overview
Before we show you how to integrate XLogin with proxies, here are the features to expect straight out of the box:
- Multi-account management
XLogin helps you create and manage multiple unlinked and anonymous browser sessions. Each profile exists in a fully isolated environment to prevent data leaks.
- Advanced fingerprint protection
A browser fingerprint is a collection of information that identifies web sessions, including browser type and version, device operating system, screen resolution, color depth, and even the device’s installed fonts. XLogin generates a unique browser fingerprint for each profile to maintain anonymity.
- Automation integration
For those interested in web scraping, ad testing, and social media management, XLogin is compatible with popular tools like Selenium and Puppeteer.
- Profile sharing and integration
XLogin is created for teams. It allows up to six team members to collaborate on sharing profiles with customizable access rights, which can streamline processes like account creation and integration.
What Does MarsProxies Offer
As you already know, XLogin can’t change your IP address. While it will create multiple unique fingerprints to keep each account separate, websites can still link them because the requests originate from the same address.
MarsProxies takes care of this problem by providing an extensive pool of more than 1 million IP addresses in over 190 countries. Here is what our residential proxies offer:
- A global pool of residential IP addresses with city-level targeting
- Non-expiring residential traffic
- HTTP(S) and SOCKS5 support
- Dual authentication
- Custom session control, with rotating and sticky sessions (1 second to 7 days)
- Residential IPs start from $4.99/GB with bulk discounts
How to Use MarsProxies With XLogin
You’re probably wondering how to integrate XLogin with MarsProxies, given all the benefits that you stand to gain. First, you‘re going to need an XLogin account (you can take advantage of the three-day free trial) and a MarsProxies subscription.
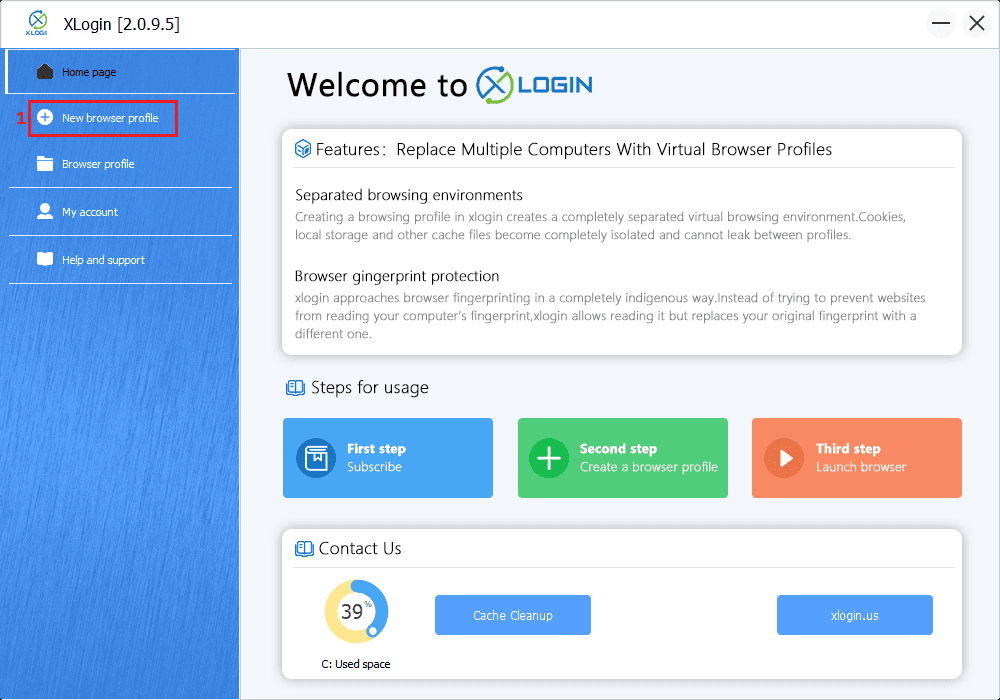
1. Launch XLogin.

2. Click the New browser profile (1) button.
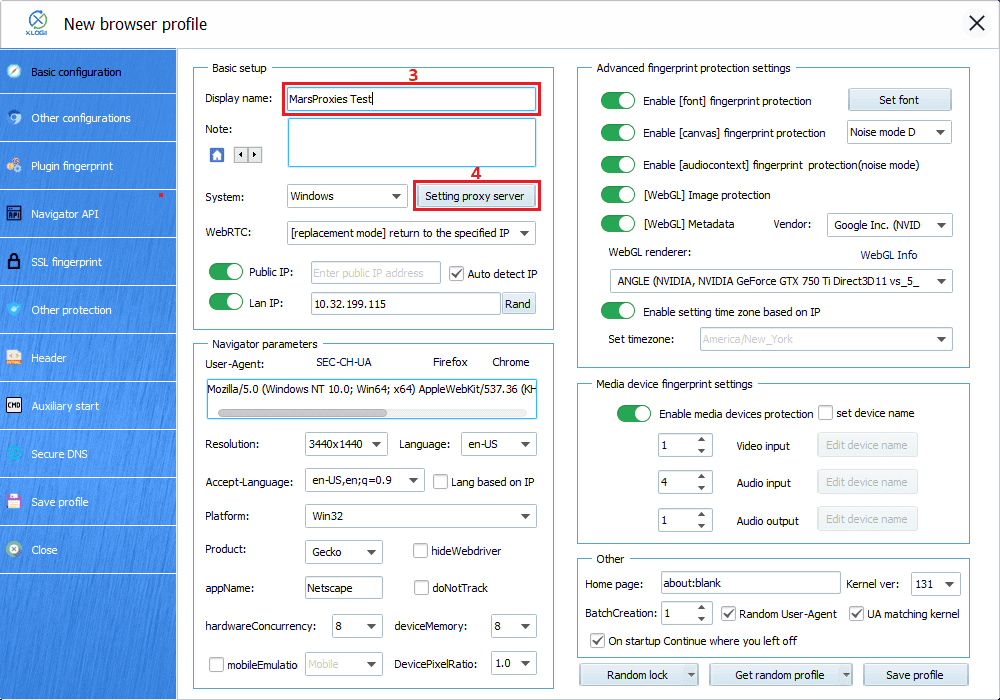
3. Fill in the Display name (3) and click the Setting Proxy Server (4) button.
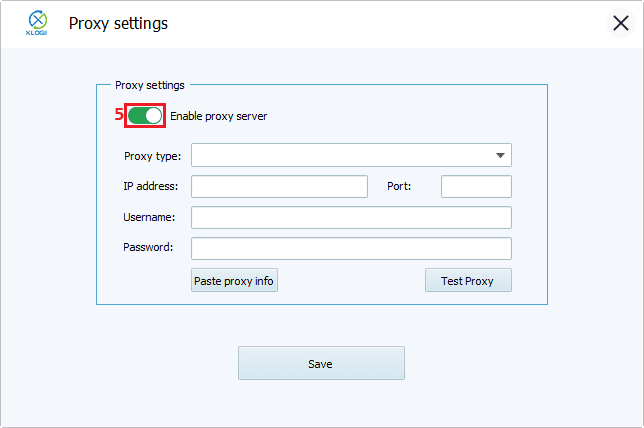
4. A new dialog box will appear. Start by toggling Enable proxy server (5).
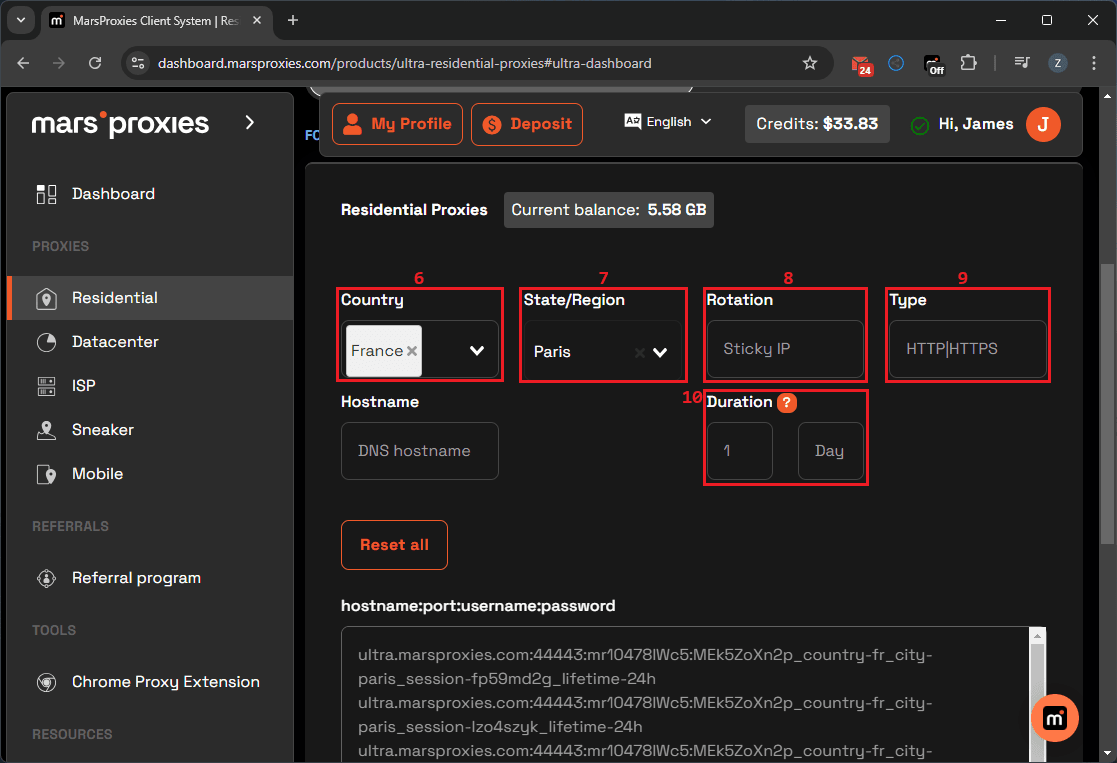
5. Visit the MarsProxies dashboard and configure your proxies. Choose the country (6), state or region (7), rotation (8), type (9), and session duration (10) for sticky sessions.
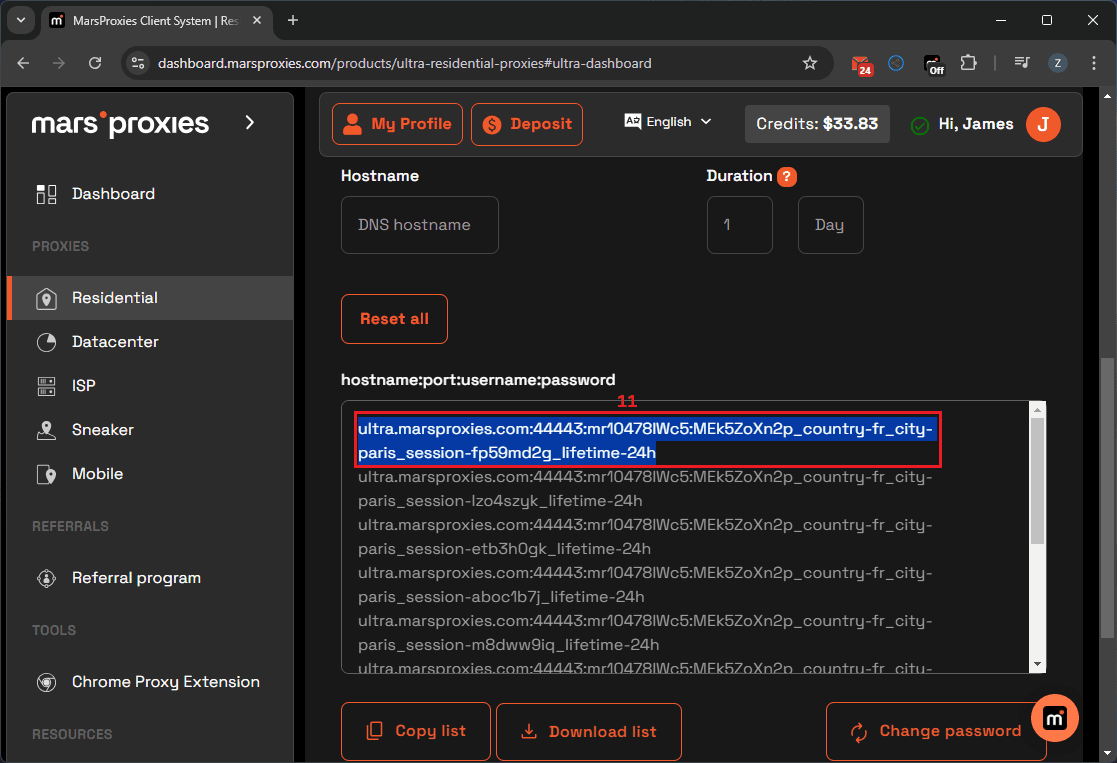
6. Scroll down to your generated proxy sessions. Each line here is a unique set of credentials (11). It contains the proxy hostname, port, username, and password.
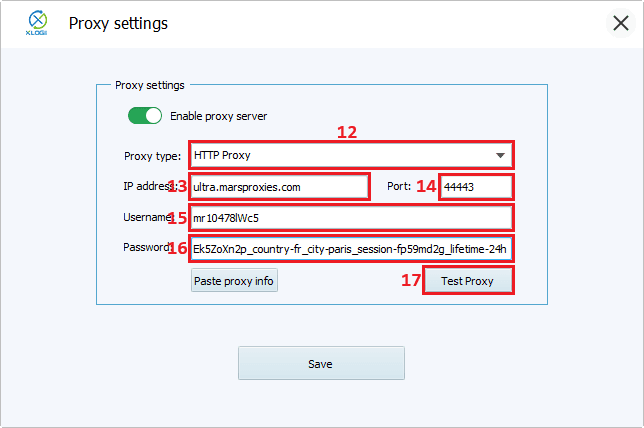
7. Now, enter these details into XLogin’s proxy settings. Choose the correct proxy type (12), add the IP address (13), port (14), as well as the proxy username (15) and password (16). Finally, click the Test Proxy (17) button.
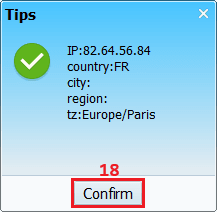
8. A new dialog box will appear, displaying the IP address and location details. If everything is correct, click the Confirm (18) button.
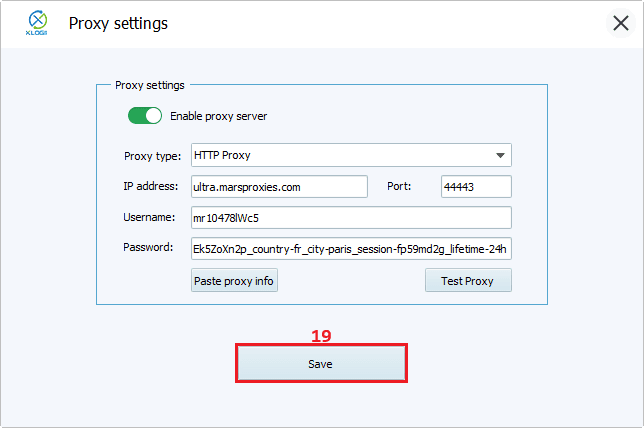
9. Click the Save (19) button to save your proxy settings.
10. Finish creating your browser profile and click the Save profile (20) button.

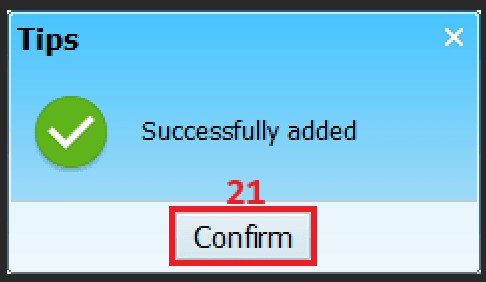
11. A new dialog box will appear to confirm the creation of your profile. Click the Confirm (21) button.
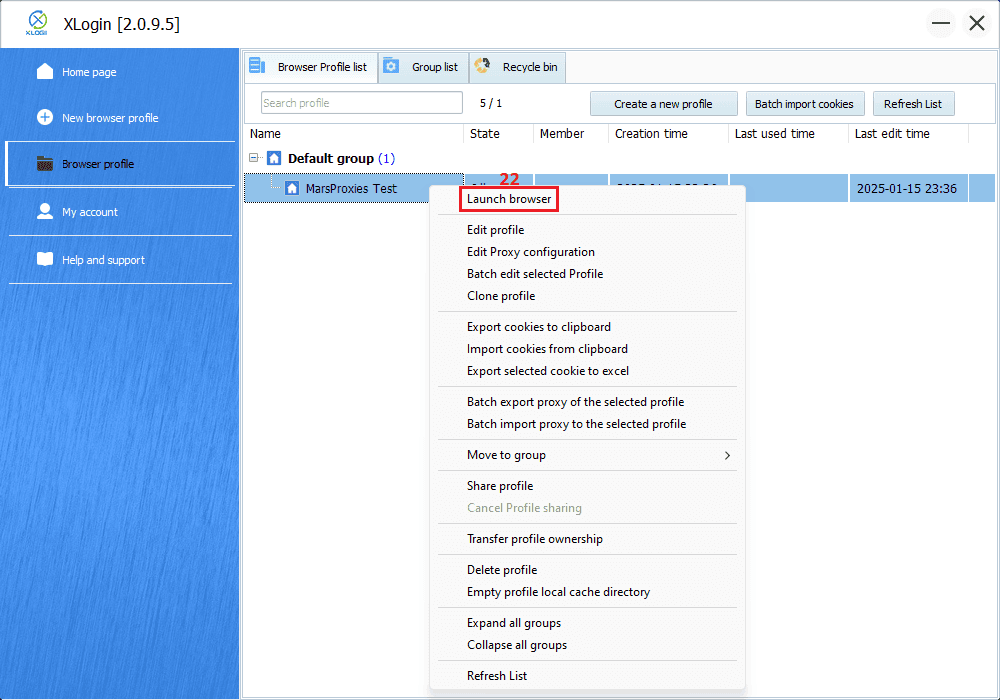
12. You can find the new profile in the Browser Profile section. Left-click on it and choose the Launch browser option (22) to launch it.
13. Let’s confirm that the proxy has masked your IP address by checking the IP that your profile is displaying to other computers on the web. We’ll use IPHey.
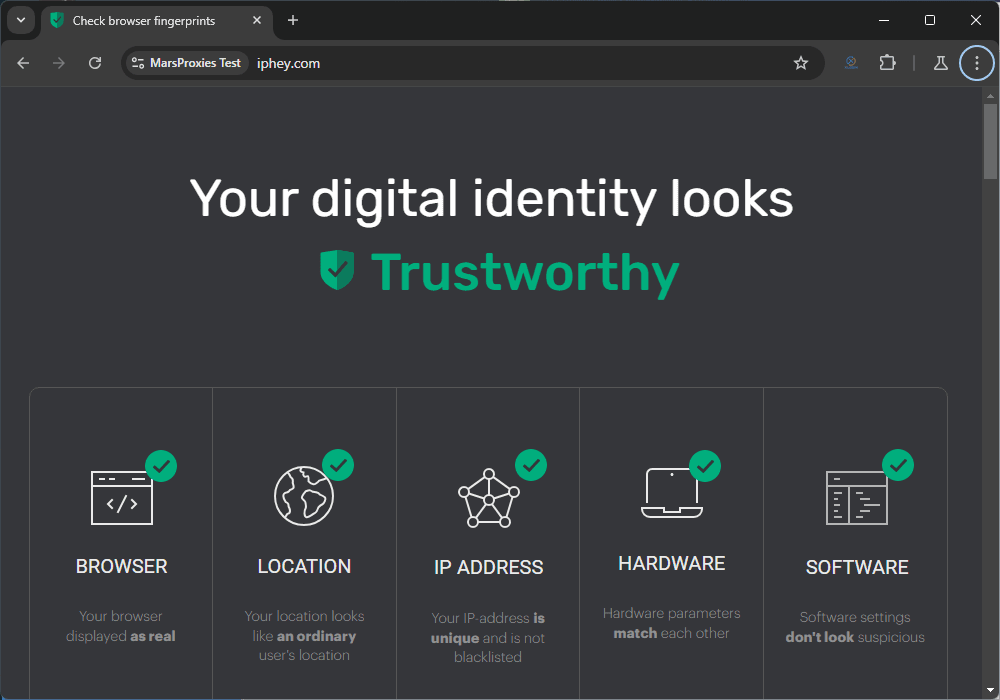
You’re now free to browse the web confidently with an anonymous XLogin profile powered by MarsProxies IPs.
Wrapping Up
A unique XLogin-generated browser profile configured with a MarsProxies server offers unmatched privacy and reliability. You can create multiple profiles using the process we described and assign unique IP addresses to each. This way, you don’t have to worry about your detection systems linking your accounts, whether for web scraping, social media, e-commerce, trading, or even research.